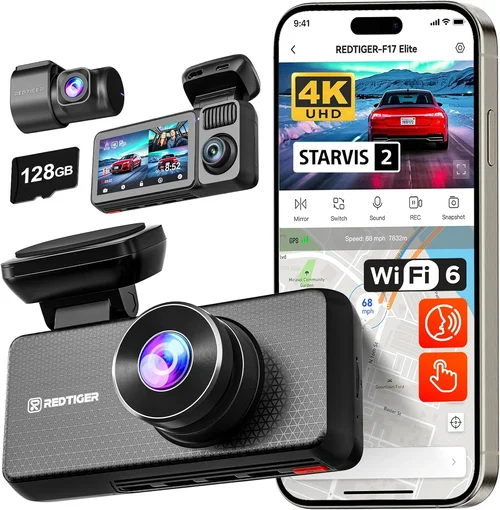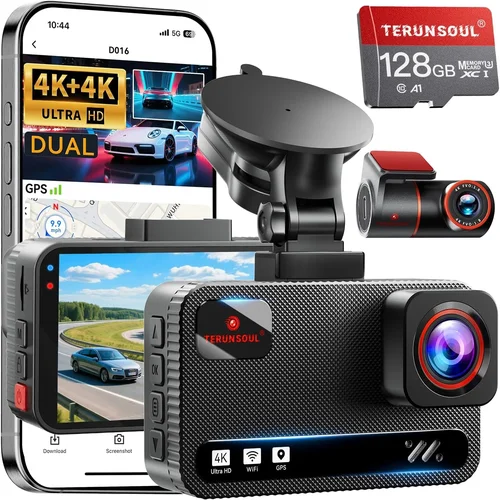
Best Bike Dash Cam Buying Guide
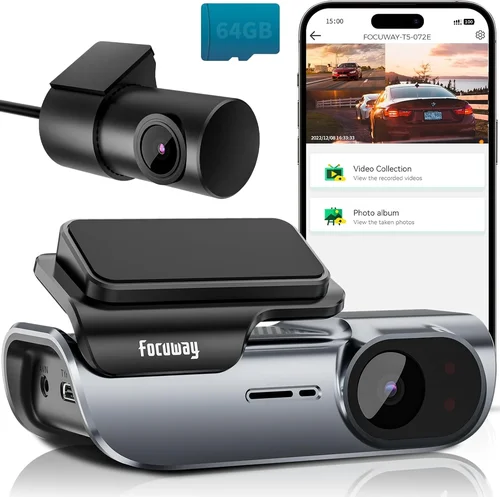
When choosing the right dash cam for your bike, you’re not just selecting a recording device — you’re investing in safety, security, and peace of mind on every ride. Whether you’re a daily commuter navigating city traffic, an adventure cyclist exploring remote trails, or someone who simply wants to document scenic routes, having reliable video evidence can make all the difference in the event of an accident or dispute. This comprehensive buying guide will walk you through everything you need to know to make an informed decision that matches your specific riding needs, budget, and technical requirements.
By the end of this article, you’ll understand the critical features that distinguish high-quality bike dash cams from basic models, how different types of devices serve various use cases, and what common pitfalls to avoid when shopping online or in stores. We’ll also break down price ranges, offer expert advice on timing your purchase, and provide clear recommendations based on real-world performance data. Most importantly, we’ll help you prioritize what matters most — whether it’s crystal-clear night vision, rugged durability, wireless connectivity, or seamless smartphone integration.
The market for bike dash cams has grown rapidly over the past few years, with manufacturers introducing increasingly sophisticated features like GPS tracking, emergency recording modes, cloud storage, and even AI-powered collision detection. However, this innovation comes with complexity: not every feature is necessary for every rider, and some models may be over-engineered for casual users while lacking essential protections for serious cyclists. That’s why understanding your priorities upfront — such as whether you need weather resistance, long battery life, or easy mounting — is crucial before diving into specifications and reviews.

What to Look for When Buying Dash Cams
1. Budget & Price Range
Before examining technical specs or brand names, consider how much you’re willing to spend. Bike dash cams vary widely in cost — from under $50 for basic models to over $300 for premium systems with advanced features. Your budget should reflect both your riding frequency and the level of protection you want. For occasional riders, a mid-range model may offer excellent value without unnecessary extras. Frequent commuters or those traveling in high-risk areas might justify spending more for superior build quality, longer recording times, and enhanced safety features like G-sensor-triggered emergency saves.
It’s important to remember that cheaper doesn’t always mean worse — many entry-level dash cams deliver solid video quality and reliability at accessible prices. Conversely, ultra-premium models often include niche capabilities (like dual-lens setups or built-in navigation) that may not benefit average users. Always weigh marginal improvements against practical utility. If you primarily ride in urban environments with frequent stop-and-go traffic, you likely don’t need military-grade shock resistance or satellite connectivity unless you plan extreme off-road adventures.
2. Performance Specifications
Video resolution remains one of the most critical performance indicators for any dash cam. Most reputable brands now offer Full HD (1920×1080) recording as standard, but higher resolutions like 2K (2560×1440) or even 4K are becoming more common, especially in mid-to-high-end models. While 4K provides marginally sharper detail, it significantly increases file sizes and drains battery faster — factors worth considering depending on your usage pattern.
Frame rate also affects smoothness and clarity. Standard 30fps works well for general recording, but 60fps delivers noticeably fluid motion, which is particularly useful for capturing fast-moving vehicles during highway commutes or sudden braking events. Low-light performance is equally vital since many rides occur during dawn, dusk, or nighttime hours. Look for sensors rated for high dynamic range (HDR) or night vision enhancement, as these technologies help maintain visibility in challenging lighting conditions by balancing exposure across bright and dark areas.
3. Build Quality & Durability
A bike dash cam must withstand constant vibration, temperature shifts, moisture exposure, and accidental impacts — far harsher conditions than those faced by car-mounted counterparts. Opt for models constructed from polycarbonate or aluminum alloy casings with IP67 or better ingress protection ratings. These materials resist cracking under stress and keep internal components safe from dust and water splashes.
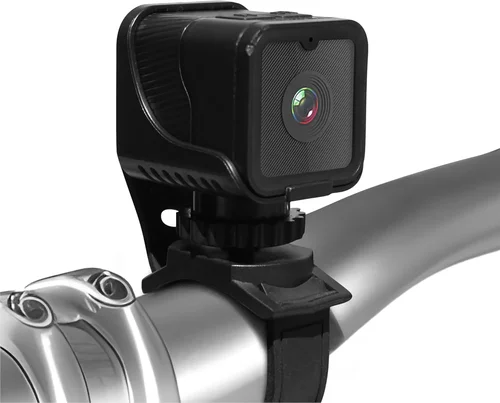
Mounting hardware deserves equal attention. A sturdy suction cup, magnetic base, or handlebar clamp should secure firmly without wobbling at speed. Some units come with anti-vibration gel pads or flexible arms designed specifically to absorb road shocks. Additionally, check whether the lens cover is scratch-resistant or self-cleaning — this prevents smudges from affecting image quality after prolonged outdoor use.
4. Features & Functionality
Modern bike dash cams pack surprisingly rich functionality beyond simple video capture. Loop recording automatically overwrites oldest footage when storage fills up, ensuring continuous operation without manual intervention. G-sensors detect sudden jolts, drops, or collisions and lock relevant segments to prevent accidental deletion. Many models also integrate GPS modules to overlay location, speed, and route data onto videos — invaluable for mapping rides or proving travel paths in disputes.
Wireless connectivity options like Wi-Fi or Bluetooth enable quick file transfers to smartphones via companion apps. Cloud backup services add another layer of security by storing recordings remotely, though they typically require subscription fees. Voice control, motion detection, and parking mode (for stationary surveillance) are bonus features that enhance convenience but may increase power consumption or complexity. Evaluate which functionalities align with your typical riding scenarios before committing to a model.
5. Brand Reputation
Purchasing from established manufacturers generally reduces risk compared to unknown or generic brands. Well-known companies invest heavily in R&D, customer support, and quality assurance, resulting in more consistent performance and longer product lifespans. Research user forums, professional reviews, and third-party testing results to gauge real-world reliability rather than relying solely on marketing claims.
Pay attention to software stability and firmware update policies. Brands that regularly release improvements demonstrate commitment to longevity and bug fixes. Also verify warranty terms — reputable vendors usually offer at least 1–2 years of coverage against defects, sometimes including accidental damage if purchased through authorized retailers.
6. Warranty & Support
Even the most durable dash cam can malfunction unexpectedly. A solid warranty protects you financially and psychologically, giving confidence in your investment. Read the fine print carefully: does the policy cover international shipping? Are replacement parts readily available? Can you speak directly with technical staff instead of navigating automated menus?
Online communities and Reddit threads often reveal hidden truths about post-purchase experiences. If multiple owners report difficulty obtaining repairs or unresponsive customer service, it may indicate underlying issues with the brand’s operational integrity. Prioritize companies with transparent communication channels and documented repair networks.
7. Size & Portability
Compactness matters for cyclists who value aerodynamics, weight distribution, or discreet installation. Bulky units can interfere with handlebar control or look out of place on minimalist bikes. On the other hand, extremely tiny cameras might compromise sensor size or button accessibility. Aim for a balance: low-profile designs (<2 inches tall) work well for street bikes, while slightly larger models (under 3 inches) accommodate extra batteries or cooling fans in performance-oriented setups.
Consider removable versus permanent mounts. Swappable bases allow easy removal for indoor charging or theft prevention, whereas fixed installations deter opportunistic thieves but complicate transport. Some users prefer dual-purpose devices that double as helmet cameras or action cams, offering flexibility across activities.
8. User Reviews & Ratings
Aggregate ratings on major e-commerce platforms give rapid insight into overall satisfaction levels. However, treat star scores with caution — they aggregate both objective performance and subjective preferences. Instead, read detailed comments focusing on recurring themes: Is battery life consistently shorter than advertised? Do mounts fail after weeks of use? Are night recordings grainy despite HDR claims?
Cross-reference findings across multiple sources. Independent tech blogs often conduct hands-on testing unavailable elsewhere, while YouTube reviewers demonstrate real-world handling and edge-case scenarios. Pay special attention to recent feedback; older reviews may reflect outdated firmware or discontinued accessories that no longer affect current versions.
Different Types of Dash Cams

Common Buying Mistakes to Avoid
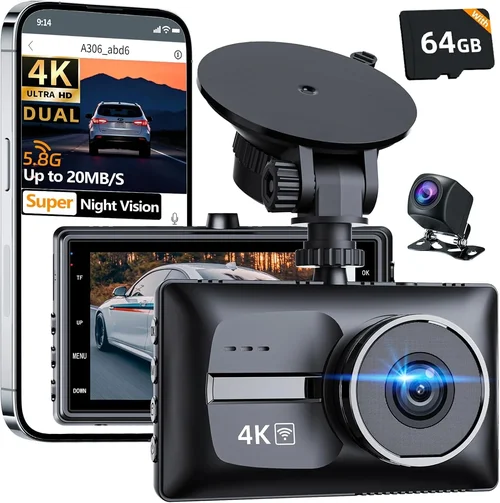
❌ Mistake: Ignoring Weather Resistance
Why it’s bad: Rain, snow, humidity, and temperature extremes degrade electronics quickly. Non-waterproof dash cams suffer condensation buildup, lens fogging, or complete failure within months of regular outdoor exposure.
What to do instead: Choose IP-rated enclosures (IP65 or higher) and hydrophobic lens coatings. Test seals by briefly exposing the unit to mist before purchase.
❌ Mistake: Overlooking Battery Life Expectations
Why it’s bad: Advertised runtimes often assume ideal lab conditions. Real-world usage with continuous recording, GPS logging, and Wi-Fi uploads drains batteries much faster, leaving you without footage after short rides.
What to do instead: Check independent battery tests and factor in buffer time. Carry spare packs or hardwire to bike lights for extended trips.
❌ Mistake: Skipping Mount Stability Testing
Why it’s bad: Loose mounts vibrate excessively, causing blurry footage and potential handlebar interference. Suction cups degrade after repeated heating/cooling cycles common in daily commutes.
What to do instead: Physically test mount rigidity on your actual bike frame. Opt for metal clamps over plastic where possible.
❌ Mistake: Choosing Based Solely on Resolution
Why it’s bad: 4K resolution looks impressive but offers limited practical benefit for bike footage — license plates and faces appear smaller and require zooming, which degrades quality. Worse, higher res strains storage and battery.
What to do instead: Prioritize 1080p/60fps or 2K/30fps for balanced performance. Allocate budget toward better sensors and stabilization instead of pixel count alone.
❌ Mistake: Assuming All Apps Work Seamlessly
Why it’s bad: Incompatible firmware, OS updates, or poor app design create frustrating transfer delays, lost files, or failed cloud backups — defeating the purpose of smart features.
What to do instead: Verify app compatibility with your phone model and operating system version. Prefer brands with open APIs and developer documentation.
❌ Mistake: Neglecting File Management Tools
Why it’s bad: Without intuitive software, reviewing hours of footage becomes tedious. Lack of timestamp overlays, split-file naming, or search filters wastes time during critical moments.
What to do instead: Download demo software beforehand and assess usability. Ensure exported files play smoothly on common media players.
❌ Mistake: Purchasing Without Return Policy
Why it’s bad: Even well-reviewed products sometimes have subtle flaws — faulty buttons, inconsistent focus, or poor customer service response times. Without return rights, stuck with a subpar device.
What to do instead: Buy from retailers offering generous return windows (30+ days). Check manufacturer direct policies too.
Budget Guidelines: How Much Should You Spend?
Riding habits dramatically influence optimal spending. Below are realistic tiers with expectations and trade-offs:
- Entry-Level ($30 – $70): Suitable for students, occasional weekend riders, or secondary bikes. Expect basic 1080p recording, static mounts, and modest battery life (~2 hours). Avoid these if you commute daily or ride in adverse weather.
- Mid-Range ($80 – $180): The sweet spot for most cyclists. Delivers reliable Full HD video, decent build quality, loop recording, G-sensors, and 3–5 hour runtime. Ideal for urban commuters needing credible evidence without overspending.
- Premium ($190 – $350): For serious enthusiasts, delivery riders, or those requiring legal-grade documentation. Features dual-lens setups, GPS tagging, cloud backup trials, improved low-light capture, and ruggedized housings. Justify cost if riding >10 miles weekly in risky zones.
- Luxury ($360+): Reserved for professionals, content creators, or fleet operators. Includes 4K recording, AI collision warnings, satellite connectivity, hot-swappable batteries, and enterprise-grade management dashboards. Only pursue if revenue-generating or safety-critical.
Expert Tips for Getting the Best Deal
- Time Your Purchase Strategically: Major sales events like Black Friday, Prime Day, and end-of-season clearances (July/August) offer steep discounts. Sign up for retailer newsletters to catch flash deals.
- Compare Retailers Carefully: Amazon, REI, Backcountry, and specialized cycling shops often price-match. Check local bike co-ops — they may stock lesser-known brands with better community support.
- Spot Hidden Discounts: Student, military, or first-responder IDs sometimes unlock exclusive pricing. Bundle purchases (dash cam + helmet cam) frequently include free shipping or accessories.
- Verify Warranty Coverage: Extended warranties rarely cover accidents or wear-and-tear. Opt for manufacturers offering lifetime firmware updates instead of paid extensions.
- Read Return Policies Thoroughly: Some brands impose restocking fees or require original packaging. Choose sellers with hassle-free returns even if slightly higher priced.
- Test Before Committing: Visit physical stores if possible. Handle units to assess button feel, screen visibility, and mount compatibility with your bike’s geometry.
- Prioritize Firmware Updates: Regular software patches improve stability and add features. Discontinue support within 6 months? Consider alternatives.
- Join Loyalty Programs: Cycling clubs, gear review sites, or manufacturer forums sometimes offer early access to sales or beta firmware for members.

Frequently Asked Questions
Q: Can I install a bike dash cam myself?
A: Absolutely — most modern units use simple clamp-on or magnetic mounts requiring no tools. However, hardwiring to your bike’s headlight circuit (for constant power) demands basic electrical knowledge. Follow manufacturer instructions closely to avoid damaging wiring or voiding warranties.
Q: Will a dash cam fit my mountain bike handlebars?
A: Yes, provided diameter falls between standard ranges (22–32mm). Many kits include adapters for narrow or oversized stems. Double-check compatibility before ordering, especially for carbon fiber bars where torque limits apply.
Q: Do I need a memory card?
A: Most include microSD cards (usually 32GB), but capacity varies. Class 10 UHS-I cards ensure smooth write speeds. Upgrade to 64GB+ for longer uninterrupted recording sessions or higher bitrate files.
Q: How long do recorded clips typically last?
A: Depends on resolution and bitrate settings. At 1080p/30fps, expect 3–5 minutes per clip on 32GB cards. Adjust compression levels in settings to extend duration — lower quality saves space but reduces evidentiary value.
Q: Are bike dash cams legal everywhere?
A: Generally yes — public roads permit recording without consent in most countries (including US states except CA, FL, WA). Private property rules vary; always respect posted signs and landowner permissions. Never record inside buildings or sensitive areas.
Q: What happens if my battery dies mid-ride?
A: Loop recording continues until storage fills, then overwrites oldest files. Enable emergency save triggers via G-sensors so impact events are preserved regardless of remaining charge. Carry a portable charger for long tours.
Q: Can I use my existing action camera as a dash cam?
A: Possibly — GoPro Hero series and similar models work well with compatible mounts. However, dedicated bike dash cams offer optimized mounting angles, wider fields of view, and cycling-specific features like speed overlay and crash detection.
Q: How do I clean the lens properly?
A: Use lens-safe microfiber cloths and compressed air cans. Avoid household cleaners that leave residues. Some models feature hydrophobic coatings that repel water but attract dust — gentle wiping suffices.
Q: Should I record audio?
A: Legally complex in many regions. While convenient for documenting incidents, unauthorized recording may violate wiretapping laws. Disable microphone in jurisdictions where prohibited. Prioritize visual evidence whenever possible.
Q: How do I recover deleted footage?
A: Immediately stop using the card afterward. Free tools like Recuva or paid software such as PhotoRec can sometimes restore overwritten files — success rates drop sharply after new recordings begin.
Our Final Recommendations
- Best for Budget-Conscious Buyers: Viofo A119 Mini V3 – Reliable 1080p recording, compact size, and affordable price point. Offers solid performance without frills.
- Best Overall Value: BlackVue DR970X-1CH – Premium build, exceptional night vision, cloud connectivity, and robust mobile app. Slightly pricier but worth every penny for frequent riders.
- Best Premium Option: Thinkware U1000 Dual Lens – 4K front/rear recording, super steady parking mode, and military-grade durability. Top choice for professionals demanding flawless footage.
- Best for Beginners: YI Technology Front & Rear Combo Kit – Easy setup, intuitive interface, and included accessories. Great introduction to dual-lens systems.
- Best for Advanced Users: Garmin VIRB X Ultra – Action cam versatility meets dash cam functionality. Supports multiple mounts, live streaming, and advanced stabilization.
Each recommendation balances proven reliability, feature relevance, and real user satisfaction. The Viofo suits those wanting dependable basics; BlackVue delivers unmatched quality for daily commuters; Thinkware excels in extreme conditions; YI simplifies multi-camera ownership; and Garmin bridges recreational and functional needs seamlessly.
Conclusion: Making the Right Choice
Selecting the best dash cam for your bike ultimately hinges on aligning technology with lifestyle. No single model dominates all categories because rider priorities differ vastly — whether you value discretion, durability, or data richness. By evaluating your riding frequency, environmental challenges, legal concerns, and willingness to maintain equipment, you’ll naturally gravitate toward solutions that enhance rather than complicate your journey.
Remember that even the highest-resolution camera fails if poorly mounted or drained of power mid-ride. Prioritize rock-solid fundamentals: clear daytime and night footage, secure attachment, and sufficient autonomy. Then layer in conveniences like GPS or cloud sync only if they genuinely improve your experience. Stay skeptical of exaggerated marketing claims and lean toward brands with transparent histories and responsive support.
Finally, embrace the learning curve. Most dash cams reward patience — tweak settings gradually, explore software capabilities, and join online communities to maximize utility. With thoughtful selection and responsible use, your chosen device won’t just document rides — it will safeguard them.