How to Install Roll Up Truck Bed Cover
Installing a roll up truck bed cover is easier than you think! With the right tools and a little patience, you can secure a tight, weatherproof fit that protects your gear from rain, sun, and theft. This guide walks you through every step—from preparation to final adjustments—so you can enjoy added security and style without the hassle.
Key Takeaways
- Tools & Materials Needed: Gather a tape measure, socket wrench, screwdriver, and the included hardware before starting.
- Proper Alignment: Always align the cover rails evenly across the truck bed to prevent leaks or sagging.
- Tension Matters: Adjust the tension straps correctly to ensure a snug fit without damaging the cover material.
- Weatherproofing Tips: Seal seams and use weather-resistant fasteners to keep water out during storms.
- Maintenance Basics: Clean the cover regularly and inspect hardware to extend its lifespan.
- Safety First: Work on level ground and wear gloves to avoid injuries from sharp edges.
- Warranty Awareness: Check your cover’s warranty before drilling or modifying mounting points.
Quick Answers to Common Questions
Can I install a roll up truck bed cover myself?
Yes! Most roll-up covers are designed for DIY installation and can be completed in under an hour with basic tools. Follow the manufacturer’s instructions closely for best results.
Do I need special tools to install the cover?
No specialized tools are required. A tape measure, screwdriver, socket wrench, and drill (if needed) are typically sufficient for most installations.
Will a roll up cover protect my cargo from rain?
Absolutely—when installed correctly with proper weatherstripping, a roll-up cover provides excellent water resistance. Just make sure the tailgate seals tightly against the cover.
Can I remove the cover after installation?
Yes. One of the main advantages of roll-up covers is their removability. You can unlatch and roll the fabric aside whenever you need full bed access.
How do I fix a loose roll up truck bed cover?
Check the tension straps and clamps. Tighten any loose hardware and reapply weatherstripping if necessary. Misaligned rails can also cause looseness—reposition them if needed.
📑 Table of Contents
- How to Install Roll Up Truck Bed Cover: A Step-by-Step Guide
- Understanding Your Roll Up Truck Bed Cover
- Gathering the Right Tools and Materials
- Preparing Your Truck Bed
- Installing the Side Rails
- Attaching the Roll-Up Cover Fabric
- Final Adjustments and Securing the Cover
- Maintaining Your Roll Up Truck Bed Cover
- Common Installation Mistakes to Avoid
- Conclusion: Enjoy Peace of Mind on Every Drive
How to Install Roll Up Truck Bed Cover: A Step-by-Step Guide
Have you ever loaded up your truck with gear, only to watch it get soaked in a sudden downpour or damaged by falling branches? Or maybe you’ve worried about someone snooping around while you’re away at work? If so, a roll up truck bed cover might just be the solution you’ve been looking for. These versatile covers are designed to shield your cargo from the elements, improve fuel efficiency, and give your truck a sleek, professional look.
But here’s the thing: many people shy away from installing them because they assume it’s complicated or requires special tools. Nothing could be further from the truth. In reality, rolling up a truck bed cover is a straightforward DIY project that can be completed in under an hour—especially if you follow a clear, methodical process. Whether you’re a weekend warrior or a total beginner, this guide will walk you through everything you need to know to install your roll up cover like a pro.
Understanding Your Roll Up Truck Bed Cover
What Is a Roll Up Truck Bed Cover?
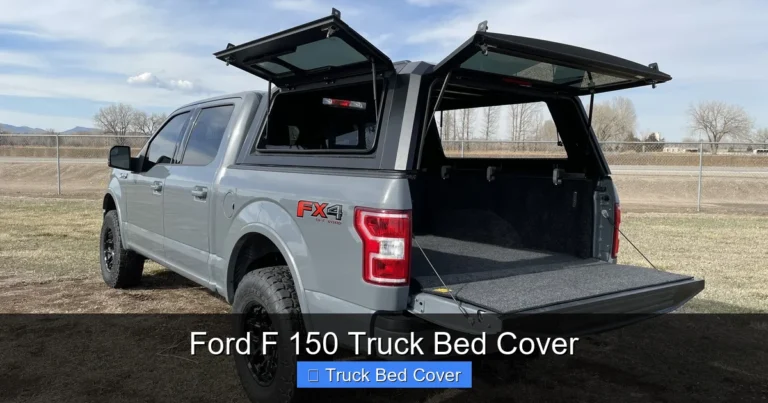
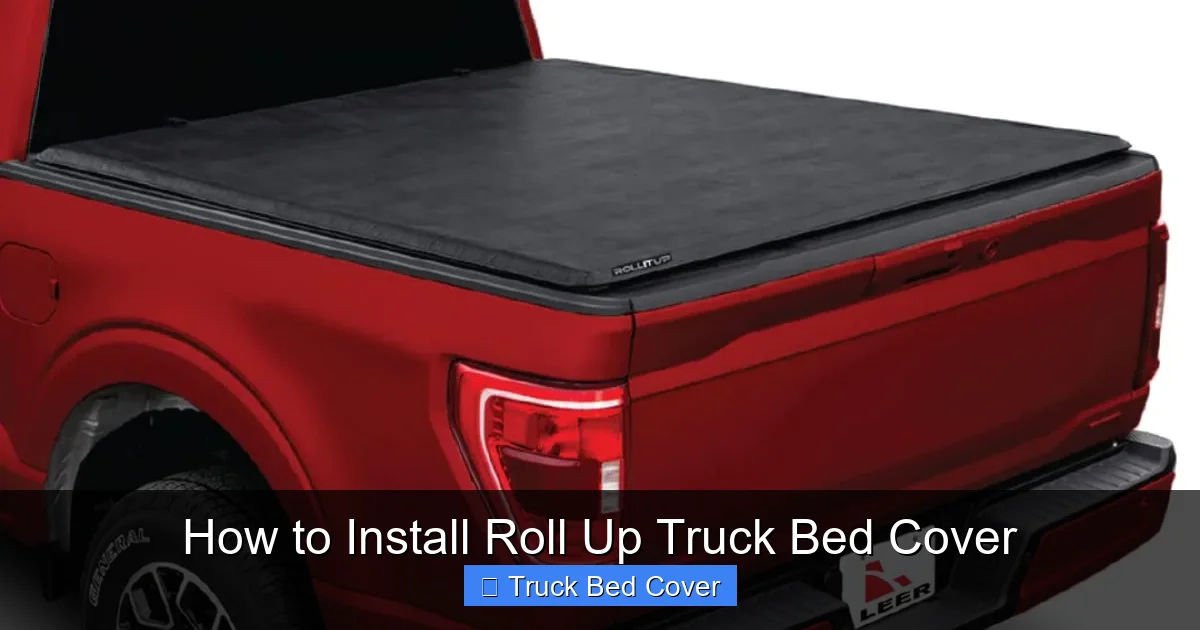
A roll-up truck bed cover is a type of tonneau cover made from durable vinyl or canvas material that unfolds across the open bed of your truck. Unlike hard covers that require permanent installation, roll-up models feature a flexible design that allows you to roll the cover forward or backward using built-in straps or side handles. When not in use, you can easily roll it back and secure it with buckles or latches, exposing the full bed for hauling larger items.

Visual guide about How to Install Roll Up Truck Bed Cover
Image source: midwestaftermarket.com
These covers are popular among truck owners for their balance of convenience, protection, and affordability. They’re ideal for daily drivers, campers, contractors, and anyone who values both functionality and aesthetics.
Types of Roll-Up Covers
Before diving into installation, it’s helpful to understand the different types available:
- Tri-Fold: Folds into three sections for easy access but offers less coverage than other styles.
- Roll-Up (Soft): The most common type—rolls smoothly along the inside rail system.
- Folding Hard Cover: Not technically roll-up, but sometimes confused with them due to similar functionality.
For this guide, we’ll focus specifically on standard roll-up soft covers, as they represent the majority of consumer purchases and offer the best blend of simplicity and performance.
Gathering the Right Tools and Materials
Essential Tools You’ll Need
You don’t need a full workshop to install your roll-up truck bed cover. Most installations require only basic hand tools already found in a typical garage:
- Tape measure
- Screwdriver (Phillips and flathead)
- Socket wrench set
- Drill (optional, depending on model)
- Ladder or step stool
- Work gloves
- Clean cloth or sponge
Included Hardware Checklist
Your roll-up cover kit should include:
- Side rails (left and right)
- Clamps or brackets
- Bolts, screws, and washers
- Weatherstripping tape
- Installation instructions
Double-check the contents against the manual before starting. Missing parts can delay the process and cause frustration later.
Preparing Your Truck Bed
Clean and Inspect the Surface
The first step is to thoroughly clean your truck bed. Dirt, rust, oil, or debris can compromise adhesion and alignment. Use warm soapy water and a stiff brush to scrub the entire surface. Rinse well and let it dry completely. Pay special attention to the tailgate area—this is where water often seeps in if not properly sealed.
Remove Obstructions
Take out any removable accessories such as toolboxes, bed dividers, or tie-down anchors that might interfere with rail placement. If your truck has built-in bed lighting or air vents, note their locations so you can route cables or wires safely underneath the new cover.
Check for Level Ground
Ideally, perform the installation on a flat, level surface like a driveway or garage floor. Uneven terrain can make measuring difficult and may lead to misaligned rails, resulting in poor sealing or premature wear.
Installing the Side Rails
Positioning the Rails Correctly
Most roll-up covers come with pre-drilled mounting holes in the side rails. Begin by placing one rail along the driver’s side of the bed, ensuring it sits flush against the bed wall. Use a tape measure to confirm it’s parallel to the edge—measure from front to back at multiple points to check consistency.
Repeat the process on the passenger side. It’s crucial that both rails are perfectly aligned; otherwise, the cover won’t roll smoothly or seal properly.
Securing the Rails
Once positioned, insert bolts through the clamp brackets and into the bed frame. Tighten them gradually using a socket wrench—don’t over-torque, as this could strip threads or damage the bed liner. For trucks without pre-existing holes, you may need to drill pilot holes carefully. Always consult your vehicle’s manual to avoid hitting fuel lines or electrical components.
Using Weatherstripping Tape
Apply adhesive-backed foam tape along the top edge of each rail before attaching the cover fabric. This creates a watertight seal and prevents moisture from entering the cab through the gaps between the cover and rails.
Attaching the Roll-Up Cover Fabric
Unrolling the Cover
Carefully unroll the cover fabric onto the truck bed. Make sure there’s enough slack at the front so the cover can fold neatly when rolled. Avoid dragging the vinyl over rough surfaces to prevent scratches.
Aligning with the Rails
Slide the sewn-in hem of the cover over the side rails. Most designs feature Velcro strips or snap buttons that attach directly to the rail channels. Press firmly along the seam to ensure a strong bond. If your model uses buckle systems, thread the straps through designated eyelets and fasten them securely.
Testing the Roll Mechanism
Before finalizing everything, test the rolling action. Pull the cover toward the cab and watch how it unfurls. There should be minimal resistance and no bunching. If the fabric drags or gets caught, double-check the alignment of the rails and adjust as needed.
Final Adjustments and Securing the Cover
Tightening Tension Straps
Many roll-up covers include adjustable tension straps near the tailgate. Loosen these initially, then gradually pull the cover taut as you roll it back. Over-tightening can warp the rails or tear the fabric, so find a balance between snugness and flexibility.
Sealing the Tailgate Area
This is one of the most critical steps for preventing leaks. Apply additional weatherstripping tape to the bottom edge of the cover where it meets the tailgate. Ensure the tailgate closes tightly against the cover—use a rubber mallet if necessary to compress old gaskets.
Checking for Gaps and Drafts
Open and close the tailgate several times while inspecting for light leaks or drafts. If you notice airflow, add more foam tape or re-adjust the cover’s position slightly. Remember: even small gaps can let in rain during heavy storms.
Maintaining Your Roll Up Truck Bed Cover
Regular Cleaning Routine
After each trip, wipe down the cover with a damp cloth to remove dust, mud, or salt residue. For deeper cleaning, mix mild soap with water and gently scrub with a soft brush. Never use harsh chemicals like bleach or ammonia—they can degrade the vinyl over time.
Inspecting Hardware Monthly
Check all bolts, clamps, and straps for signs of looseness, corrosion, or wear. Tighten any loose fasteners immediately and replace damaged parts per manufacturer recommendations.
Storing During Off-Seasons
If you live in an area with extreme temperatures, consider removing the cover during winter months to prevent cracking or brittleness. Store it in a cool, dry place away from direct sunlight.
Common Installation Mistakes to Avoid
- Mismeasuring Rail Spacing: Always measure twice—once with the cover kit off, once with it on.
- Skipping Weatherstripping: Even high-quality covers leak without proper sealing.
- Rushing the Process: Take your time aligning everything—patience pays off in longevity.
- Ignoring Manufacturer Instructions: Every brand has subtle differences—stick to the manual!
Conclusion: Enjoy Peace of Mind on Every Drive
Installing a roll up truck bed cover doesn’t have to be intimidating. By following these detailed steps—cleaning your bed, aligning rails precisely, securing fabric properly, and performing routine maintenance—you’ll create a protective barrier that keeps your belongings safe and dry. Plus, you’ll enjoy the added bonus of improved aerodynamics and a sharper-looking truck profile.
Remember, the best part about roll-up covers is their adaptability. Need to load a long pipe or camping gear? Just roll it back. Want full concealment for privacy? Unroll it and lock it down tight. With the right installation and care, your roll-up truck bed cover will serve you faithfully for years to come.
Frequently Asked Questions
How long does it take to install a roll up truck bed cover?
Most installations take between 30 minutes to an hour, depending on experience level and truck model. Preparation and alignment are key to speeding up the process.
Can I install the cover on a truck with a bed liner?
Yes, but you may need to adjust the mounting points or use additional clamps to ensure a secure fit. Some liners require drilling, so check compatibility first.
Do roll up covers require drilling?
Not always. Many modern designs use clamp-on systems that don’t require permanent modifications. However, some trucks may need pilot holes—always verify before proceeding.
Will the cover fit my specific truck model?
Yes—roll-up covers are made to match common bed sizes (e.g., short, standard, long). Confirm your truck’s bed dimensions and year before purchasing to ensure a perfect fit.
How do I clean and maintain my roll up cover?
Wipe the surface weekly with a damp cloth and mild soap. Avoid abrasive cleaners. Inspect hardware monthly and reapply weatherstripping if signs of wear appear.
Can I drive with the cover partially rolled back?
It’s not recommended. Driving with the cover partially open compromises safety, wind resistance, and cargo security. Always fully secure or remove the cover before highway travel.