Homemade Truck Bed Cover
Building your own truck bed cover is a smart way to protect your cargo while saving money compared to store-bought options. With the right materials and basic tools, you can create a custom-fit cover that keeps your belongings dry and secure. This guide walks you through step-by-step instructions for making a reliable, weather-resistant truck bed cover that works for any pickup truck.
Making your own truck bed cover isn’t just about saving money—it’s about creating something perfectly suited to your specific needs. Whether you’re hauling equipment, groceries, or weekend gear, a well-designed cover protects your items from weather damage while keeping them secure on the road. The best part? You get complete control over materials, size, and functionality without breaking the bank.
Many people assume professional truck bed covers are the only option worth considering, but that couldn’t be further from the truth. Commercial covers often come with unnecessary features you don’t need, plus markup costs that inflate prices. A homemade alternative lets you focus on what matters: durability, fit, and value. Plus, you’ll gain satisfaction knowing you built it yourself!
Key Takeaways
- Cost-effective solution: Homemade truck bed covers cost 50-70% less than commercial alternatives while offering similar protection.
- Custom fit: DIY covers can be tailored exactly to your truck’s dimensions, ensuring perfect coverage and secure attachment.
- Weather protection: Properly made covers shield cargo from rain, snow, UV rays, and dust during transport.
- Easy materials: Basic supplies like canvas, PVC sheets, bungee cords, and aluminum tracks make construction straightforward.
- Quick assembly: Most homemade covers can be built in one weekend and installed in under 30 minutes.
- Durability potential: With quality materials and proper sealing, homemade covers can last 5+ years with regular maintenance.
Quick Answers to Common Questions
How long does it take to build a homemade truck bed cover?
Most DIY truck bed covers can be constructed in one weekend using basic tools and materials. Simple bolt-on designs take less time than complex rolling systems, with installation typically completed within 30-60 minutes once the frame is ready.
What’s the biggest challenge when making your own truck bed cover?
The most common difficulty is achieving a watertight seal at all edges and connection points. Proper sealing requires attention to detail, quality materials, and sometimes multiple applications of waterproofing products to prevent leaks during heavy rain.
Can I modify an existing commercial cover instead of building from scratch?
Yes, many people modify existing covers by adding reinforcements, changing attachment methods, or upgrading materials. However, starting fresh often gives better results since you can design everything specifically for your truck’s exact dimensions.
What materials work best for extreme weather conditions?
For harsh environments, marine-grade vinyl or coated polyester fabrics provide superior UV and water resistance. In freezing climates, avoid materials that become brittle in cold temperatures—opt for flexible polymers or treated canvas instead.
Do homemade covers pass safety inspections?
Yes, properly designed and installed homemade truck bed covers meet all safety requirements as long as they don’t obstruct lights, license plates, or driver visibility. Always ensure your cover complies with local regulations regarding load coverage and attachment security.
📑 Table of Contents
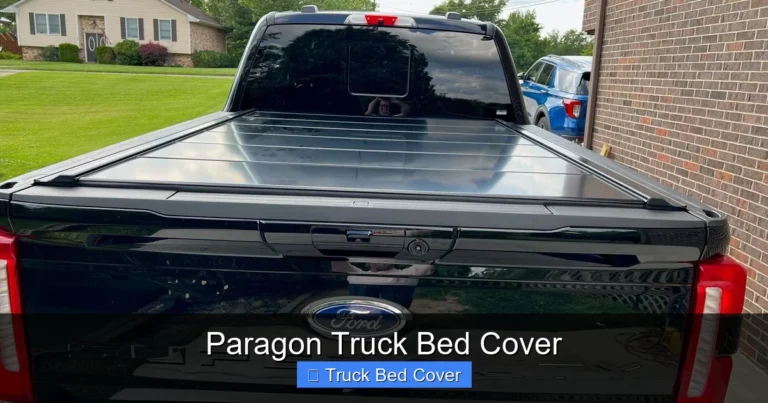
Understanding Truck Bed Cover Types
Before diving into construction, it helps to understand the different types of covers available. Each serves slightly different purposes and requires different building approaches.
Tonneau Covers
Tonneau covers sit flush with the truck bed rails and provide the most aerodynamic profile. They’re ideal for frequent access and maximum security. These require precise measurements and sturdy mounting hardware.
Roll-Up Covers
These versatile covers roll up along tracks mounted inside the bed. They offer easy access to all areas of the bed while remaining protected when rolled tight. The rolling mechanism needs smooth operation and secure locking at the front.
Hard Folding Covers
Made with multiple panels hinged together, these fold neatly against the cab. They provide excellent security and full bed access. Building these requires careful hinge placement and panel alignment.
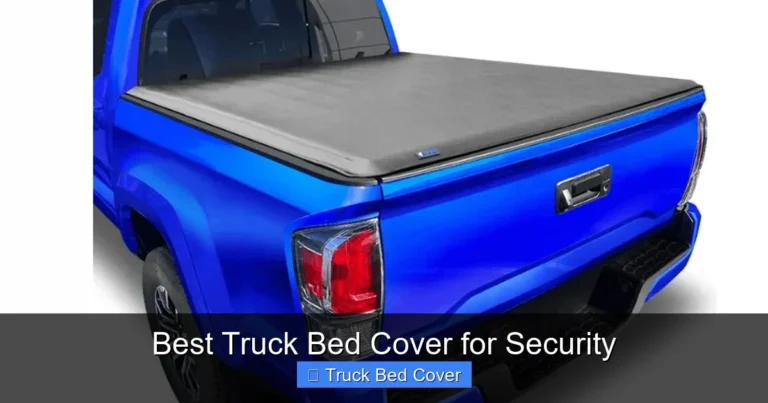
Bolt-On Soft Covers
The simplest type, these attach directly to existing bed rails using bolts. They’re quick to install and remove but offer less security than other options. Perfect for temporary or seasonal use.
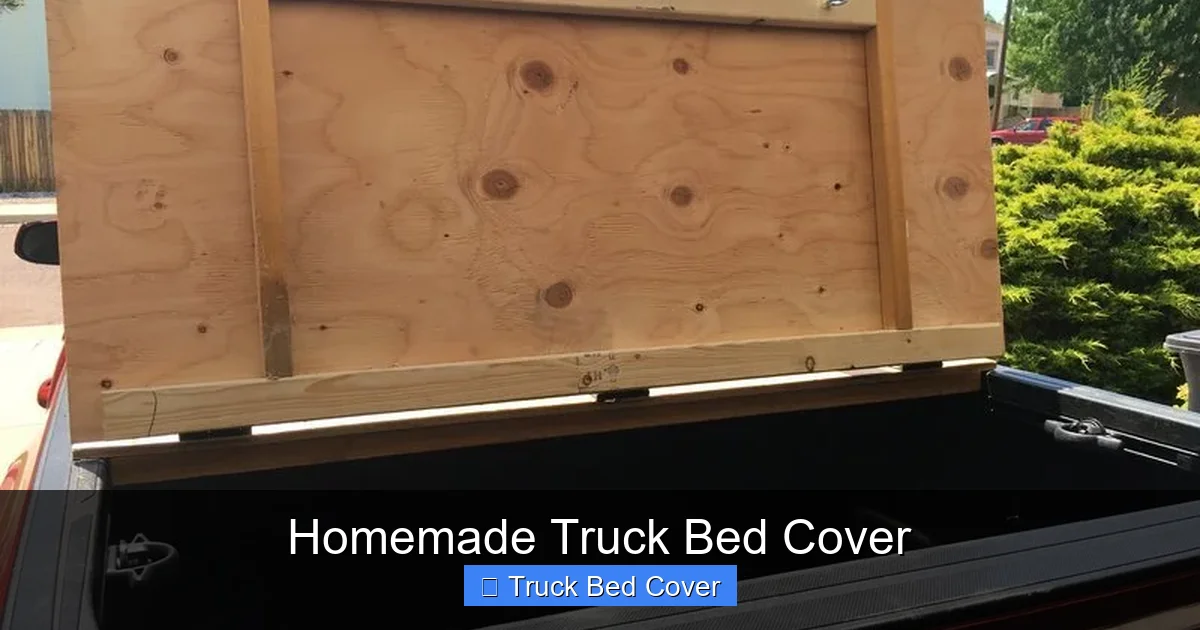
Essential Materials and Tools

Visual guide about Homemade Truck Bed Cover
Image source: i.pinimg.com
Success with any homemade project depends on having the right supplies. Here’s what you’ll need for a professional-quality cover:
Primary Materials
For waterproof protection, consider marine-grade vinyl or heavy-duty canvas treated with waterproofing spray. PVC sheets work well for rigid panels, while corrugated plastic offers lightweight rigidity. Choose materials rated for outdoor exposure and UV resistance.
Fasteners and Hardware
Stainless steel bolts and washers resist rust better than standard hardware. Consider using rubber grommets to reinforce holes and prevent tearing. For securing the cover, quality bungee cords, ratchet straps, or custom buckles work best.
Mounting System
Aluminum extrusion channels provide clean, adjustable mounting points. These can be bolted to existing bed rails or welded to custom brackets. Ensure your mounting system allows for proper tension adjustment and quick removal.
Tools Required
Basic workshop tools include a circular saw or jigsaw for cutting materials, drill with various bits, measuring tape, and level. For softer materials like canvas, a staple gun works well; for rigid panels, screws and brackets are better.
Measuring and Planning Your Design
Getting accurate measurements is crucial—measure your truck bed twice before cutting anything. Start by measuring the length, width, and depth at multiple points to account for any irregularities. Note where the bed rails are located and how much clearance you have above the bed.
Design Considerations
Think about how you’ll access the bed—do you need side loading, tailgate removal, or full bed access? Consider whether you want a removable cover or one that stays attached. Plan the attachment points carefully to avoid damaging your truck’s paint or structure.
Pattern Creation
Create detailed paper templates before cutting actual materials. This lets you test fit everything and make adjustments without wasting expensive materials. Include allowances for overlap and attachment hardware in your measurements.
Weight Distribution
Plan for how the cover will affect your truck’s center of gravity. Heavy covers should be distributed evenly across the bed rather than concentrated at one end. Consider adding counterweights if necessary for highway driving.
Step-by-Step Construction Process
Now comes the fun part—actually building your cover! Follow these steps for a professional result:
Frame Assembly (for hard covers)
Start by cutting your frame pieces to length using a miter saw for clean angles. Assemble the frame corners with corner brackets or welding, depending on your material. Reinforce stress points with additional braces.
Panel Attachment
If using multiple panels, install hinges between them first. Test the folding action before attaching to the frame. For single-piece covers, ensure the material is large enough to wrap around the frame with proper overlap.
Waterproof Sealing
Apply waterproof sealant around all edges and attachment points. Use silicone caulk for flexible joints and polyurethane for rigid connections. Allow proper drying time between coats.
Installation Hardware
Mount your attachment system to the truck bed rails first, then attach the cover. Use rubber washers between metal and paint to prevent scratches. Tighten bolts evenly to avoid warping the cover.
Final Testing
Before hitting the road, test the cover in various weather conditions. Check that it secures properly and doesn’t flap in the wind. Make any adjustments needed for a snug, secure fit.
Maintenance and Care Tips
Even the best homemade cover needs occasional maintenance to keep performing well:
Cleaning Schedule
Wipe down your cover weekly with mild soap and water. For stubborn stains, use a soft brush and avoid harsh chemicals that might damage waterproof coatings. Rinse thoroughly and let air dry completely.
Storage Practices
When not in use, store your cover in a dry, covered area. Never leave it exposed to extreme temperatures or direct sunlight for extended periods. Roll or fold loosely to prevent creases and material fatigue.
Inspection Routine
Check monthly for signs of wear, loose fasteners, or damaged seals. Replace worn gaskets or straps immediately to maintain waterproof integrity. Keep spare hardware on hand for quick repairs.
Winter Protection
In snowy climates, clear accumulated ice and snow regularly to prevent buildup that could damage the cover or strain attachment points. Use a plastic scraper rather than metal tools that might scratch surfaces.
Tension Adjustments
As materials stretch or settle over time, you may need to re-tension your cover. Most systems allow for minor adjustments—check manufacturer specifications for your particular design.
Customization Options
One advantage of DIY is the ability to add personal touches:
Color Matching
Choose fabrics or materials that complement your truck’s exterior color for a cohesive look. Many suppliers offer custom dye lots to match specific paint codes.
Lift-Assist Systems
Add gas struts or springs to make lifting heavier covers easier. These mount to the frame and provide controlled assistance when opening the cover.
Security Enhancements
Install additional locks, latches, or cable ties for extra security. Consider adding reflective strips for visibility during night driving.
Integrated Lighting
Some builders incorporate LED strips along the edges for interior lighting when the cover is closed. This requires careful wiring and waterproofing around electrical connections.
Ventilation Solutions
For enclosed storage, add small vents with mesh screens to allow airflow while keeping out debris. Position these near the tailgate end to prevent moisture buildup.
Logo or Branding
Personalize your cover with embroidered logos, decals, or screen printing. Professional finishes give your DIY project a polished, commercial appearance.
Frequently Asked Questions
Is it cheaper to buy or make a truck bed cover?
Personalize your cover with embroidered logos, decals, or screen printing. Professional finishes give your DIY project a polished, commercial appearance.
Frequently Asked Questions
Is it cheaper to buy or make a truck bed cover?
Homemade truck bed covers typically cost 50-70% less than commercial versions while offering comparable protection. Savings come from avoiding retail markup and choosing materials based on your specific needs rather than paying for unnecessary features.
How do I ensure my DIY cover fits properly?
Take precise measurements of your truck bed at multiple points to account for any irregularities. Create detailed paper templates before cutting materials, and include overlap allowances for attachment hardware in your final dimensions.
Can I install the cover myself without professional help?
Yes, most DIY truck bed covers can be installed with basic mechanical skills using standard tools. Bolt-on designs are particularly beginner-friendly, while more complex systems may require assistance for proper alignment and tensioning.
What maintenance do homemade covers require?
Regular cleaning with mild soap and water, inspection for wear every month, and prompt repair of any damaged seals or fasteners. Store the cover in a dry location when not in use to extend its lifespan.
Will a homemade cover protect my cargo from theft?
Properly secured homemade covers provide good security, especially when combined with additional locks or cables. While no cover is completely theft-proof, a well-built DIY system makes unauthorized access significantly more difficult.
How do I choose the right material for my climate?
Select materials based on your primary weather challenges: marine vinyl for wet climates, UV-resistant fabrics for sunny regions, and flexible polymers for extreme temperature variations. Always consider both durability and ease of use in your decision.