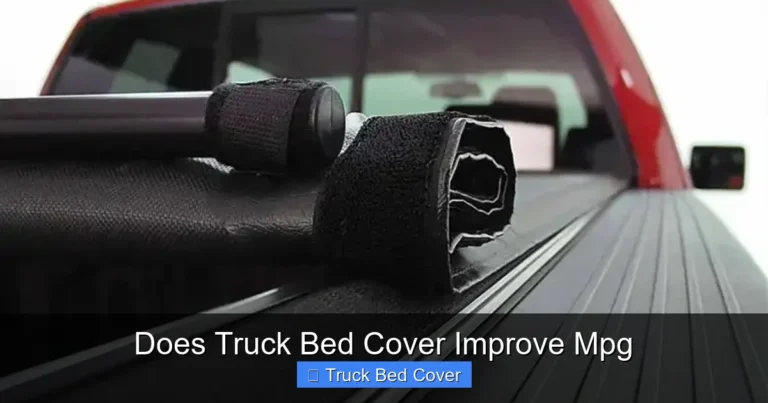
Diy Truck Bed Cover Ideas
Building a DIY truck bed cover is an affordable way to protect your gear, improve aerodynamics, and personalize your ride. Whether you’re tackling a basic tarp setup or crafting a sleek hardtop, these DIY truck bed cover ideas offer flexibility for every skill level and budget. With the right materials and a little creativity, you can create a functional, weatherproof solution that turns heads and keeps your truck bed secure.
If you’ve ever looked at the price tag on a factory-installed truck bed cover—whether it’s a roll-up tonneau, retractable cap, or hard tri-fold—you might have felt the urge to say, “There has to be a better way.” Enter: DIY truck bed cover ideas. Not only do these custom builds save you money, but they also give you full control over design, durability, and functionality. Whether you’re hauling tools across construction sites, camping gear to the mountains, or just want to keep your groceries dry on the drive home, a well-made DIY cover does the job better than most off-the-shelf options—especially when tailored to your exact needs.
The beauty of a DIY truck bed cover lies in its simplicity and adaptability. Unlike mass-produced caps that often require professional installation and come with limited warranties, your handiwork can be as unique as your truck. You can choose eco-friendly materials, integrate smart storage solutions, or even add solar panels for charging devices. Plus, building it yourself gives you peace of mind knowing exactly how it holds up in storms, heavy loads, or scorching heat. In this guide, we’ll walk you through everything you need to know—from choosing the right materials to step-by-step instructions for five popular DIY designs. Let’s get started!
Key Takeaways
- Cost Savings: DIY truck bed covers are significantly cheaper than factory options, often saving hundreds of dollars.
- Custom Fit: You control the size, shape, and features, ensuring a perfect match for your truck’s bed dimensions.
- Ease of Installation: Most projects require only basic tools and take just a weekend to complete.
- Durability Options: Choose from plywood, aluminum, or marine-grade fabrics for long-lasting performance.
- Aesthetic Freedom: Paint, wrap, or add trim to make your cover blend in or stand out.
- Weather Protection: Properly sealed DIY covers shield cargo from rain, snow, and UV damage.
- Skill-Level Friendly: Beginners can start with simple designs, while experts can build modular or motorized systems.
Quick Answers to Common Questions
How much does a DIY truck bed cover cost?
It depends on the design, but most DIY truck bed covers cost between $50 and $300—significantly less than factory options that often exceed $600.
Can I install a DIY cover myself?
Yes! Most DIY truck bed cover ideas are designed for homeowners and require only basic tools and skills. Projects range from simple tarp setups to more complex aluminum shells.
Will a DIY cover protect my cargo in heavy rain?
Absolutely—if built correctly with waterproof materials and sealed seams. Use marine-grade plywood, vinyl canvas, and rubber weatherstripping for best results.
Do I need permits to modify my truck bed?
Generally, no. However, some states regulate truck bed height or modifications affecting emissions. Check local DMV rules before installing large structures.
Can I convert my DIY cover into a camper?
Yes! Add insulation, windows, and a mattress to transform your truck bed cover into a mobile sleeping space. Just ensure structural integrity and ventilation.
📑 Table of Contents
Why Build Your Own Truck Bed Cover?
Before diving into specific projects, let’s talk about why so many truck owners are turning away from store-bought covers and toward DIY solutions. First, there’s the financial benefit. A high-quality tonneau cover from a brand like UnderCover or TruXedo can cost anywhere from $400 to over $1,000. Meanwhile, a DIY version made from plywood, aluminum sheets, and hardware cloth might run under $150—sometimes less. That’s not just savings; it’s freedom.
Second, customization is king. Factory covers often come in standard sizes and colors that don’t always match your truck’s bed length or your personal style. With a DIY approach, you can cut the frame to fit perfectly, paint it to match your truck’s color, or even add LED lighting for nighttime visibility. And if you decide later you want a different type of cover? No problem. Swap out the fabric or reconfigure the rails—your truck bed remains ready for whatever comes next.
Finally, there’s the satisfaction of a job well done. There’s nothing quite like pulling into your driveway after finishing a project and seeing your truck transformed. It’s more than utility—it’s pride. And if you ever sell your truck, a well-maintained, custom-fit cover can actually increase resale value by making your vehicle stand out in the used market.
Essential Tools and Materials for DIY Truck Bed Covers

Visual guide about Diy Truck Bed Cover Ideas
Image source: i.pinimg.com
Every great DIY project starts with preparation. Before you pick up a saw or drill, make sure you have the right tools and materials on hand. The good news? You don’t need a garage full of equipment—just a few basics will get you far.
Basic Tool List
- Measuring tape and square: Precision is key when cutting frames.
- Circular saw or jigsaw: For cutting wood or metal.
- Drill and bits: Essential for assembling joints and attaching hardware.
- Clamps: Hold pieces together while you work.
- Screwdrivers (Phillips and flathead): For tightening bolts and screws.
- Level: Ensures your cover sits evenly.
- Sandpaper or orbital sander: Smooth rough edges and prep surfaces for painting.
Now for materials. Your choices depend on the type of cover you’re building:
- Plywood or OSB: Affordable, sturdy, and easy to cut—great for flatbed or camper shell-style covers.
- Aluminum sheets: Lightweight yet strong; resistant to rust and dents. Ideal for modern, sleek looks.
- Marine-grade plywood: Water-resistant and durable—perfect if you live in a rainy climate.
- Polyester canvas or vinyl: Flexible, waterproof, and available in multiple colors.
- Foam padding: Adds insulation and softens impact for delicate cargo.
- Hardware cloth or mesh: Allows airflow while keeping bugs out—useful for ventilated covers.
- Stainless steel screws, bolts, and hinges: Corrosion-resistant and built to last.
Pro tip: Always measure your truck bed twice before ordering materials. Even a half-inch difference can throw off the entire fit. And don’t forget to account for overhang—most covers extend slightly beyond the bed edges for secure attachment.
DIY Truck Bed Cover Ideas: Five Popular Projects
Ready to build? Here are five tried-and-true DIY truck bed cover designs, ranging from beginner-friendly to advanced. Each includes materials list, estimated cost, and time required.
1. Simple Canvas Tarp Cover
Perfect for occasional use and light-duty protection, this no-frills option uses a heavy-duty tarp stretched over a wooden frame.
Materials:
- 4×8 sheet of 1/2″ plywood (cut to bed size)
- Heavy-duty canvas tarp (same size)
- Galvanized angle iron or PVC pipes (for frame support)
- Rope or bungee cords
- Wood screws and brackets
Steps:
- Cut two side rails and one crossbeam to fit snugly inside your truck bed.
- Attach the rails perpendicular to the crossbeam using corner braces.
- Lay the canvas over the frame and secure it with grommets and bungees along all four sides.
- Test the fit by placing it in the bed and adjusting as needed.
Pros: Extremely low cost ($50–$80), quick build (3–5 hours), lightweight.
Cons: Not secure in high winds, requires manual removal daily.
2. Plywood Flatbed Cap
This classic design creates a solid, enclosed look—ideal for hauling sensitive items or adding sleeping space.
Materials:
- Marine-grade plywood (3/4″ thick)
- Stainless steel hinges
- Cam locks or latch system
- Weather stripping
- Paint or sealant
Steps:
- Build a rectangular box slightly larger than your truck bed.
- Add a rear door using hinges and install a cam lock for security.
- Attach rubber weather stripping around all edges to prevent leaks.
- Paint with exterior-grade paint or apply a clear sealant.
Pros: Fully enclosed, weatherproof, increases truck height.
Cons:** Heavier (may affect fuel economy), harder to remove.
3. Aluminum Roll-Up Cover
Inspired by commercial models but made inexpensively at home, this cover uses slats and a roller mechanism.
Materials:
- Aluminum channel strips
- Polycarbonate or acrylic sheets
- PVC pipe (for roller shaft)
- U-channel tracks
- Springs and ratchet straps
Steps:
- Install U-channels along the front and back of the truck bed.
- Attach aluminum slats to polycarbonate panels using rivets.
- Mount the roller assembly at the cab end.
- Thread the panel through the slats and secure with springs.
Pros:** Sleek appearance, easy to roll open/close, wind-resistant.
Cons:** Higher material cost ($150–$250), requires precise alignment.
4. Modular Storage Box System
Turn your truck bed into organized workspace with interlocking plastic or wood boxes.
Materials:
- Plastic storage containers or wooden crates
- Drawer slides or hinges
- Locking latches
- Non-slip matting
Steps:
- Measure and mark positions for each box along the bed walls.
- Install drawer slides or hinges depending on access needs.
- Secure latches to prevent rattling during drives.
- Add foam inserts to protect fragile tools or electronics.
Pros:** Highly customizable, excellent organization, reusable.
Cons:** Limited weather protection unless sealed.
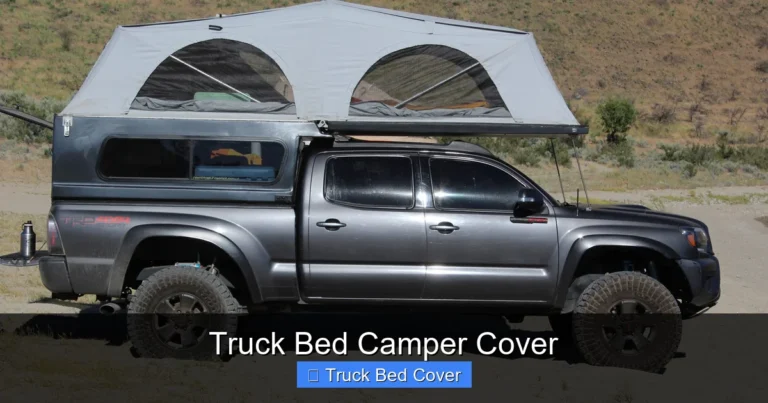
5. Solar-Powered Camper Shell
For serious off-roaders or van lifers, combine a camper shell with solar panels and battery storage.
Materials:
- Aluminum or fiberglass shell kit
- Flexible solar panels
- Charge controller and deep-cycle battery
- LED lighting system
- Insulation foam
Steps:**
- Install the base shell following manufacturer guidelines.
- Mount solar panels on the roof with waterproof sealant.
- Wire the charge controller to the battery and connect lights.
- Line interior walls with insulation for temperature control.
Pros:** Off-grid capability, multi-functional, stylish.
Cons:** Expensive ($500+), complex electrical work required.
Tips for a Professional-Looking Finish
Even if you’re not aiming for perfection, small details make a big difference. Follow these pro tips to ensure your DIY truck bed cover looks polished and lasts years.
Seal All Edges
Water intrusion is the #1 enemy of any truck bed cover. Use silicone caulk or rubber weatherstripping along every seam and bolt hole. Pay special attention to corners and where the cover meets the tailgate.
Use Powder-Coated Hardware
Stainless steel is great, but powder-coated finishes resist chipping and fading better. They also reduce glare in sunlight.
Paint with Exterior-Grade Products
Automotive spray paint or enamel works best on wood and metal. Apply at least two coats with proper drying time between layers. Don’t skip primer—it ensures adhesion and longevity.
Add Reflective Strips
Safety first! Tuck reflective tape along the bottom edge so other drivers see your truck at night—especially helpful if you frequently drive on rural roads.
Test in Real Conditions
Before declaring victory, test your cover in light rain, strong wind, and heavy loads. Make adjustments based on real-world performance.
Common Mistakes to Avoid
Learning from others saves time and money. Watch out for these frequent pitfalls:
- Mismeasuring the bed: Always measure inside the wheel wells and account for tailgate clearance.
- Using low-grade materials: Cheap plywood swells in humidity; avoid it unless sealed properly.
- Skipping drainage holes: If your cover isn’t fully sealed, include small holes near the corners to let water drain instead of pooling.
- Over-tightening fasteners: This can crack wood or warp metal. Use washers to distribute pressure.
- Neglecting ventilation: Trapped moisture causes mold. Include mesh panels or gaps near the cab.
Remember: Perfection isn’t required. Function matters more than form. A slightly imperfect DIY cover that keeps your stuff dry is better than a flawless one that leaks.
Maintenance and Longevity
Once your DIY truck bed cover is installed, ongoing care extends its life dramatically.
Clean Regularly
Wipe down surfaces monthly with mild soap and water. For tarps or canvas, use a gentle cleaner designed for outdoor fabrics. Rinse thoroughly and allow to air dry completely.
Inspect for Damage
Check hinges, latches, and seals quarterly. Replace worn parts immediately—a broken latch today could lead to stolen goods tomorrow.
Lubricate Moving Parts
Apply silicone spray to rollers, hinges, and sliding mechanisms every 6 months to prevent sticking and corrosion.
Store Properly When Not in Use
If you remove the cover seasonally (like in winter), clean it and store it in a dry place away from direct sunlight.
With proper maintenance, many DIY covers last 5–10 years—comparable to commercial versions, but at a fraction of the cost.
Frequently Asked Questions
What’s the easiest DIY truck bed cover to build?
The simplest option is a canvas tarp stretched over a wooden frame. It takes just a few hours, costs under $100, and requires minimal tools. Perfect for beginners.
Are DIY covers legal in all states?
Most basic covers are legal, but some states have restrictions on bed height or protruding objects. Always check your state’s Department of Motor Vehicles guidelines.
How do I keep my DIY cover from blowing off in the wind?
Use heavy-duty bungee cords or ratchet straps anchored to eye bolts on the truck frame. Adding weight (like sandbags) inside the cover also helps.
Can I paint my DIY cover to match my truck?
Yes! Use automotive-grade spray paint or enamel on metal or sealed wood. Prime first for best adhesion and color consistency.
Is aluminum better than wood for a DIY cover?
Aluminum is lighter, rust-proof, and easier to maintain, but more expensive. Wood is cheaper and sturdier but heavier and prone to water damage without sealing.
How long does it take to build a typical DIY truck bed cover?
Simple projects like tarp covers take 3–5 hours. More complex ones like aluminum roll-ups or camper shells may take a full weekend or two evenings.