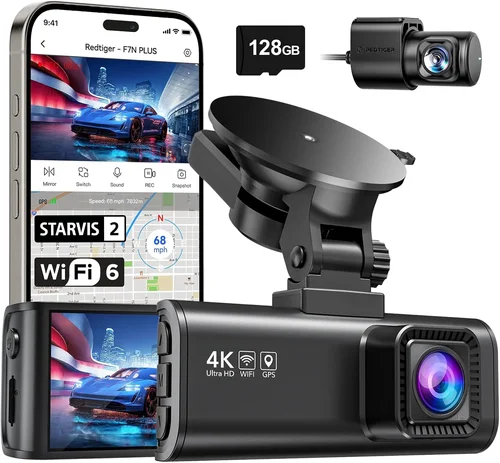
Best Bicycle Dash Cam Buying Guide
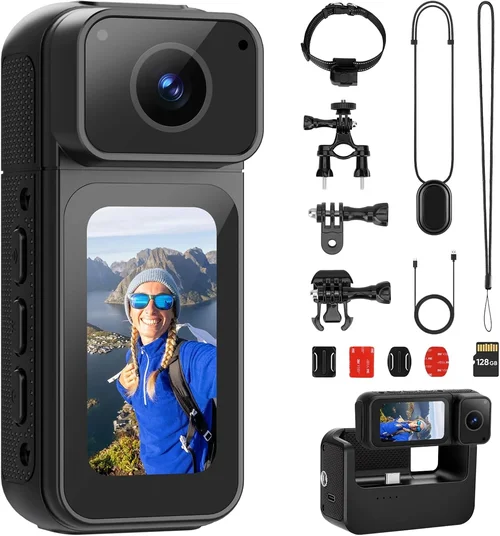
When choosing the best dash cam for your bicycle, you’re not just selecting a recording device—you’re investing in safety, security, and peace of mind. Whether you’re a daily commuter navigating busy city streets, an adventure cyclist exploring remote trails, or someone who simply wants to protect themselves from false claims, the right bicycle dash cam can make all the difference. This comprehensive buying guide will walk you through every critical factor to consider, helping you find the perfect balance between features, durability, and value.
In this guide, you’ll learn how to evaluate performance specifications like video resolution and field of view, understand build quality requirements for outdoor use, compare different mounting systems, and discover which features actually matter for cycling. We’ll also break down common misconceptions, provide realistic budget expectations, and share expert insights that go beyond marketing claims. By the end, you’ll have the knowledge to confidently choose a dash cam that fits your specific needs and riding style.
The market for bicycle dash cams has evolved significantly in recent years, with manufacturers now offering specialized solutions designed specifically for cyclists. Unlike automotive dash cams that primarily focus on road coverage and impact detection, bicycle dash cams must contend with wind noise, vibration, weather exposure, and limited power options. Understanding these unique challenges is essential when evaluating products. From compact action cameras to dedicated cycling computers with built-in recording, the choices can be overwhelming without proper guidance.

What to Look for When Buying Dash Cams
1. Video Quality & Resolution
Video resolution remains one of the most important factors when selecting a bicycle dash cam. For cycling footage, you’ll want at least 1080p Full HD resolution, though 4K Ultra HD provides significantly clearer detail, especially for license plate recognition and identifying faces. Higher resolutions also allow for better digital zoom during playback, which can be crucial if you need to review details from a distance.
Consider the frame rate as well—60fps is ideal for smooth motion capture during fast descents or quick maneuvers. Most importantly, look for a camera with good low-light performance since many cycling incidents happen during dawn, dusk, or in shaded areas. Cameras with larger image sensors (1/2.3″ or larger) typically perform better in challenging lighting conditions.
2. Field of View (FOV)
Field of view determines what your camera can capture around you while riding. A wide-angle lens is essential for cycling since you need to see approaching vehicles, pedestrians, and potential hazards coming from multiple directions. Look for cameras with 120-170 degrees horizontal FOV—this range provides excellent coverage without excessive distortion at the edges.
For urban commuting, a moderate FOV (around 140 degrees) works well to capture traffic lanes and sidewalks. Adventure cyclists might prefer slightly narrower angles (120-130 degrees) to reduce distortion when recording technical terrain features. Avoid cameras with extremely wide angles over 170 degrees, as they often suffer from significant barrel distortion that makes objects appear warped.
3. Storage Capacity & Recording Options
Storage capacity directly impacts how much footage you can store before needing to overwrite old recordings. Most dash cams use microSD cards ranging from 32GB to 1TB. For typical cycling usage, 64GB provides about 8-12 hours of continuous recording at 1080p, while 128GB can store up to 24 hours.
Consider whether your dash cam supports loop recording, which automatically overwrites the oldest files when storage fills up. Some models also offer event-triggered recording that saves incidents separately from regular footage. GPS logging is another valuable feature that timestamps and geotags your rides, making it easier to prove location during disputes.
4. Battery Life & Power Management
Battery life varies dramatically between models and can make or break your cycling experience. Basic action cameras typically offer 1-2 hours of continuous recording, while dedicated cycling computers might last 3-5 hours. For longer rides, consider models with removable batteries or external power options.
Look for efficient power management features like automatic shutoff when stationary, battery-saving modes, and the ability to charge while recording. USB-C charging is becoming standard and offers faster charging times. Some premium models include solar charging capabilities or support for external battery packs designed specifically for cycling.
5. Weather Resistance & Build Quality
Bicycle dash cams face harsh environmental conditions—rain, dust, extreme temperatures, and constant vibration. IP67 or higher waterproof ratings ensure protection against splashes and brief submersion. The housing should be made of durable materials like polycarbonate or aluminum that can withstand drops and impacts.
Consider how the camera mounts to your bike—secure attachment points are crucial since loose equipment could become dangerous projectiles. Look for shock-resistant designs rated for high-G impacts, and check if the lens is protected by a scratch-resistant coating. Temperature tolerance is also important; most quality dash cams operate reliably from -4°F to 140°F (-20°C to 60°C).
6. Audio Recording Capabilities
Audio can provide crucial context to your video footage, especially in accident situations. Built-in microphones should capture clear voice commands and ambient sounds without picking up excessive wind noise. Some models offer directional mics that focus on sounds in front of the camera while reducing background noise.
Consider whether the audio is recorded separately from video or embedded within the video file. Embedded audio is simpler but may be compressed along with the video. External microphone options are available for those who need professional-grade audio quality, though this adds complexity and cost.
7. Mounting System & Flexibility
A reliable mounting system is absolutely essential for safe cycling. Look for 360-degree adjustable mounts that allow you to position the camera at optimal angles regardless of your bike’s geometry. Quick-release mechanisms enable easy removal for storage or charging.
Consider compatibility with different handlebar sizes (typically 22-32mm diameter) and whether the mount includes vibration-dampening features. Magnetic mounts offer convenience but may lack the security needed for high-speed riding. Some models include secondary mounts for helmet or chest placement, providing multiple perspectives.
8. Smart Features & Connectivity
Modern bicycle dash cams increasingly include smart connectivity options. Wi-Fi and Bluetooth enable wireless transfer of footage to smartphones for quick sharing or backup. Cloud storage services allow automatic uploading of incident videos, providing additional protection against tampering.
GPS integration tracks your route, speed, and elevation, adding valuable data to your recordings. Some models offer live streaming capabilities, though this consumes significant battery life. Voice control and touchscreen interfaces improve usability while riding, reducing the need to handle the device manually.
9. Ease of Use & Interface
While cycling, you shouldn’t need to fiddle with complex menus. Look for intuitive interfaces with large buttons, clear icons, and minimal setup required. Physical controls are generally more reliable than touchscreens in wet conditions.
Consider how quickly the camera starts recording—some models boot up in under 5 seconds, allowing you to capture unexpected events immediately. Menu navigation should be simple enough that you can access settings without removing your hands from the handlebars.
10. Warranty & Customer Support
Reliable customer support and solid warranty coverage provide peace of mind. Most reputable brands offer at least a 1-year warranty covering defects, with some providing 2-3 years. Check whether the warranty covers accidental damage or just manufacturing defects.
Research the brand’s reputation for responsive customer service and availability of replacement parts. Online forums and user reviews can reveal whether companies stand behind their products when issues arise.
Different Types of Dash Cams

Common Buying Mistakes to Avoid
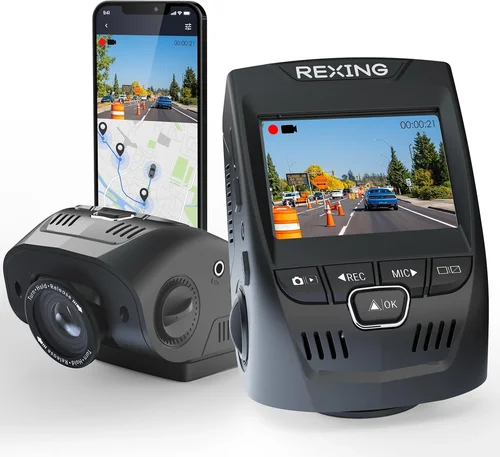
❌ Mistake: Ignoring Weather Resistance Requirements
Why it’s bad: Many buyers assume any “waterproof” camera will handle cycling conditions. In reality, cheap waterproof coatings fail quickly under UV exposure and mechanical stress. Without proper IP rating certification, your camera could malfunction in light rain or lose structural integrity over time.
What to do instead: Choose cameras with certified IP67 or higher ratings and reinforced housing. Look for models tested specifically for cycling conditions, not just automotive use. Consider additional protective cases for extreme weather.
❌ Mistake: Overlooking Vibration Impact
Why it’s bad: Bicycles create constant vibrations that can cause premature failure in poorly designed mounts and electronics. Cheap mounts loosen over time, while unprotected cameras experience increased wear from shaking.
What to do instead: Select vibration-dampening mounts and shock-resistant camera housings. Test mount security before long rides and consider secondary retention systems like safety cables.
❌ Mistake: Choosing Based Solely on Price
Why it’s bad: The cheapest options often lack essential features like GPS, good low-light performance, or reliable mounts. You might save money upfront but end up with a camera that fails when you need it most.
What to do instead: Compare value across price ranges rather than focusing only on lowest cost. Factor in total ownership expenses including memory cards, replacement parts, and potential replacements.
❌ Mistake: Neglecting Storage Planning
Why it’s bad: Running out of storage mid-ride means losing critical footage. Many users don’t realize that GPS logging, higher resolutions, and continuous recording consume storage rapidly.
What to do instead: Calculate your storage needs based on ride frequency and duration. Plan regular data transfers and consider cloud backup subscriptions for important footage.
❌ Mistake: Assuming All Dash Cams Are Equal
Why it’s bad: Automotive and bicycle dash cams serve different purposes. Cars move at consistent speeds with predictable lighting, while bicycles experience rapid acceleration, braking, and variable conditions.
What to do instead: Research cycling-specific features like handlebar mounts, efficient power management, and wind-resistant audio. Don’t assume automotive dash cam recommendations apply to cycling.
❌ Mistake: Skipping User Reviews
Why it’s bad: Marketing materials highlight ideal scenarios but hide real-world limitations. Users encounter issues like firmware bugs, compatibility problems, and unexpected failures.
What to do instead: Read detailed user reviews across multiple platforms. Pay attention to comments about longevity, customer service experiences, and specific use case performance.
❌ Mistake: Not Testing Before Committing
Why it’s bad: Even with thorough research, hands-on testing reveals practical concerns like button placement, menu navigation, and actual battery life that specs can’t convey.
What to do instead: If possible, test the camera on short rides before purchasing. Check return policies so you can exchange if the device doesn’t meet your expectations.
Budget Guidelines: How Much Should You Spend?
Entry-Level ($50 – $150): Essential Protection
For casual riders and occasional commuters, entry-level options provide basic protection without breaking the bank. These typically include 1080p recording, decent mounts, and adequate battery life for short trips. Look for brands with proven track records like GoPro Hero Session, DJI Osmo Action, or Garmin Varia Vision. While lacking advanced features, they offer reliable performance for everyday use. Expect limitations like smaller screens, fewer smart features, and basic weather resistance.
Mid-Range ($150 – $300): Balanced Performance
This sweet spot delivers excellent value for serious commuters and regular riders. Mid-range dash cams typically offer 4K recording, improved GPS functionality, better low-light performance, and enhanced build quality. Brands like Bryton Rider, Lezyne Super GPS, and BlackVue DR series fall into this category. You’ll get professional-grade recording quality with user-friendly interfaces and robust mounting systems. These models often include cloud connectivity and smartphone integration at reasonable prices.
Premium ($300 – $600): Professional-Grade Features
For enthusiasts, competitive cyclists, and those requiring maximum reliability, premium options deliver top-tier performance. These include dual-camera systems, extended battery life, superior weather sealing, and advanced stabilization. Consider devices like Garmin Varia UT800, Bryton Rider 800, or specialized cycling computers with integrated recording. Premium models often include professional editing software, extended warranties, and priority customer support. They’re worth the investment for frequent riders or those who depend on their recordings for insurance claims.
Luxury ($600+): Ultimate Protection
Luxury bicycle dash cams represent the pinnacle of cycling technology, featuring military-grade construction, multi-sensor arrays, and enterprise-level security. These include systems like CatEye Pathfinder Pro, specialized racing computers, and custom-built surveillance solutions. Luxury options often incorporate AI-powered event detection, encrypted cloud storage, and forensic-quality recording standards suitable for legal proceedings. While overkill for most recreational cyclists, they’re essential for professional athletes, tour operators, and anyone requiring absolute certainty in their recordings.
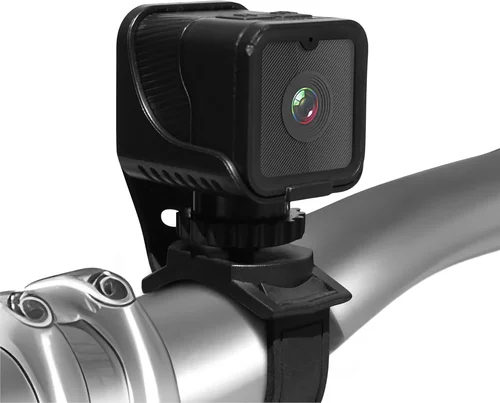
Expert Tips for Getting the Best Deal
Timing Your Purchase Right
Major sporting goods retailers typically run spring sales in March-April and back-to-school promotions in August. Online retailers offer Black Friday deals in November and summer clearance events in June. Avoid major holidays when prices often increase due to demand. Consider buying refurbished units from certified sellers during off-season periods when new model releases push older versions to discounted prices.
Where to Buy: Physical vs Digital Stores
Physical bike shops provide immediate hands-on testing and expert advice from staff who understand local riding conditions. Online retailers offer broader selection, competitive pricing, and home delivery convenience. For complex purchases, combine both approaches—test in-store then order online for best prices. Specialty cycling websites often have exclusive bundles including mounts, cases, and accessories that retail stores don’t carry.
Spotting Hidden Deals & Discounts
Sign up for email newsletters from manufacturers and retailers to receive exclusive promo codes. Join loyalty programs that offer member-only discounts and early access to sales. Check student, military, and first-responder discount programs offered by major brands. Bundle deals combining dash cams with other cycling accessories often provide better overall value than individual purchases.
Warranty Strategy
Always register your product immediately after purchase to activate warranty coverage. Keep original packaging and receipts in case you need to return or replace items. Understand what your warranty covers—some exclude water damage or physical impacts. Consider extended warranty plans for expensive units, but research whether the coverage is worth the additional cost compared to manufacturer repairs.
Return Policy Navigation
Choose retailers with generous return windows (90 days or longer) rather than restrictive policies. Inspect equipment thoroughly upon delivery and document any shipping damage immediately. Test all features during the return period to ensure everything functions as expected. Keep all original packaging and accessories to maintain resale value or facilitate returns.
Testing Before Committing
If possible, rent or borrow equipment before purchasing to test performance under your specific riding conditions. Take sample footage and review it at home to assess video quality and usability. Test mounting stability during different types of riding including rough terrain, high speeds, and wet conditions. Evaluate whether the device meets your expectations for ease of use and reliability.
Negotiation Techniques
Don’t hesitate to ask for price matching if you find lower prices elsewhere. Mention competing offers when making purchases—many retailers will match or beat competitors’ prices. For multiple item purchases, ask about bundle discounts or free accessories. Building rapport with knowledgeable sales staff can sometimes result in unadvertised discounts or upgrade opportunities.
Future-Proofing Your Investment
Choose models with firmware update capabilities to extend useful life. Consider expandable storage options that allow future upgrades. Select brands with established ecosystems where accessories remain compatible over time. Invest in versatile mounting systems that work with multiple devices and bike configurations, reducing the need for complete system replacements.

Frequently Asked Questions
Q: Can I use my existing action camera as a bicycle dash cam?
A: Yes, many popular action cameras like GoPro Hero, DJI Osmo, and Garmin VIRB can serve as effective bicycle dash cams. However, ensure you have appropriate handlebar mounts and consider weather protection. Dedicated cycling mounts provide better stability and positioning than universal mounts. For optimal performance, choose cameras with GPS capabilities and sufficient battery life for your typical ride durations.
Q: How long do bicycle dash cam batteries actually last?
A: Actual battery life varies significantly based on usage conditions. At 1080p resolution with GPS disabled, expect 1.5-3 hours from action cameras and 3-6 hours from cycling computers. Enabling GPS reduces runtime by 30-50%. Higher resolutions, frequent use of LCD screens, and cold weather further decrease battery life. Always carry spare batteries or portable chargers for rides exceeding manufacturer specifications.
Q: Will my dash cam footage hold up in court?
A: Footage quality and authenticity determine admissibility in legal proceedings. High-resolution, timestamped recordings with GPS data provide strong evidence. Ensure your device automatically creates secure backups and maintains metadata including date/time/location. Court acceptance depends on chain-of-custody documentation and verification that recordings haven’t been altered. Consult legal professionals about specific evidentiary requirements in your jurisdiction.
Q: How do I prevent my dash cam from falling off during rides?
A: Use high-quality vibration-dampening mounts specifically designed for cycling. Apply thread locker to mounting screws and consider secondary retention systems like safety cables. Position cameras toward the rear of handlebars to minimize aerodynamic lift forces. Regularly inspect mounts before rides and tighten any loosened components. For extreme conditions, consider professional installation services.
Q: What’s the best way to store and manage dash cam footage?
A: Transfer footage immediately after rides to external hard drives or cloud storage. Organize files chronologically with descriptive names including date, location, and event type. Maintain separate folders for regular rides versus incident footage. Use reliable formatting tools when reusing memory cards and consider encrypted cloud storage for sensitive recordings. Regularly backup important footage to multiple locations.
Q: Can dash cams record audio, and should I enable it?
A: Most modern dash cams include built-in microphones capable of recording audio alongside video. Enable audio recording for comprehensive incident documentation, but be aware that some jurisdictions have strict laws about recording conversations. Wind noise can overwhelm audio quality, so consider external microphone options for professional applications. Always comply with local privacy regulations regarding audio recording.
Q: How do I choose the right memory card for my dash cam?
A: Select Class 10 or UHS-I/UHS-II microSD cards with V30 speed rating for reliable 4K recording. Format cards using your dash cam before first use to ensure compatibility. Avoid counterfeit cards that may fail unexpectedly. For extended recording sessions, calculate required capacity based on resolution, frame rate, and compression settings. Keep spare cards charged and easily accessible.
Q: What maintenance does my bicycle dash cam require?
A: Clean lenses regularly with microfiber cloths to maintain clear footage. Check mounting hardware weekly for tightness and wear. Update firmware when new versions are released to improve performance and fix bugs. Store devices properly when not in use, protecting from extreme temperatures and humidity. Replace worn mounts or damaged components promptly to maintain safety.
Q: Can I connect multiple dash cams to my bike?
A: Yes, dual-camera setups provide comprehensive coverage from multiple angles. Front-mounted cameras capture traffic interactions while rear-mounted units record following vehicles or trail features. Ensure your chosen system allows simultaneous recording without excessive battery drain. Consider synchronization features that align footage from multiple cameras for seamless editing.
Q: How do I know if my dash cam is working correctly?
A: Perform routine visual checks before rides to confirm power status and recording indicators. Review sample footage after short test rides to verify quality and functionality. Monitor battery levels and storage space regularly. If experiencing issues, consult troubleshooting guides or contact manufacturer support. Document any malfunctions for warranty claims or repair requests.
Our Final Recommendations
Best for Budget-Conscious Buyers
For those seeking affordable protection without sacrificing essential features, the GoPro Hero 7 White offers excellent value at under $150. Its compact size, 1080p recording, and reliable build quality make it ideal for casual riders. Pair it with a sturdy handlebar mount and you’ll have professional-looking footage without breaking the bank. While lacking GPS and advanced cycling metrics, it provides reliable recording for everyday commuting and recreational rides.
Best Overall Value
The Garmin Varia Vision Display represents the perfect balance of cycling-specific features and recording capabilities. Priced around $300, it combines a heads-up display with integrated recording, showing turn-by-turn directions while capturing your journey. Its 4K recording quality, 13-hour battery life, and seamless integration with other Garmin devices make it exceptional value for serious cyclists who want both navigation and documentation in one package.
Best Premium Option
For ultimate protection and professional-grade performance, the Bryton Rider 800 delivers outstanding value in the premium category. With 4K recording, dual-channel capability, 18-hour battery life, and comprehensive cycling metrics, it’s designed for endurance riders and adventure cyclists. Its rugged construction, cloud connectivity, and extensive accessory ecosystem justify the higher price point for frequent riders who demand reliability and advanced features.
Best for Beginners
New cyclists should start with the DJI Osmo Action, offering familiar operation and excellent image stabilization. At around $150, it provides 4K recording with RockSteady stabilization that keeps footage smooth even on rough terrain. Its intuitive controls, waterproof design, and compatibility with various mounts make it perfect for those learning the ropes while documenting their cycling journey.
Best for Advanced Users
Experienced cyclists requiring maximum functionality will appreciate the CatEye Pathfinder Pro. This comprehensive cycling computer integrates navigation, performance metrics, and recording in a single rugged unit. With 4K recording, dual-band GPS, 12-hour battery life, and professional-grade construction, it’s built for demanding conditions and extended adventures. Its extensive data analysis capabilities and compatibility with training software make it invaluable for performance-focused riders.
Conclusion: Making the Right Choice
Choosing the best dash cam for your bicycle ultimately comes down to understanding your specific needs, riding patterns, and budget constraints. There’s no single “perfect” solution—only the right choice for your circumstances. Consider how frequently you ride, the environments you encounter, the level of protection you require, and the features that genuinely enhance your experience.
Start by prioritizing must-have features like video quality, battery life, and build quality before exploring optional extras. Remember that a slightly more expensive model today might save you money and frustration tomorrow through better reliability and longer lifespan. Don’t overlook mounting systems and power management—these practical considerations often determine real-world usability.
Take advantage of testing opportunities, read comprehensive reviews, and leverage expert advice from cycling communities. The investment in a quality dash cam pays dividends through enhanced safety, peace of mind, and valuable documentation of your cycling adventures. Whether you’re protecting yourself from false claims, capturing stunning scenery, or improving your riding skills, the right bicycle dash cam becomes an indispensable companion on every journey.
Most importantly, remember that technology serves your goals—not the other way around. Choose a device that seamlessly integrates into your riding routine without creating complications or distractions. With careful consideration and the guidance provided here, you’ll find a bicycle dash cam that enhances your cycling experience while providing the protection and documentation you need.