How to Install a Weathertech Truck Bed Cover
Installing a WeatherTech truck bed cover is a simple DIY project that can be completed in under an hour. With the right tools and a few helpful tips, you’ll have a secure, weather-resistant cover protecting your truck bed from rain, snow, and sun damage. This guide walks you through the entire process—from preparation to final adjustments—ensuring a tight, professional fit every time.
Key Takeaways
- Tools You’ll Need: Basic hand tools like a socket wrench, screwdriver, and tape measure are sufficient for most installations.
- Preparation Is Key: Clean and inspect your truck bed thoroughly before starting the installation.
- Follow Manufacturer Instructions: Always refer to the WeatherTech installation manual specific to your model.
- Secure All Clamps: Properly tighten all clamps and latches to prevent water leakage and ensure longevity.
- Test Fit Before Finalizing: Slide the cover into place multiple times to check alignment and make minor adjustments.
- Weather Considerations: Install during dry conditions to avoid moisture interference with adhesive or clamping mechanisms.
- Maintenance Tips: Regularly inspect seals and hardware to maintain optimal performance over time.
Quick Answers to Common Questions
Can I install a WeatherTech cover alone?
Yes, most WeatherTech truck bed covers are designed for single-person installation. The lightweight materials and user-friendly clamp system make it easy to handle without assistance.
How long does installation take?
Typically, installation takes 30 to 60 minutes, depending on your experience level and whether you encounter any alignment issues.
Will the cover fit my specific truck model?
Absolutely. WeatherTech offers custom-fit covers for thousands of truck models and years. Check their website or packaging to confirm compatibility before purchasing.
Do I need to drill holes in my truck bed?
No. WeatherTech covers use clamp-on systems that attach to existing bed rails—no drilling required. This preserves your truck’s resale value.
Is the cover easy to remove?
Yes. To remove the cover, simply loosen and remove the clamps. Store it in a dry place until reinstallation.
📑 Table of Contents
- How to Install a WeatherTech Truck Bed Cover: A Complete Guide
- Why Choose a WeatherTech Truck Bed Cover?
- Gathering Your Tools and Materials
- Preparing Your Truck Bed
- Unboxing and Inspecting the WeatherTech Cover
- Step-by-Step Installation Process
- Final Adjustments and Testing
- Troubleshooting Common Issues
- Maintenance Tips for Longevity
- Conclusion: Enjoy a Secure, Stylish Truck Bed
How to Install a WeatherTech Truck Bed Cover: A Complete Guide
If you’re a truck owner, you know how important it is to protect your cargo from the elements. Whether you’re hauling equipment, groceries, or just want to keep your tailgate clean, a high-quality truck bed cover makes a huge difference. One of the most trusted brands in the market today is WeatherTech. Known for precision engineering and durable materials, WeatherTech truck bed covers are designed to fit snugly, resist UV rays, and withstand harsh weather conditions. But installing one doesn’t have to be complicated. In fact, with the right approach, you can do it yourself in less than an hour.
This guide will walk you through the entire process—step by step—so you can confidently install your WeatherTech truck bed cover like a pro. We’ll cover everything from preparing your truck to fine-tuning the fit, plus share some insider tips to make the job even easier. No need for professional help or expensive labor costs. Let’s get started!
Why Choose a WeatherTech Truck Bed Cover?
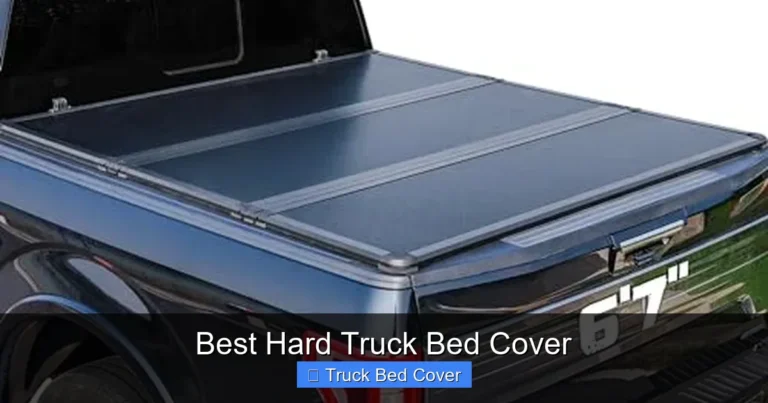
Before diving into the installation process, it’s worth understanding why so many truck owners choose WeatherTech. These covers aren’t just another piece of plastic on the market. They’re engineered with custom-molded precision, meaning each model is tailored to fit specific truck beds without gaps or overhangs. Made from tough, UV-resistant materials, they protect your cargo from rain, snow, dirt, and sun fading.
Visual guide about How to Install a Weathertech Truck Bed Cover
Image source: i.ytimg.com
But beyond protection, WeatherTech covers also improve your truck’s aerodynamics. By reducing wind resistance at the tailgate, you may notice better gas mileage over time. Plus, the sleek design enhances your truck’s appearance without compromising functionality. Whether you drive a Ford F-150, Chevy Silverado, or Ram 1500, there’s a WeatherTech cover built just for your model.
Gathering Your Tools and Materials
One of the biggest advantages of installing a WeatherTech truck bed cover is how straightforward it is. You don’t need a full garage workshop or specialized equipment. Most people already have the necessary tools at home. Here’s what you’ll need:
- A clean, dry truck bed (preferably on a cloudy day)
- A socket wrench set (typically 1/4-inch and 3/8-inch drives)
- A flathead and Phillips screwdriver
- A tape measure (optional but helpful for alignment)
- A soft cloth or microfiber towel
- The WeatherTech installation kit (usually includes clamps, bolts, and instructions)
Make sure you have all parts from the WeatherTech package laid out. Missing hardware can delay the process, so double-check the contents against the manual. Also, choose a calm day with no rain or high winds. Moisture can interfere with clamp adhesion, and strong gusts might make handling the cover difficult.
Preparing Your Truck Bed
The success of your installation starts long before you touch the first bolt. Cleaning and inspecting your truck bed is crucial. Any dirt, rust, or debris can create gaps or uneven surfaces, leading to poor sealing later on.
Step 1: Empty and Clean the Bed
Remove all items from your truck bed. Use a vacuum to get rid of loose dirt, then wipe down the entire surface with a damp cloth. Pay special attention to the tailgate area, where grime tends to accumulate. Once dry, inspect for dents or rust spots. If you find any, lightly sand them and apply touch-up paint if needed.
Step 2: Check the Tailgate Alignment
Ensure your tailgate opens and closes smoothly. If it’s misaligned or sticking, the cover may not seal properly. Adjust hinges if necessary, or consult your truck’s manual for tailgate repair tips.
Step 3: Dry the Surface
Moisture is your enemy during installation. Use a dry towel to wipe down every inch of the bed rails and tailgate. Even a small amount of water can prevent clamps from gripping securely.
Unboxing and Inspecting the WeatherTech Cover
Now that your truck is ready, it’s time to unpack the WeatherTech kit. Carefully remove the cover and all components from the box. Lay them out on a clean surface so you can see everything at once.
- The main cover panel (usually made of ABS plastic)
- Clamp assemblies with rubber gaskets
- Bolt kits and washers
- Installation instructions (read this carefully!)
Check each part for damage. If anything looks cracked, bent, or missing, contact WeatherTech customer service immediately. It’s better to resolve issues now than after partial installation.
Step-by-Step Installation Process
With everything prepared, follow these detailed steps to install your WeatherTech truck bed cover.
Step 1: Position the Cover
Carefully lift the cover and place it over the bed. Start by aligning the rear edge with the tailgate. Make sure it sits flush along the bed rails. Don’t force it—if it feels stuck, double-check alignment.
Step 2: Attach the Rear Clamp
The rear clamp secures the cover to the tailgate. Slide the clamp into place and insert the provided bolt. Tighten it just enough to hold firm—don’t overtighten yet. You’ll adjust later.
Step 3: Secure the Side Clamps
Move to the driver’s side first. Insert the side clamp into the track and bolt it down. Repeat on the passenger side. Keep bolts snug but not fully tightened. This allows for minor adjustments during final positioning.
Step 4: Test the Fit
Slide the cover forward and backward a few times to check for smooth operation. Listen for any scraping sounds—this could indicate misalignment. Make small adjustments as needed.
Step 5: Fully Tighten All Bolts
Once satisfied with the fit, go back and fully tighten every bolt using your socket wrench. Apply steady pressure—don’t use excessive force, as this can strip threads or warp the cover.
Step 6: Inspect the Seal
Close the tailgate completely and press firmly around the edges. The cover should stay in place without lifting. If it shifts, re-tighten the clamps slightly.
Final Adjustments and Testing
After tightening everything, take a moment to inspect the entire system. Look for gaps between the cover and bed rails. If you spot any, loosen the clamps, reposition the cover, and retighten. Remember—small adjustments now save headaches later.
Next, test the cover in different weather conditions if possible. Open and close the tailgate several times to ensure smooth operation. Also, check for water leakage during light rain (you can simulate this with a hose). A properly installed WeatherTech cover should repel water instantly.
Troubleshooting Common Issues
Even with careful installation, you might run into a few hiccups. Here’s how to handle them:
- Cover Won’t Stay Closed: Re-tighten all clamps. If the tailgate is warped, consider adding shims or adjusting hinge tension.
- Water Leaks at the Edges: Ensure the rubber gaskets are seated correctly. Replace them if they’re worn.
- Cover Scrapes Against Rails: Loosen clamps and slide the cover slightly forward or backward until clearance improves.
- Loose Hardware: Double-check all bolts and screws. Vibration over time can cause loosening.
If problems persist, consult the WeatherTech support team. They offer model-specific advice and replacement parts if needed.
Maintenance Tips for Longevity
Your WeatherTech cover is built to last, but regular maintenance keeps it performing at its best. Here’s how to care for it:
- Wash the cover annually with mild soap and water. Avoid harsh chemicals or abrasive scrubbers.
- Inspect clamps and seals every six months for wear or damage.
- Lubricate moving parts (like tailgate hinges) with silicone spray to prevent stiffness.
- Store the cover indoors during winter if possible, or cover it with a protective tarp.
Cleaning is simple—just wipe down with a damp cloth and let it air dry. Never use a pressure washer directly on the cover, as high pressure can damage the material over time.
Conclusion: Enjoy a Secure, Stylish Truck Bed
Installing a WeatherTech truck bed cover is a smart investment that pays off in protection, convenience, and style. With this guide, you now have the knowledge and confidence to complete the job yourself—saving time and money while achieving a professional result. From cleaning the bed to fine-tuning the clamps, every step matters. Follow the instructions, take your time, and remember that patience leads to perfection.
Once installed, enjoy peace of mind knowing your cargo is safe from rain, dust, and sun. Plus, the sleek look of a custom-fit WeatherTech cover enhances your truck’s overall appeal. Whether you use your truck for work, recreation, or daily driving, this upgrade makes a real difference.
So grab your tools, roll up your sleeves, and get ready to transform your truck bed. You’ve got this!
Frequently Asked Questions
Can I wash my WeatherTech cover with a pressure washer?
It’s not recommended. High-pressure water can damage the material or force water into seams. Instead, use a garden hose with low pressure or clean it manually with soap and water.
What happens if the cover gets scratched?
Minor scratches are normal and won’t affect performance. For deep cuts, contact WeatherTech customer service—they may offer replacement panels for certain models.
How do I clean mold or mildew from the cover?
Mix a solution of mild soap and water. Gently scrub the affected area with a soft brush, rinse thoroughly, and allow to air dry completely.
Can I install the cover in cold weather?
It’s best to install in temperatures above 40°F (4°C). Cold can make plastic brittle and reduce clamp grip. If you must install in winter, warm the cover slightly before fitting.
Are WeatherTech covers compatible with tonneau covers?
No. WeatherTech bed covers are standalone systems. However, they’re designed to integrate with other accessories like bed liners and toolboxes.
What warranty does WeatherTech provide?
Most WeatherTech truck bed covers come with a limited lifetime warranty against defects in materials and workmanship. Be sure to register your product online to activate coverage.