How to Build a Truck Bed Cover
Building your own truck bed cover is a smart way to protect your gear, improve fuel efficiency, and add style to your vehicle. With the right materials and tools, you can create a custom cover that fits perfectly and lasts for years. Whether you’re hauling tools, sports equipment, or just want extra security, a DIY cover gives you control over design, function, and cost.
Key Takeaways
- Custom Fit: A DIY truck bed cover allows you to tailor size, shape, and features to your specific truck model and needs.
- Cost Savings: Building it yourself can save hundreds compared to buying a pre-made cover.
- Improved Security: Lockable, enclosed covers deter theft and protect your belongings from rain, snow, and sun.
- Fuel Efficiency: A well-designed cover reduces wind resistance, improving gas mileage.
- Easy Maintenance: Use weather-resistant materials like marine-grade plywood and aluminum to ensure long-term durability.
- DIY Skills Boost: This project improves woodworking, measuring, and assembly skills.
- Weather Protection: Proper sealing prevents water leaks and protects cargo from moisture damage.
Quick Answers to Common Questions
Can I build a truck bed cover without prior experience?
Yes, absolutely. While some basic woodworking or metalworking skills help, many successful builds start with beginners. Follow clear instructions, take your time, and don’t hesitate to watch tutorial videos online.
What’s the cheapest material for a DIY truck bed cover?
Marine-grade plywood is usually the most affordable option for hard covers, costing around $20–$30 per sheet. Aluminum is more expensive upfront but lasts longer and resists dents.
Do I need special tools?
No. Standard tools like a saw, drill, tape measure, and clamps are sufficient. Renting specialized tools (like a router) is only necessary for advanced detailing.
Will my cover improve gas mileage?
Yes, especially if it has a low profile and smooth surface. Reduced wind drag can improve fuel efficiency by 2–5%, depending on speed and design.
How do I stop water from leaking under the cover?
Use rubber weatherstripping along the edges and apply silicone sealant at joints. Ensure the cover sits slightly higher than the bed rails to shed water naturally.
📑 Table of Contents
- How to Build a Truck Bed Cover: A Complete DIY Guide
- Why Build Your Own Truck Bed Cover?
- Choosing the Right Design for Your Needs
- Gathering Materials and Tools
- Measuring and Cutting Your Panels
- Assembling the Frame and Panels
- Installing the Cover on Your Truck
- Finishing Touches and Customization
- Maintenance and Longevity Tips
- Conclusion: Why Every Truck Owner Should Try This
How to Build a Truck Bed Cover: A Complete DIY Guide
Have you ever pulled up to a job site or campsite, only to find your truck bed soaked from rain or cluttered with dust? Or maybe you’ve struggled to secure your gear during long drives because there’s no lid to lock it in place? If so, you’re not alone. Millions of truck owners face these challenges every day—until they build their own truck bed cover.
A truck bed cover isn’t just a luxury; it’s a practical solution for anyone who uses their truck for work, recreation, or daily driving. Whether you’re hauling lumber, camping gear, or sensitive electronics, having a reliable, weatherproof lid makes all the difference. And the best part? You don’t need to spend $500–$1,500 on a factory-installed tonneau cover. With a little planning, basic tools, and some elbow grease, you can build a custom cover that fits perfectly and looks great.
In this detailed guide, we’ll walk you through everything you need to know about building your own truck bed cover—from choosing materials and measuring your bed to assembling, installing, and finishing the final product. By the end, you’ll have the confidence and knowledge to tackle this rewarding DIY project.
Why Build Your Own Truck Bed Cover?
Before diving into measurements and materials, let’s talk about why building your own cover is such a smart move. While pre-made covers are convenient, they often come with limitations. They might be expensive, not fit perfectly, or lack the customization you want. A DIY approach gives you full control over every aspect of the build.
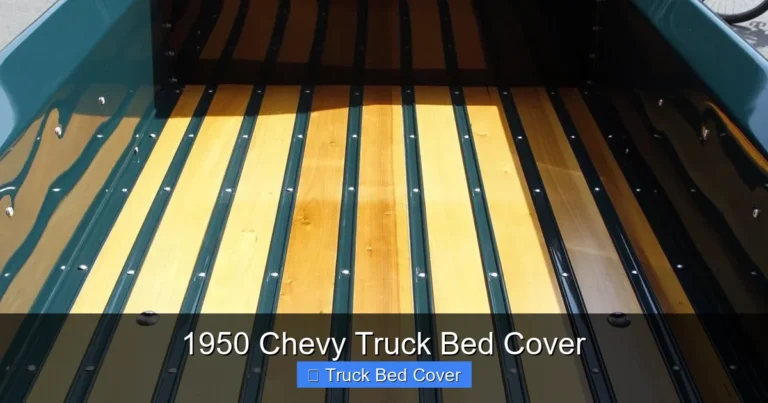
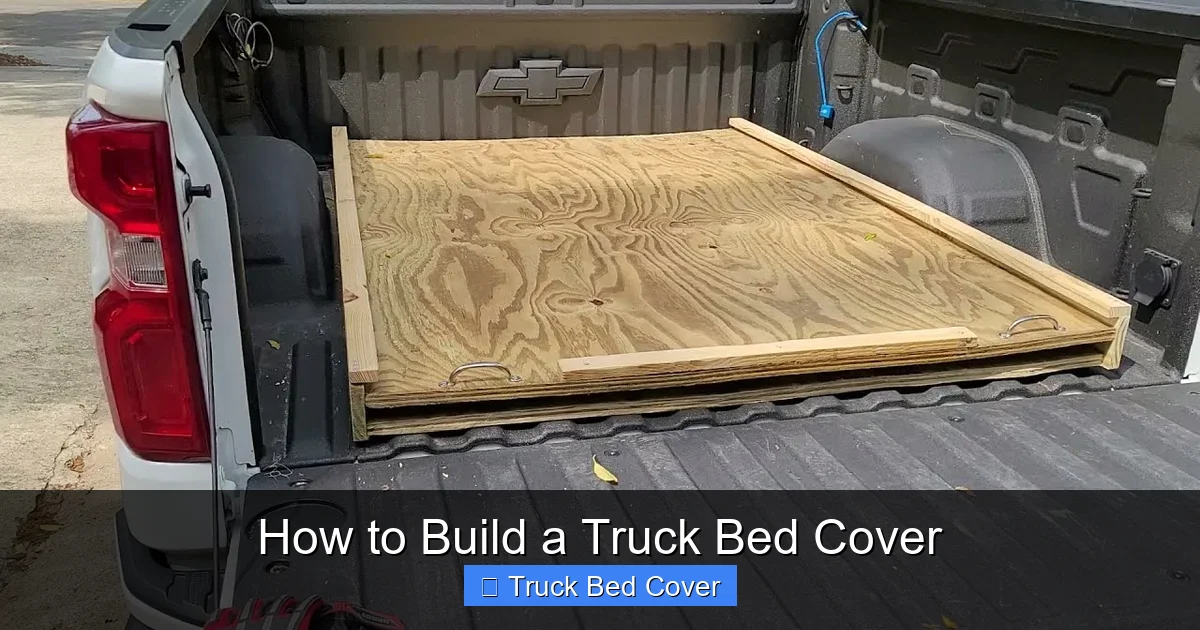
Visual guide about How to Build a Truck Bed Cover
Image source: i.pinimg.com
For example, you can choose whether you want a soft roll-up, hard tri-fold, or flat panel design. You can add side rails, tie-down points, or even integrate LED lighting. Plus, you’ll learn valuable skills like measuring accurately, cutting straight lines, and assembling components securely. It’s not just about saving money—it’s about creating something truly yours.
Another major benefit is improved functionality. A poorly designed cover might trap moisture or create wind noise at high speeds. But when you build it yourself, you can optimize airflow, ensure proper sealing, and reinforce weak spots. That means less maintenance and more peace of mind on the road.
Choosing the Right Design for Your Needs
The first real decision you’ll make is selecting the type of cover you want. There are several popular styles, each with its own pros and cons. Let’s break them down so you can pick the one that fits your lifestyle.
Soft Roll-Up Covers
These are lightweight, flexible, and easy to store when not in use. Made from durable vinyl or canvas stretched over a series of aluminum or steel bows, they unroll smoothly and lock securely. Soft roll-ups are ideal if you frequently need access to the entire bed—like when loading large items. However, they offer less structural strength and may not hold up as well in extreme weather or against repeated impacts.
Tip: Look for models with reinforced stitching and UV-treated fabric to prevent fading and tearing.
Hard Tri-Fold Covers
This is one of the most popular designs for DIY builds. The cover folds into three sections, allowing partial access to the bed while still offering full coverage when closed. Hard tri-folds are sturdy, secure, and provide excellent protection from the elements. They’re also less likely to be damaged by branches or debris during transport.
When building your own tri-fold, consider using marine-grade plywood or aluminum sheets for the panels. These materials resist warping and last much longer than cheaper alternatives.
Flat Bed Covers
As the name suggests, these sit flush across the entire truck bed without folding or rolling. They offer maximum security and a sleek, low-profile look. Flat covers are great for trucks used in construction or agriculture, where you need to secure heavy loads quickly. However, they can be harder to install and may require additional support frames.
Pro tip: Add rubber seals around the edges to prevent water from seeping in during rainstorms.
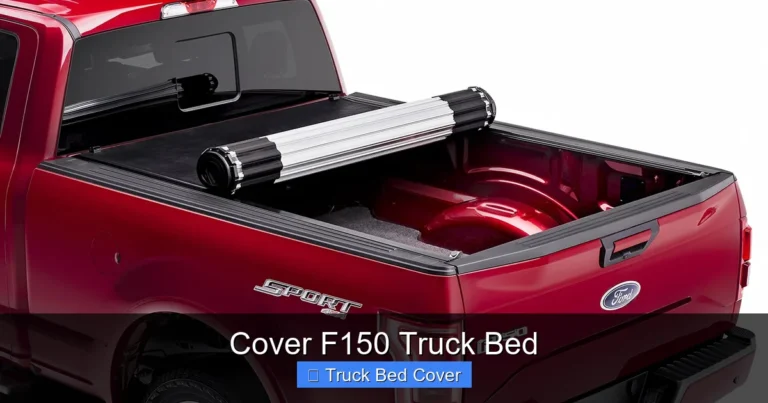
Tonneau Covers (Soft or Hard)
Tonneau covers are essentially streamlined versions of flat or tri-fold designs. Soft tonneaus use fabric stretched over a frame, while hard ones use rigid panels. They’re known for their aerodynamic shape, which helps reduce drag and improve fuel economy. Many people opt for tonneau-style covers because they balance style, function, and ease of use.
If you choose this route, plan for a center rail or locking mechanism to keep everything secure.
Gathering Materials and Tools
Once you’ve decided on a design, it’s time to gather your supplies. Don’t worry—you won’t need anything too exotic. Here’s a checklist of common materials and tools you’ll likely need:
Materials List
- Main Panel Material: Marine-grade plywood (¾ inch thick) or aluminum sheets (¼ inch minimum)
- Frame Supports: 2×4 lumber or angle iron (for reinforcement)
- Hardware: Stainless steel screws, hinges, latches, and rubber gaskets
- Sealant: Silicone caulk or weatherproof tape (e.g., 3M VHB tape)
- Optional Features: LED lights, tie-down anchors, side rails
Tools Required
- Circular saw or jigsaw
- Drill and drill bits
- Measuring tape and square
- Sander (orbital or belt)
- Clamps
- Level
- Paintbrush and exterior-grade paint or sealant (optional)
Note: Always wear safety glasses and work gloves when cutting or sanding. Work in a well-ventilated area if using adhesives or paints.
Measuring and Cutting Your Panels
Accuracy is key when building a truck bed cover. Even a half-inch error can throw off the entire fit. Start by measuring your truck bed carefully. Most standard full-size beds are 6.5 feet long, but confirm yours to avoid mistakes.
For a tri-fold design, divide the length into thirds. For example, if your bed is 78 inches wide, each fold should be about 26 inches. Mark these divisions clearly before cutting.
Cutting Tips
- Use a straightedge and pencil to draw clean lines before cutting.
- Double-check measurements twice before making the cut.
- Cut slightly undersized if possible—you can always trim to fit later.
- Sand rough edges to prevent splintering and improve appearance.
If you’re using plywood, consider adding cross-grain layers for extra strength. Aluminum sheets are easier to cut but may dent if dropped.
Assembling the Frame and Panels
With your pieces cut, it’s time to assemble the structure. Start by building the main frame using 2x4s or metal angles. Attach vertical supports every 12–16 inches to prevent sagging. Then, secure your top panels to the frame using screws or bolts.
Hinge Installation
For tri-fold covers, install hinges along the front edge and between each fold. Make sure they’re aligned properly so the cover opens smoothly. Use stainless steel hardware to prevent rust.
Locking Mechanism
Add latches or buckles near the tailgate. These should be strong enough to withstand pulling forces but easy to operate with one hand. Consider using magnetic locks for quick access.
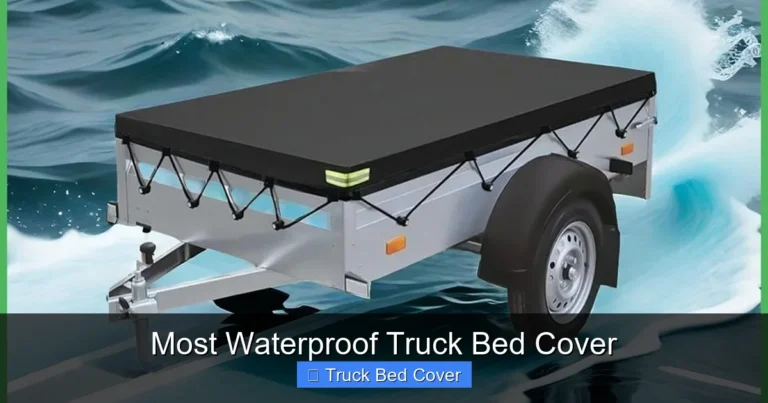
Sealing the Edges
Apply silicone sealant or weatherstrip along all seams and edges. This prevents water from entering during rain. Test the seal by spraying water lightly—if any drips inside, reapply sealant.
Installing the Cover on Your Truck
Installation varies depending on your design, but here’s a general process:
- Position the cover over the bed and check for alignment.
- Mark screw locations on the bed rails.
- Drill pilot holes to avoid splitting wood.
- Secure the cover using bolts or brackets through pre-drilled holes.
- Adjust tension so the cover sits flat without gaps.
Test the operation multiple times—open and close the cover fully several times to ensure smooth movement. Make small adjustments as needed.
Finishing Touches and Customization
Now comes the fun part: personalizing your cover! You can paint it to match your truck, add reflective striping, or even install solar-powered lights. Some builders add side rails to carry bikes or kayaks, while others include built-in toolboxes.
Don’t forget to add a drip rail or gutter system along the front edge. This channels rainwater away from the cab and prevents pooling.
Finally, apply a protective coat of sealant or paint. This enhances durability and gives your cover a professional finish.
Maintenance and Longevity Tips
Even the best-built cover will degrade over time without proper care. Here’s how to keep yours in top shape:
- Clean Regularly: Wash with mild soap and water every few months.
- Inspect Seals: Replace worn rubber gaskets annually.
- Lubricate Hinges: Apply silicone spray to keep moving parts smooth.
- Avoid Heavy Loads: Don’t stack items directly on the cover unless it’s rated for weight.
- Store When Not Needed: If you rarely use it, remove and store indoors.
With routine maintenance, your DIY truck bed cover can last 10+ years.
Conclusion: Why Every Truck Owner Should Try This
Building your own truck bed cover isn’t just a weekend project—it’s an investment in convenience, security, and pride of ownership. Yes, it takes time and effort, but the rewards far outweigh the initial labor. You’ll gain a better-fitting, more functional cover than most commercial options, all while learning hands-on skills that serve you well beyond this project.
Whether you’re a weekend warrior, a tradesperson, or someone who just wants to protect their stuff, this guide gives you everything you need to succeed. So grab your tools, measure twice, and get ready to transform your truck bed into something truly special.
Frequently Asked Questions
How much does it cost to build a truck bed cover?
Depending on materials and features, DIY costs typically range from $100 to $400. Plywood and basic hardware keep expenses low, while aluminum and added accessories increase the price.
Can I modify an existing cover instead of building one?
Sometimes, yes—especially for soft covers. Adding reinforcements or replacing damaged parts is easier than a full rebuild. But for major upgrades, starting from scratch gives the best results.
Is it legal to drive with a homemade cover?
In most states, as long as the cover is securely fastened and doesn’t obstruct view or violate height/weight laws, it’s perfectly legal. Check local regulations just to be safe.
How long does the installation take?
A beginner might take 8–12 hours over two days. Experienced builders can complete it in 4–6 hours. Allow extra time for drying paint or sealant.
Can I add a cover to a truck with a camper shell?
Not recommended. Camper shells have sealed roofs and different mounting systems. A separate tonneau cover may interfere or cause leaks. Consult a professional installer.
What’s the best way to secure tools under a DIY cover?
Install D-rings or tie-down brackets inside the bed rails. Use bungee cords or ratchet straps to anchor items firmly. Never overload the cover—check weight limits before loading.