Diy Bed Cover Truck
Transform your truck’s utility and style with a DIY bed cover truck project that’s both cost-effective and rewarding. Whether you’re protecting cargo from the elements or upgrading your truck’s look, this guide walks you through everything from materials to installation—all while keeping your budget in check.
Have you ever loaded up your truck bed only to watch your belongings get soaked in the rain or damaged by dust and debris? Or maybe you’ve seen a slick, custom-fitted bed cover on someone’s truck and thought, *I wish I had something like that*? You’re not alone. A diy bed cover truck isn’t just about looks—it’s about protection, convenience, and personal pride. And the best part? You don’t need to be a mechanic or carpenter to build one yourself. With the right tools, materials, and a little patience, turning your truck into a secure, stylish hauler is totally within reach.
Whether you drive a compact pickup for weekend adventures or a full-size work truck for daily use, a bed cover adds value in multiple ways. It keeps your cargo dry, reduces wind resistance (improving fuel efficiency), deters theft, and even helps lower interior cabin temps when parked in the sun. Plus, nothing says “I built this myself” quite like a custom-fit cover that perfectly matches your truck’s bed dimensions. In this guide, we’ll walk you through everything you need to know to create a professional-looking, durable bed cover—without breaking the bank.
Key Takeaways
- DIY Bed Cover Truck Saves Money: Building your own cover eliminates high retail prices and allows custom sizing for your specific truck model.
- Improved Cargo Protection: A quality bed cover shields gear from rain, snow, sun, and theft—keeping your truck bed functional year-round.
- Customization Is Key: From color choices to hardware finishes, a DIY approach lets you match your cover to your truck’s personality.
- Tools Are Simple: Most projects require basic hand tools like drills, tape measures, and clamps—no professional shop needed.
- Durability Matters: Using weather-resistant materials like aluminum, fiberglass, or reinforced vinyl ensures long-term performance.
- Installation Takes Time: Plan for 4–8 hours depending on complexity, but the satisfaction of doing it yourself makes it worth every minute.
- Safety First: Always wear protective gear and work in a clean, well-lit space to avoid injuries or damage.
Quick Answers to Common Questions
How long does it take to build a DIY bed cover truck?
Most people spend 4–8 hours on their first attempt, depending on complexity. Simpler roll-up designs take less time; hard panel builds require more precision.
Can I install a DIY bed cover on any truck?
Yes, but success depends on accurate measurements and adapting your design to your truck’s bed size, tailgate type, and existing accessories.
What’s the best material for a DIY bed cover?
Aluminum frames with heavy-duty vinyl are ideal for most DIYers—they’re strong, lightweight, and easy to work with.
Will a DIY cover improve my truck’s gas mileage?
Yes! Aerodynamic covers reduce drag, which can improve fuel efficiency by 5–10%, especially on highway drives.
Do I need special tools to build a bed cover?
Basic tools like a drill, saw, tape measure, and clamps are sufficient. No welding or fabrication experience required for soft covers.
📑 Table of Contents
- Why Choose a DIY Bed Cover Truck?
- Choosing the Right Materials for Your DIY Bed Cover Truck
- Step-by-Step Guide to Building Your DIY Bed Cover Truck
- Popular DIY Bed Cover Truck Styles You Can Build
- Tips for a Professional-Looking Result
- Maintenance and Longevity Tips
- Common Mistakes to Avoid When DIYing Your Bed Cover
- Cost Comparison: DIY vs. Store-Bought
- Final Thoughts: Is a DIY Bed Cover Truck Right for You?
Why Choose a DIY Bed Cover Truck?
Before diving into tools and techniques, let’s talk about why a DIY bed cover truck makes so much sense. Off-the-shelf covers can cost hundreds or even thousands of dollars, especially for premium brands with features like roll-up designs, locking systems, or UV-resistant fabrics. But those prices often include labor, branding, and middlemen markups. By building your own, you skip all that and keep more cash in your pocket.
Another major benefit is customization. Store-bought covers come in standard sizes—but what if your truck has a special bed liner, toolboxes, or a tailgate lift? A DIY project lets you measure precisely and design around obstacles. Want matte black rails instead of chrome? Need extra bracing for heavy loads? You control every detail.
And let’s be real: there’s a certain satisfaction in completing a project from scratch. Watching raw materials transform into a functional, eye-catching accessory is incredibly rewarding. Plus, if something goes wrong (or wears out later), you know exactly how to fix it.
Choosing the Right Materials for Your DIY Bed Cover Truck
The foundation of any great bed cover starts with the materials. The wrong choice could mean warping, rust, or premature failure—no matter how skilled your craftsmanship. So, what should you use?
Aluminum vs. Steel vs. Fiberglass
For structural frames, aluminum is usually the top pick. It’s lightweight, corrosion-resistant, and strong enough to support most cover types. Extruded aluminum bars are commonly used because they’re easy to cut, drill, and assemble. Just make sure to use marine-grade aluminum to prevent oxidation.
Steel offers more strength but comes with weight and rust risks unless properly coated. If you go steel, galvanized or powder-coated options add durability without sacrificing style.
Fiberglass panels are another option—especially for soft-top or retractable styles. They’re flexible, impact-resistant, and blend well with modern truck aesthetics. However, they can be tricky to shape and may require specialized tools.
Vinyl, Canvas, or Hard Panels?
For the actual covering material, consider:
– Heavy-duty vinyl: Waterproof, UV-resistant, and flexible. Ideal for roll-up or folding covers.
– Canvas: Breathable and less reflective than vinyl, but less waterproof unless treated.
– Hard composite panels: Rigid and sleek, often used in low-profile or tonneau-style covers. Can be painted or wrapped.
Always opt for commercial-grade materials rated for outdoor use. Cheaper alternatives may peel, crack, or fade within months.
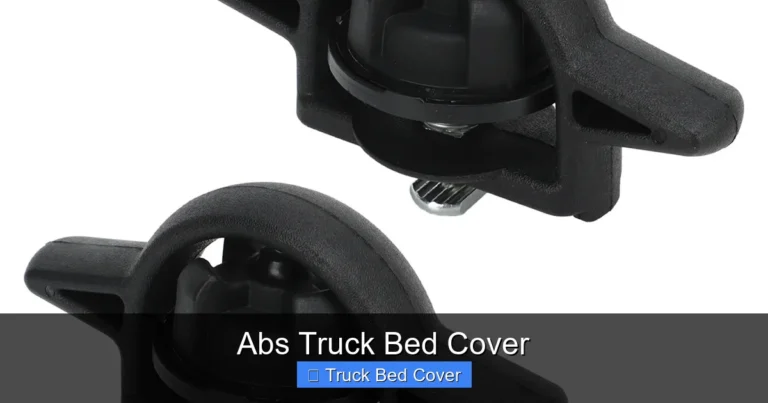
Hardware That Lasts
Don’t skimp on bolts, hinges, latches, and rubber seals. Use stainless steel or coated fasteners to resist corrosion. Silicone weatherstripping around edges prevents water ingress. Quality hardware might cost more upfront, but it saves headaches down the road.
Step-by-Step Guide to Building Your DIY Bed Cover Truck
Ready to roll up your sleeves? Here’s a clear roadmap to follow:
Gather Your Tools and Materials
You’ll need:
– Measuring tape, level, and square
– Drill with bits and impact driver
– Jigsaw or circular saw
– Clamps and workbench
– Safety goggles and gloves
– Aluminum extrusions (U-channel or T-slots)
– Cover fabric or hard panel material
– Stainless steel screws, brackets, hinges
– Sealant (silicone or polyurethane)
Measure and Mark Your Truck Bed
Start by removing the tailgate and measuring the inside of your bed from front to back and side to side. Note any obstructions like tie-down rings or toolboxes. Transfer these measurements to your frame pieces—adding a half-inch on each side allows for adjustments.
Use a level to ensure your frame runs straight. Misalignment now means a wobbly cover later.
Build the Frame
Cut aluminum extrusions to size using a miter saw or jigsaw. Assemble the main rails along the sides and rear header bar. Reinforce joints with corner brackets. For added strength, consider adding a center brace across shorter beds.
If you’re making a soft cover, attach mounting rails along the top edge of the bed walls. These will hold the fabric taut.
Install Hardware
Mount hinges at the front or rear (depending on your style) using lag bolts. Test the movement early—hinges should open smoothly without binding. Install latches or buckles at the front edge to secure the cover when closed.
For roll-up designs, add a roller mechanism at the front header. Make sure the axle is centered and bearings are lubricated.
Attach the Cover Material
Lay your chosen material over the frame. For vinyl, staple it tightly to the underside of the frame, leaving a slight excess at the edges to tuck under. Trim carefully with a utility knife.
For hard panels, drill pilot holes and secure with screws. Avoid over-tightening—this can crack composite materials.
Seal and Finish
Apply silicone sealant around edges where the cover meets the truck bed. This stops water from seeping underneath. Let it cure fully before testing.
Paint or powder-coat metal parts for a uniform look. Clear coat fabric if desired.
Final Testing
Open and close the cover several times to check alignment and operation. Adjust hinges or latches as needed. Test in light rain if possible.
Popular DIY Bed Cover Truck Styles You Can Build
Not every bed cover needs to look like a factory-installed cap. Depending on your needs and skill level, here are some popular DIY styles:
Soft Roll-Up Tonneau Cover
This is one of the most common DIY projects. It uses a flexible vinyl sheet rolled onto a front-mounted spool. Side rails guide the material as you unroll it. Great for quick access and moderate weather protection.
Pro tip: Use a spring-loaded tensioner to keep the roll tight and prevent sagging.
Folding Panel Cover
Three or four hinged panels fold forward or backward over the bed. Each panel rests on a rail system. Lightweight and easy to remove entirely.
Best for trucks used mostly off-road—just remember to secure loose panels during drives.
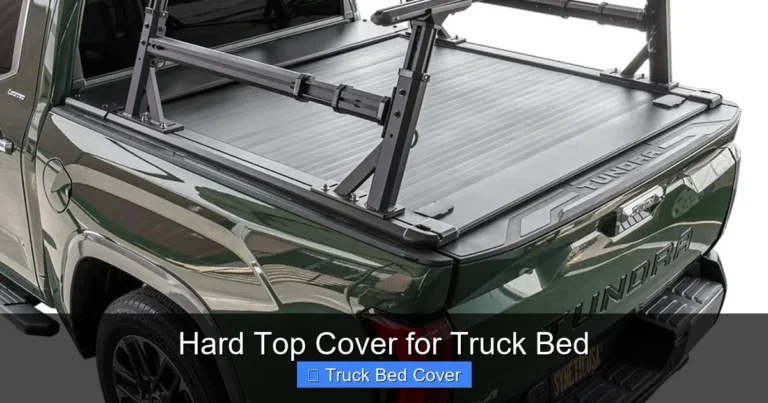
Low-Profile Hard Top
Made from rigid panels or aluminum sheets, this creates a flush, aerodynamic look. Often includes built-in storage compartments underneath.
Requires precise measurements and strong framing—ideal for advanced builders.
Retractable Soft Cover
Similar to roll-up but with a track system allowing smooth sliding motion. More complex but offers excellent accessibility.
Needs careful alignment of tracks and rollers—practice assembly before final installation.
Bakery-Style Cap (Flat Bed Conversion)
Turn your open bed into a sealed cargo area with vertical side walls and a fixed roof. Perfect for contractors or landscapers who need enclosed transport.
Uses sheet metal or composite panels welded or screwed together. Requires welding skills or heavy-duty adhesives.
Tips for a Professional-Looking Result
Even with basic skills, you can achieve results that rival store-bought covers:
Take Your Time with Measurements
Double-check every dimension twice. A quarter-inch error can throw off the whole fit. Use digital calipers for precision.
Pre-drill All Holes
Prevents aluminum from cracking when screwing in hardware. Countersink small holes for a cleaner finish.
Sand and Prime Before Painting
Smooth out rough edges on metal frames. Apply primer before paint—it ensures better adhesion and color consistency.
Add Visual Cues for Function
Label hinges, latches, or release points with small tags. It helps future-you (or anyone helping you) understand how things work.
Include Drain Holes (for Soft Covers)
Water can collect under vinyl during heavy rain. Drill small holes near corners to let excess drain out.
Weatherproof Everything
Even if your cover looks perfect, moisture trapped behind it can ruin your bed liner or electronics. Always include drainage and ventilation.
Test Before Finalizing
Do a trial run with the cover installed but not secured. Check for gaps, wobbles, or rubbing. Fix issues now—not after painting!
Maintenance and Longevity Tips
A well-built cover shouldn’t need constant attention—but a little care goes a long way:
– Clean regularly with mild soap and water. Avoid harsh chemicals that strip UV protectants.
– Lubricate hinges and latches annually with silicone spray.
– Inspect seals and weatherstripping every six months. Replace if cracked or brittle.
– Store soft covers loosely coiled (not compressed) during winter months.
– Park in shade when possible to reduce sun exposure on materials.
With proper maintenance, your DIY bed cover truck can last 10+ years—sometimes longer than generic retail versions.
Common Mistakes to Avoid When DIYing Your Bed Cover
Learning from others’ errors saves time and frustration:
– Rushing the build: Skipping steps leads to misaligned frames and loose fits. Let’s put numbers on this. A mid-range retail roll-up cover costs $500–$1,200. Now compare that to a DIY version: | Material Type | Estimated DIY Cost | Add $50–$100 for tools if you don’t already own them. That’s still 50–75% savings! And you get a cover tailored exactly to your needs. Of course, store-bought covers include warranties, professional installation, and brand reputation. But if you enjoy hands-on projects and want maximum customization, DIY wins every time. Building your own bed cover isn’t for everyone. If you hate working with tools, prefer ready-made solutions, or need instant results, a pre-packaged cover might suit you better. But if you’re handy, patient, and excited by the idea of creating something unique—this project delivers big. It teaches valuable skills, boosts confidence, and gives you a functional upgrade you designed yourself. Plus, when friends ask where you got your “custom” cover, you get to say proudly: *I built it.* So grab your tape measure, fire up that drill, and turn your truck bed into the secure, stylish space you’ve always wanted. With the right plan and a bit of elbow grease, your DIY bed cover truck will be rolling strong for years to come. With quality materials and proper installation, a well-made DIY cover can be just as durable—sometimes even more customizable and better suited to your exact needs. Absolutely. Most designs hinge or slide off completely, giving you full access to the bed when needed. Just ensure hardware is secure during storage. While no cover is 100% theft-proof, a locked or fastened DIY cover makes it significantly harder for thieves to access cargo compared to an open bed. Mistakes happen! Many can be corrected with sanding, re-drilling, or replacing parts. Online communities and forums offer great troubleshooting help. Yes—always. Use marine-grade sealants on seams and edges, and consider adding drainage holes to prevent water buildup under the cover. Yes! Powder-coating aluminum or painting hard panels allows full color matching. Just prep the surface properly for lasting results.
– Underestimating weight: Heavy panels need sturdy supports. Don’t overload small trucks.
– Ignoring aerodynamics: Bulky, uneven covers increase drag and hurt gas mileage.
– Using cheap fasteners:Neglecting ventilation:Cost Comparison: DIY vs. Store-Bought
|———————|——————–|
| Aluminum + Vinyl | $200–$400 |
| Fiberglass + Paint | $300–$600 |
| Full Hard Panel | $400–$800 |Final Thoughts: Is a DIY Bed Cover Truck Right for You?
Frequently Asked Questions
Is a DIY bed cover as durable as a store-bought one?
Can I remove my DIY bed cover easily?
Will a DIY cover protect against theft?
What if I make a mistake during construction?
Should I waterproof my DIY bed cover?
Can I paint my DIY bed cover to match my truck?