Truck Bed Cover Repair
Truck bed cover repair can save you hundreds of dollars compared to buying a new cover. Whether you’re dealing with water leaks, cracked panels, or loose mounting brackets, simple fixes often resolve most issues quickly and affordably. With the right tools and a little know-how, you can extend the life of your truck bed cover and keep your cargo protected.
Key Takeaways
- Identify the Problem: Common issues include water leaks, cracked panels, misaligned latches, and worn seals—diagnosing the exact cause is the first step in effective truck bed cover repair.
- Safety First: Always wear protective gear like gloves and safety glasses when handling tools or sharp edges during the repair process.
- Use Quality Materials: Invest in OEM or high-grade replacement parts to ensure durability and a proper fit for long-term performance.
- DIY Is Often Possible: Many truck bed cover repairs, such as replacing weather stripping or tightening bolts, can be done at home without professional help.
- Prevent Future Damage: Regular maintenance, like cleaning seals and inspecting for wear, helps prevent costly repairs down the road.
- Know When to Call a Pro: Structural damage or complex electrical issues (in retractable covers) may require a certified technician.
Quick Answers to Common Questions
Can I repair a soft tonneau cover myself?
Yes, many common issues like tears, loose latches, or seal leaks can be fixed with basic tools and replacement parts. Simple repairs such as patching fabric or resealing seams are especially DIY-friendly.
How do I stop water from leaking under my truck bed cover?
First, identify the leak source—common areas include the rear seal, tailgate corners, or mounting brackets. Replace worn rubber seals, ensure all bolts are tight, and apply marine-grade silicone to seams if needed.
What’s the average lifespan of a truck bed cover?
With proper care, most covers last 5–10 years. Soft covers tend to degrade faster due to UV exposure, while hard covers may last longer unless damaged physically or exposed to extreme conditions.
Is it worth repairing a cracked hard panel?
For small cracks, epoxy or specialized panel repair kits may work temporarily. However, deep or large cracks compromise structural integrity and waterproofing—so replacement is often safer and more reliable.
Do I need special tools to install a new seal?
No. Most seal replacements require only a screwdriver, utility knife, and clean cloth. Some models benefit from a hairdryer to soften stubborn old adhesive before removal.
📑 Table of Contents
- Introduction: Why Your Truck Bed Cover Needs Attention
- Common Types of Truck Bed Covers
- Diagnosing Common Truck Bed Cover Problems
- Tools and Materials You’ll Need for Truck Bed Cover Repair
- Step-by-Step Guide to Basic Truck Bed Cover Repairs
- Advanced Repairs: When DIY Isn’t Enough
- Maintenance Tips to Prevent Future Repairs
- Cost Comparison: Repair vs. Replace
- Choosing the Right Replacement Parts
- Environmental and Safety Considerations
Introduction: Why Your Truck Bed Cover Needs Attention
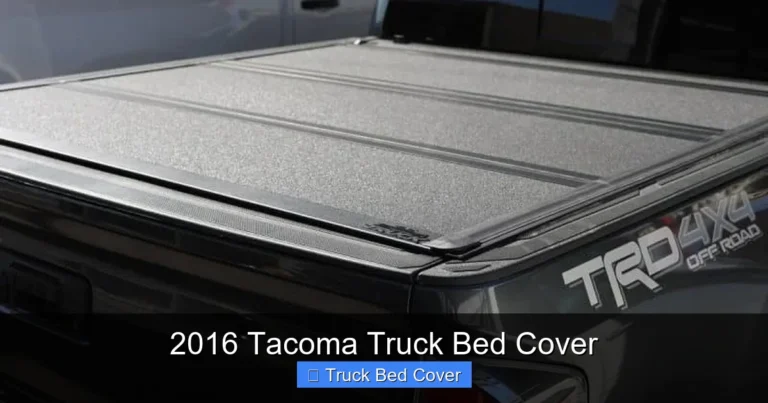
Your truck bed cover is more than just a stylish accessory—it’s a critical barrier protecting your cargo from rain, dirt, theft, and UV rays. Over time, even the best covers take a beating. Sun exposure, heavy loads, and harsh weather can lead to cracks, warping, or seal failures. That’s where truck bed cover repair comes in. Instead of rushing out to buy a brand-new cover, many issues can be fixed quickly and affordably with the right approach.
Whether you own a soft roll-up tonneau, a hard tri-fold, or a retractable model, understanding common problems and how to address them empowers you to maintain your cover’s functionality and appearance. In this comprehensive guide, we’ll walk you through everything from diagnosing issues to performing repairs, so you can keep your truck bed secure and your investment protected.
Common Types of Truck Bed Covers
Before diving into repairs, it helps to understand the different types of truck bed covers available. Each has unique components and potential failure points.
Soft Roll-Up Covers
These are lightweight, fabric-based covers that roll up into a canister at the front of the bed. Popular brands include TruXedo and Undercover. They’re easy to use but can suffer from UV degradation, seam tears, or latch malfunctions over time.
Hard Tri-Fold Covers
Made of rigid panels (often aluminum or fiberglass), these fold in thirds and sit flush on the bed. Brands like BakBox and Extang offer durability and sleek looks. Issues often involve broken hinges, cracked panels, or misaligned clamps.
Retractable Hard Covers
The premium option, featuring a motorized system that allows the cover to roll back completely. While convenient, they’re more complex and prone to electrical or track alignment problems.
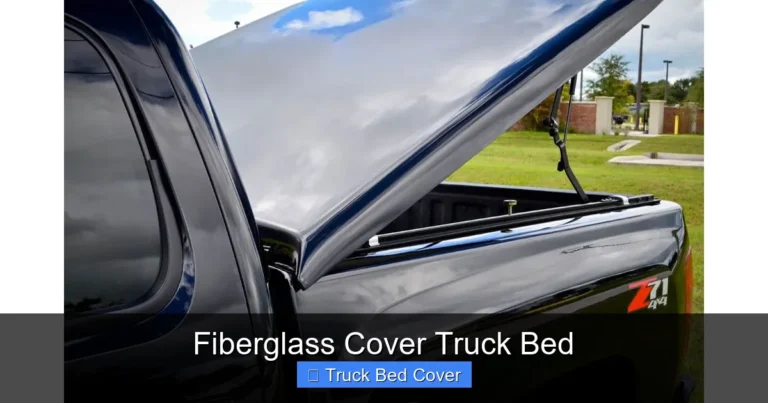
Fiberglass and Aluminum Panel Covers
Known for their strength and resistance to dents, these are ideal for heavy-duty use but can crack under impact or stress if not installed properly.
Understanding your cover type helps you pinpoint likely causes of damage and choose the right repair strategy.
Diagnosing Common Truck Bed Cover Problems
Not all damage requires a full replacement. In fact, many issues stem from simple wear or installation errors. Start by inspecting your cover thoroughly before reaching for tools or parts.
Water Leaks
One of the most frequent complaints. Leaks usually occur at the rear seal, around tailgate corners, or near mounting brackets. Check for:
– Worn rubber seals
– Loose bolts or missing clips
– Cracks in the cover panels
– Misaligned tailgate
Run a hose test: spray water over the bed while parked in the rain. Watch where it seeps in—this tells you exactly where to focus your repair efforts.
Cracked or Warped Panels
Sun exposure weakens materials over time. Soft covers may develop sunburn (cracking), while hard panels might warp due to temperature changes. Inspect each panel for:
– Hairline fractures
– Bubbling or softening in vinyl
– Gaps between panels when folded
If the damage is minor, adhesives or UV-resistant sealants may suffice. For larger cracks, panel replacement might be necessary.
Latch or Clamp Failure
Loose or broken latches prevent the cover from sealing tightly. Common causes include:
– Corrosion in metal parts
– Over-tightening during installation
– Wear from repeated use
Replace damaged latches with OEM equivalents to ensure compatibility and security.
Misalignment or Sagging
If your cover no longer sits flat or drags on the bed, the mounting rails may be loose or bent. Check:
– Tightness of bolts along the rail
– Straightness of the rail itself
– Proper tension in soft covers
Tightening hardware or realigning rails often resolves sagging issues.
Tools and Materials You’ll Need for Truck Bed Cover Repair
You don’t need a full garage setup to fix most cover issues. Here’s a basic toolkit that covers 90% of repair scenarios:
Essential Tools
- Socket wrench set
- Screwdrivers (Phillips and flathead)
- Rubber mallet or hammer
- Utility knife or scissors
- Tape measure
- Flashlight or work lamp
Recommended Materials
- Weatherstripping or adhesive-backed rubber seals
- Marine-grade silicone sealant
- UV-resistant fabric patch kit (for soft covers)
- Replacement latches or clamps
- Panel repair epoxy (for hard covers)
- Cleaning supplies: soap, water, microfiber cloths
Having these on hand makes the repair process smoother and more professional-looking.
Step-by-Step Guide to Basic Truck Bed Cover Repairs
Most repairs fall into one of two categories: sealing or structural. Let’s go through practical examples.
Replacing Weather Stripping or Seals
Over time, rubber seals dry out and crack, letting water in. Replacing them is straightforward:
1. Remove the old seal carefully using a flat tool.
2. Clean the channel thoroughly with soap and water.
3. Cut new seal to length (measure first!).
4. Press firmly into place, ensuring it seats evenly.
5. Test with a hose after installation.
Pro tip: Use marine-grade silicone to reseal seams if needed.
Fixing a Soft Cover with a Tear
Small rips can be patched:
1. Clean both sides of the tear.
2. Apply fabric glue or a specialized patch kit.
3. Press firmly and let cure overnight.
4. Sand edges lightly before applying a UV protectant spray.
Avoid duct tape—it traps moisture and degrades faster.
Realigning a Hard Cover Panel
If panels don’t align when folded:
1. Unlatch and open the cover fully.
2. Check hinge bolts for looseness—tighten if needed.
3. Adjust the position of side rails slightly.
4. Close and test the fold alignment.
Sometimes a gentle tap with a rubber mallet helps realign warped sections.
Securing Loose Mounting Bolts
Vibrations loosen bolts over time. Simply re-torque them according to manufacturer specs (usually 15–20 ft-lbs). Use a torque wrench if possible.
Advanced Repairs: When DIY Isn’t Enough
While basic fixes are doable, some situations demand professional attention.
Structural Damage to Hard Panels
Deep cracks or shattered panels compromise safety and water resistance. Unless you have access to specialty molds or fabrication tools, replacement is safer than attempting DIY epoxy repairs.
Electrical Issues in Retractable Covers
Wiring harnesses, motors, or control modules can fail. These systems are complex and often void warranties if tampered with. Certified technicians have diagnostic equipment to pinpoint faults accurately.
Full Seal Replacement on Complex Models
Some high-end covers integrate seals into molded channels. Removing and reinstalling them requires precision and patience—easier left to experts.
When in doubt, consult your manual or reach out to the manufacturer. A small consultation fee now can save thousands later.
Maintenance Tips to Prevent Future Repairs
Prevention is always cheaper than cure. Follow these habits to extend your cover’s life:
Clean Regularly
Wash your cover monthly with mild soap and water. Avoid harsh chemicals that strip protective coatings. Dry completely to prevent mold or mildew on soft fabrics.
Inspect After Harsh Weather
After storms or extreme heat, check for new leaks, loose hardware, or material stress. Catching issues early stops them from worsening.
Lubricate Moving Parts
Use silicone-based lubricant on latches, hinges, and tracks. Never use WD-40—it attracts dirt and wears out seals.
Store Properly in Summer
If possible, park in shade or use a sunshield. Prolonged UV exposure accelerates material breakdown.
Avoid Overloading
Even hard covers have weight limits. Exceeding capacity strains hinges and seals.
By making these simple practices routine, you’ll avoid many common problems associated with truck bed cover repair.
Cost Comparison: Repair vs. Replace
Many owners assume replacement is the only option. But let’s break down real-world costs:
| Repair Type | Average Cost | Notes |
|————-|————–|——-|
| Seal Replacement | $20–$50 | DIY-friendly |
| Latch Repair | $30–$80 | Includes parts |
| Panel Patch | $40–$100 | Depends on size |
| Professional Alignment | $75–$150 | For hard covers |
| Full Cover Replacement | $600–$1,500+ | Lasts 5–10 years |
As shown, repairing specific components costs less than 10% of a new cover in most cases. Plus, you retain the same look and feel.
Only consider replacement if:
– The cover is more than 7–8 years old
– Multiple major components are failing
– The cost of individual parts approaches half the price of a new unit
Choosing the Right Replacement Parts
When repairs require new pieces, quality matters. Cheap knockoffs may fit poorly or fail quickly.
Look for OEM or Brand-Approved Parts
Always match your cover model (e.g., BakFlip HD, DiamondBack DS). Brands like Bak Industries sell genuine replacement kits tailored to your cover.
Check Compatibility Before Buying
Measure panel sizes, bolt patterns, and seal dimensions. Online forums and YouTube tutorials often show exact part numbers.
Read Reviews
User feedback reveals real-world performance. Avoid parts described as “cheap” or “unfit perfectly.”
Investing in quality reduces repeat visits for the same issue—saving time and money.
Environmental and Safety Considerations
Repairing instead of replacing has environmental benefits. Manufacturing new covers uses energy and resources. By fixing what you have, you reduce waste and carbon footprint.
Safety-wise, always secure your truck properly before working underneath it. Use jack stands if lifting the bed. And never drive with an improperly secured cover—it can become airborne and cause accidents.
Frequently Asked Questions
How often should I inspect my truck bed cover?
Inspect every 3–6 months, especially after harsh weather. Look for leaks, loose hardware, material wear, or misalignment. Early detection prevents major damage.
Can I use regular glue to fix a soft cover tear?
Only if it’s fabric-specific and UV-resistant. Standard household glue won’t hold up to sun and weather. Use a dedicated tonneau cover patch kit for best results.
Why does my hard cover sag in the middle?
Usually caused by loose mounting bolts or warped rails. Tighten all bolts and check rail straightness. If the rail is bent, realignment or replacement may be required.
Will repairing my cover void the warranty?
It depends on the manufacturer. DIY repairs with non-OEM parts may void coverage, but minor fixes like seal replacement are typically allowed. Check your warranty terms before proceeding.
Can I paint a scratched hard cover?
Yes, but only with automotive-grade paint designed for plastic or fiberglass. Clean thoroughly, sand lightly, and apply multiple thin coats for a durable finish.
What’s better: repair or replace for a 10-year-old cover?
If the cover still functions well except for one or two issues, repair is cost-effective. But if multiple components are failing, replacement offers better long-term value and peace of mind.