How to Install a Hard Truck Bed Cover
Installing a hard truck bed cover is easier than you think—and it makes a big difference in protecting your gear from weather, theft, and wear. With the right tools and a clear plan, you can complete the job in under an hour. This guide walks you through every step, from prep work to final adjustments.
Key Takeaways
- Measure twice, install once: Accurate measurements prevent fit issues and ensure a snug, professional look.
- Tools matter: You’ll need basic hand tools like a socket wrench, screwdriver, and rubber mallet—no power tools required.
- Weather affects timing: Install on a dry, mild day (above 50°F) to avoid warping or difficulty sliding panels.
- Follow manufacturer instructions: Every cover brand has unique steps—don’t skip the manual!
- Test the tailgate operation: A properly installed cover should open and close smoothly without binding.
- Regular maintenance extends life: Clean seals and tighten bolts annually to keep everything working like new.
- Safety first: Wear gloves and eye protection when handling sharp edges or heavy components.
Quick Answers to Common Questions
Can I install a hard truck bed cover myself?
Yes! Most hard covers are designed for DIY installation and require only basic tools. Follow the manufacturer’s instructions, take your time, and you’ll have it done in under an hour.
Do I need to drill into my truck bed?
It depends on the cover type. Some fiberglass caps and tri-fold models require drilling for brackets, while retractables often use existing bolt holes or clamp-on systems. Always check your kit’s requirements first.
What if my cover doesn’t fit perfectly?
Minor gaps can usually be sealed with foam tape or weatherstripping. However, major misalignment may indicate incorrect rail placement or a defective part—contact the manufacturer for support.
Will a hard cover affect my gas mileage?
Modern designs are aerodynamic and may slightly improve fuel efficiency. Older or poorly fitted covers can increase drag, but a properly installed hard cover typically has minimal impact.
How do I remove the cover for full bed access?
Tri-folds unfold forward; retractables unlatch and slide back; fiberglass caps usually lift off entirely. Store removed panels in a dry place to prevent warping or scratches.
📑 Table of Contents
- How to Install a Hard Truck Bed Cover
- Understanding Your Hard Truck Bed Cover Types
- Tools and Materials You’ll Need
- Preparing Your Truck Bed
- Installing the Mounting Rails (If Required)
- Setting the Cover Panels
- Final Adjustments and Testing
- Maintenance Tips for Longevity
- When to Call a Professional
- Conclusion
How to Install a Hard Truck Bed Cover
You’ve just bought a hard truck bed cover—maybe you want to lock down your tools, keep rain out of your gear, or simply give your truck a more streamlined look. Great choice! But before you start loading up the bed, you’ll need to install that cover properly. A poorly installed cover won’t seal well, could rattle during drives, or worse, fall off in high winds.
Don’t worry—installing a hard truck bed cover isn’t rocket science. In fact, most DIYers can do it in under an hour with just a few basic tools. The key is preparation, patience, and following the manufacturer’s directions. Whether you’re installing a tri-fold, a one-piece fiberglass cap, or a retractable roll-up model, this guide will walk you through every step so you end up with a secure, weather-tight seal that looks factory-installed.
In this article, we’ll break down the entire process into easy-to-follow sections: from unpacking and inspecting your cover to mounting rails, aligning panels, and testing the final result. Plus, we’ll share pro tips to avoid common mistakes and keep your cover in top shape for years to come.
Understanding Your Hard Truck Bed Cover Types
Before diving into installation, it helps to know what kind of hard cover you have. There are several popular styles, each with its own installation method:

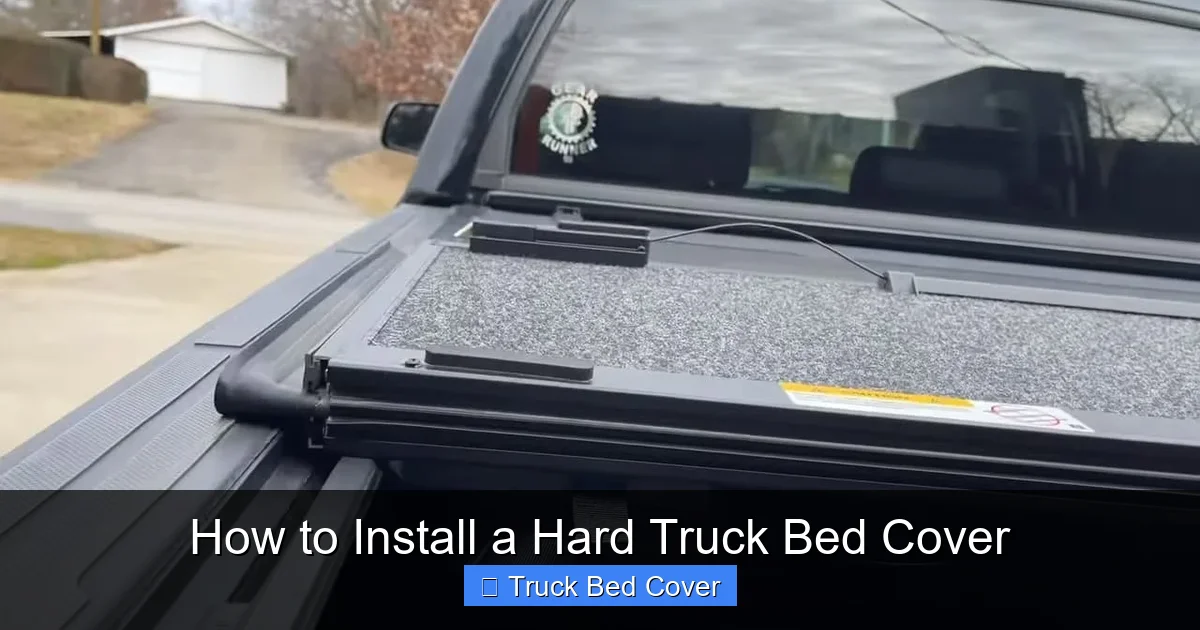
Visual guide about How to Install a Hard Truck Bed Cover
Image source: tricktrucks.com
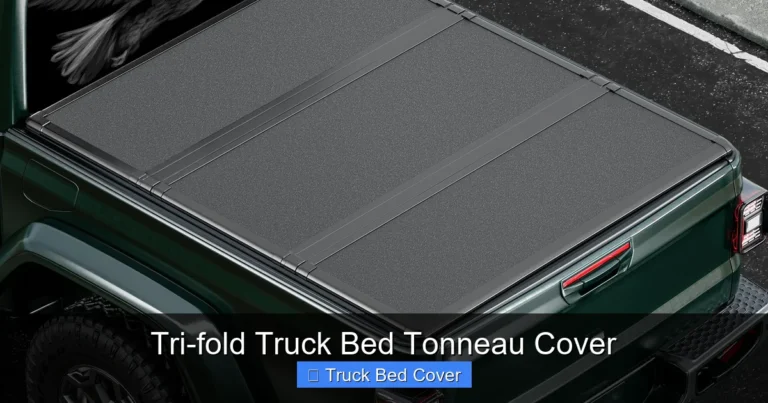
Tri-Fold Covers
The tri-fold is one of the most common types—it folds into three sections and lies flat when open. These usually require track-mounted rails and are bolted directly to the truck bed. They’re great for full access but can be bulkier when folded.
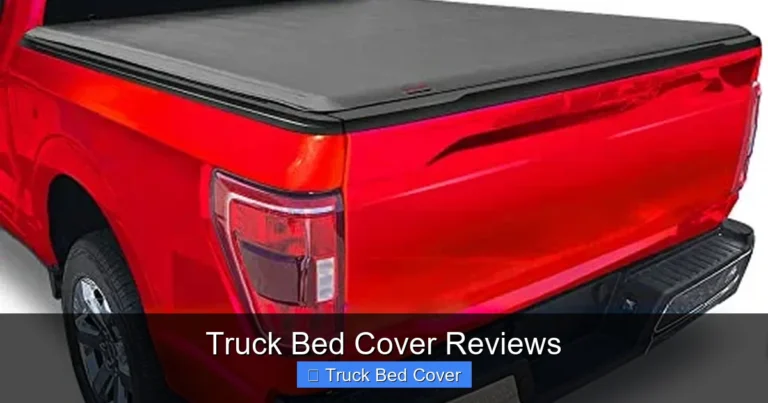
One-Piece Fiberglass Caps
These sit flush over the entire bed like a mini-roof. Installation typically involves attaching brackets to the bed sides and securing the cap with bolts. They offer excellent aerodynamics and a sleek look but may limit access to the bed unless you remove them entirely.
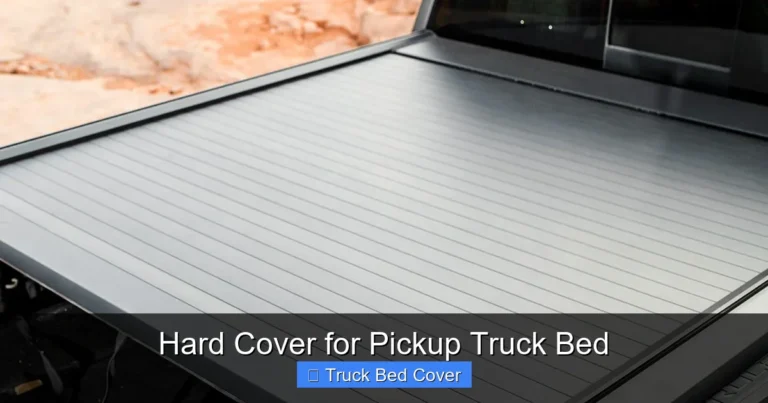
Retractable Roll-Up Covers
These slide back along built-in tracks and latch at any point along the bed. Most come with integrated locks and don’t require drilling into the bed itself. Installation focuses mainly on rail alignment and tension adjustment.
Regardless of type, all hard covers share similar core steps: preparing the truck bed, installing mounting hardware, setting the cover, and sealing gaps. Knowing your cover style helps you anticipate special considerations—like whether you need to drill holes or adjust tailgate alignment.
Tools and Materials You’ll Need
You don’t need a full garage workshop to install a hard truck bed cover. In most cases, just a handful of everyday tools does the trick. Here’s what to gather before you begin:
- Socket wrench set – For tightening bolts securely.
- Phillips and flathead screwdrivers – Handy for adjusting clips or removing panels temporarily.
- Rubber mallet – To gently tap panels into place without scratching paint.
- Tape measure – To verify fit and spacing during setup.
- Ladder or step stool – So you can reach the front of the bed comfortably.
- Clean rags and mild soap – For wiping down the bed surface before installation.
- Work gloves – Protects hands from sharp edges or dirt.
Some kits include specialty tools like trim removal tools or alignment guides—check your instruction manual. Avoid using power drills unless specifically recommended; over-tightening can strip plastic clips or damage the bed liner.
Pro tip: Lay out all parts on a clean, flat surface before starting. It’s frustrating to realize halfway through that you’re missing a bracket or two. Most manufacturers label pieces—take a photo of the packaging if needed for reference later.
Preparing Your Truck Bed
A smooth, clean installation starts with a clean truck bed. Any dirt, rust, or debris can throw off alignment or cause leaks later on. Follow these steps to get your bed ready:
1. Empty and Inspect the Bed
Remove everything from the bed—tools, mats, spare tires—and give the interior a thorough sweep. Look for dents, rust spots, or old adhesive residue that might interfere with mounting.
2. Clean the Surface
Wash the bed walls and floor with mild soap and water. Let it dry completely—moisture underneath the cover creates condensation and promotes mold. If you have a spray-on bed liner, make sure it’s cured and free of bubbles.
3. Mark Mounting Points
Most hard covers attach near the bed rails. Use chalk or painter’s tape to mark where brackets will go. Double-check symmetry by measuring from both sides—your cover should sit centered.
4. Check Tailgate Alignment
The tailgate must open and close freely without rubbing against the cover. Adjust the hinges if needed. Some covers include a tailgate gasket; ensure it’s seated properly before finalizing the install.
Skipping prep is a common mistake. A rushed job often leads to misaligned panels, uneven seals, or even stripped screw holes. Taking 15 minutes now saves hours of frustration later.
Installing the Mounting Rails (If Required)
Many hard covers—especially tri-folds and retractables—use side rails to support the panel and provide a seal against the bed walls. These rails are critical for stability and weather resistance.
Step-by-Step Rail Installation:
- Position the rails: Slide them into place along the inside edges of the bed. Make sure they sit flush with the bed wall and don’t protrude beyond the cab.
- Align brackets: Most rails come with pre-drilled holes matching factory bolt locations. If not, use the included templates to mark where to drill.
- Bolt securely: Start with hand-tight screws, then use a socket wrench to fully secure them. Don’t overtighten—this can warp the rail or damage the bed.
- Check level: Use a bubble level across the top edge of the rails. They should be perfectly horizontal for smooth panel movement.
If your cover doesn’t use rails (like some fiberglass caps), skip this section and move straight to attaching the main body. But for track-based systems, proper rail installation is non-negotiable—loose rails mean wobbly panels and potential water leaks.
Tip: Apply a thin bead of silicone sealant behind the rail where it meets the bed wall. This adds extra moisture resistance and fills tiny gaps caused by imperfections in the bed surface.
Setting the Cover Panels
Once the rails are in place, it’s time to lift and position the cover itself. This is where careful handling pays off—hard panels can crack if dropped or forced into place too aggressively.
For Tri-Fold and Retractable Covers:
- Lift carefully: Two people often help here, but one strong person can manage most models. Hold the cover by the outer edge to avoid touching the finished surface.
- Slide onto rails: Align the rear edge first, then lower the front while guiding it onto the tracks. Listen for smooth engagement—not grinding or resistance.
- Engage latches: Close the tailgate gently. The cover should click or lock automatically at the back. Test the latch by pulling outward slightly—it should resist movement.
For One-Piece Fiberglass Caps:
- Position over bed: Lift the cap and center it over the truck bed. Ensure equal overhang on both sides.
- Attach brackets: Bolt the front and rear brackets through predrilled holes. Tighten evenly in a crisscross pattern to prevent twisting.
- Secure side clamps: Fold down the side clamps and fasten them to the bed walls. These create a tight seal against wind and rain.
Common mistake: Rushing the alignment. If the cover sags in the middle or rubs against the tailgate, stop and re-adjust. Misalignment today equals constant rattling tomorrow.
Final Adjustments and Testing
After the cover is mounted, fine-tuning ensures long-term performance. Spend 10–15 minutes checking everything from seals to operation.
Seal Inspection
Run your fingers along all edges—front, sides, and tailgate interface. You shouldn’t feel any gaps larger than 1/8 inch. Add foam tape or weather stripping if needed. Most kits include adhesive-backed seals—peel and stick as directed.
Operation Test
Open and close the cover 3–5 times. Listen for smooth motion, not clicks or resistance. For retractables, try latching at different points along the bed. For tri-folds, ensure all three panels fold uniformly.
Latch Security Check
Apply moderate pressure to the closed cover. It should stay shut without needing extra force. Weak latches can fail in storms or theft attempts—replace any loose ones immediately.
Bonus tip: Take a test drive around the block. Listen for unusual noises and watch for shifting. If anything feels off, pull over safely and recheck connections.
Maintenance Tips for Longevity
A well-maintained hard truck bed cover lasts 8–12 years or more. Here’s how to keep yours in peak condition:
- Clean monthly: Wash with mild soap and water. Avoid harsh chemicals that degrade vinyl or rubber seals.
- Lubricate tracks: Once a year, apply silicone spray to retractable rails to prevent sticking.
- Inspect seals: Replace cracked or compressed weather stripping every 2–3 years.
- Tighten hardware: Vibration loosens bolts over time—check quarterly, especially after long trips.
- Store properly: If removable, keep the cover covered and dry when not in use.
Also, park in shade when possible to reduce UV exposure, which fades colors and weakens materials faster.
Remember: Prevention beats repair. A small tear today becomes a full leak tomorrow.
When to Call a Professional
While most installations are DIY-friendly, there are exceptions:
- Your truck has a custom bedliner with uneven surfaces.
- You lack confidence handling heavy panels alone.
- The manufacturer requires certified installers (rare, but check your warranty).
- You need modifications like cutouts for toolboxes or winches.
If unsure, consult a local truck accessory shop. Many offer free consultations and guarantee their work—worth the peace of mind.
Bottom line: If you followed this guide and still have doubts, it’s better to seek help than risk damaging your truck or cover.
Conclusion
Installing a hard truck bed cover is a rewarding DIY project that boosts security, weather protection, and curb appeal. With the right mindset and a few simple tools, you can achieve a professional-grade result without spending hundreds on labor.
From cleaning the bed to aligning panels and testing operation, each step builds toward a secure, watertight seal. Take your time, double-check measurements, and don’t skip the manual. Your future self will thank you when you’re hauling tools through a thunderstorm or locking down expensive gear overnight.
Ready to get started? Grab your tools, clear a weekend morning, and turn your truck into a fortress on wheels—one bolt at a time.
Frequently Asked Questions
What’s the best time of year to install a hard truck bed cover?
Install during dry, mild weather (ideally above 50°F). Cold temperatures can make plastics brittle, while heat and humidity may cause panels to expand and bind during installation.
Can I install a cover over an existing bedliner?
Yes, but ensure the liner is smooth and free of bubbles or peeling. Uneven surfaces can cause poor sealing or panel stress over time.
How tight should the mounting bolts be?
Firm enough to prevent movement—but don’t overtighten. Use a torque wrench if specified in the manual; otherwise, hand-tight plus one-quarter turn with a wrench is usually sufficient.
Will a hard cover prevent all water leakage?
High-quality covers with proper seals significantly reduce leaks, but no cover is 100% waterproof. Drainage channels and overlapping seams help manage minor splashes.
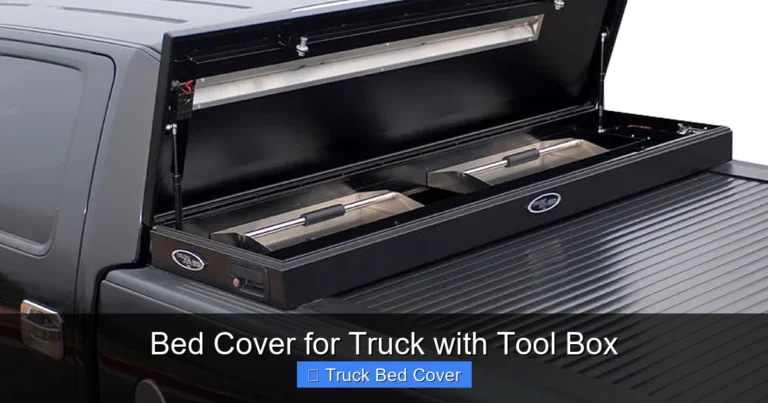
Can I add a toolbox on top of a hard cover?
Not recommended. Adding weight alters balance and may void warranties. Instead, choose a cover designed for toolbox compatibility or install the box before the cover.
How often should I replace my hard truck bed cover?
With proper care, most last 8–12 years. Signs it’s time to replace: persistent leaks, cracked panels, broken latches, or visible UV damage like fading or brittleness.