Best Dash Cam Selection Guide for Fleets
For fleet managers and transportation companies, dash cam selection isn’t just about choosing a camera—it’s about making strategic investments in safety, liability protection, and operational efficiency. The right dash cam system can significantly reduce insurance costs, provide crucial evidence in disputes, improve driver behavior, and enhance overall fleet management capabilities.
This comprehensive guide will walk you through everything you need to know about selecting the best dash cam for your fleet operation. Whether you’re managing a small delivery service with five vehicles or overseeing a large trucking company with hundreds of trucks, understanding the key factors that differentiate quality dash cams will help you make informed decisions that protect both your drivers and your business.
Throughout this article, we’ll cover critical considerations like recording quality, storage solutions, connectivity options, and integration capabilities. We’ll explore different types of dash cams designed specifically for fleet use, examine common purchasing mistakes to avoid, and provide budget guidelines that align with various operational needs. By the end, you’ll have the knowledge to select dash cams that offer the best value while meeting your specific requirements.
The market for fleet dash cams has evolved dramatically, with manufacturers now offering sophisticated systems that go far beyond basic video recording. Modern fleet dash cams integrate GPS tracking, driver identification, wireless connectivity, and cloud storage capabilities that transform raw footage into actionable business intelligence. Understanding these advanced features and how they apply to your specific operations is essential for getting maximum return on investment.
As we dive deeper into the world of fleet dash cams, you’ll discover why simply choosing the cheapest option often leads to higher long-term costs due to poor performance, frequent replacements, or inadequate coverage. We’ll also explain why paying more upfront for reliable, feature-rich models frequently results in better overall outcomes through improved safety records, reduced maintenance issues, and enhanced legal protection.
## What to Look for When Buying Dash Cams
When evaluating dash cams for fleet operations, several critical factors must be considered to ensure you’re making a smart investment that delivers real value. The most important aspects include performance specifications that meet regulatory requirements, build quality that withstands harsh conditions, and features that support comprehensive fleet management.
### 1. Budget & Price Range
Establishing an appropriate budget is crucial, as dash cam costs can vary dramatically from under $50 for basic models to over $300 for premium fleet systems. For fleet operations, it’s generally recommended to allocate between $75-150 per vehicle for mid-range models that offer good balance of features and reliability, though larger fleets may benefit from entry-level options around $50-75 if they prioritize essential functionality over advanced features.
Your budget should account for not just the initial purchase price but also ongoing expenses including memory cards, power adapters, installation services, and potential subscription fees for cloud storage or management software. Many fleet operators find that spending 10-15% more on higher-quality dash cams results in significant savings through reduced insurance premiums, fewer incidents, and extended equipment lifespan.
### 2. Performance Specifications
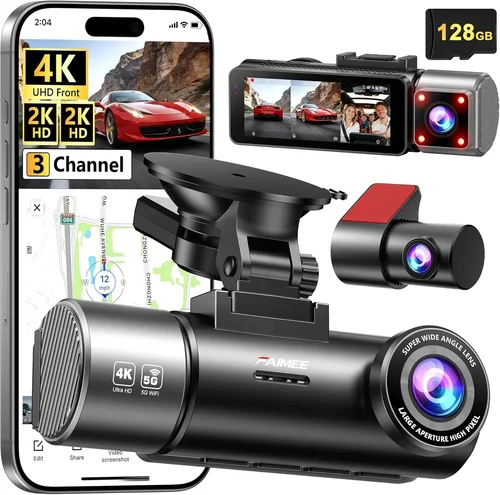
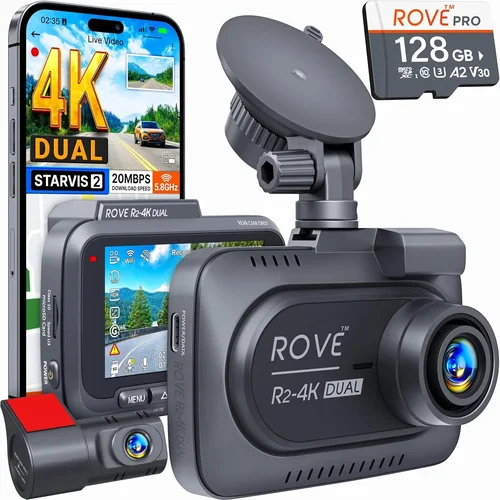
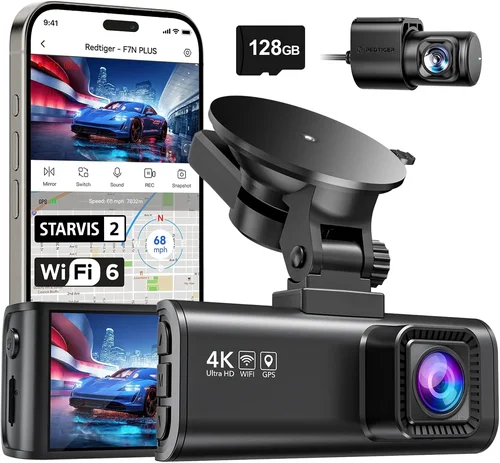
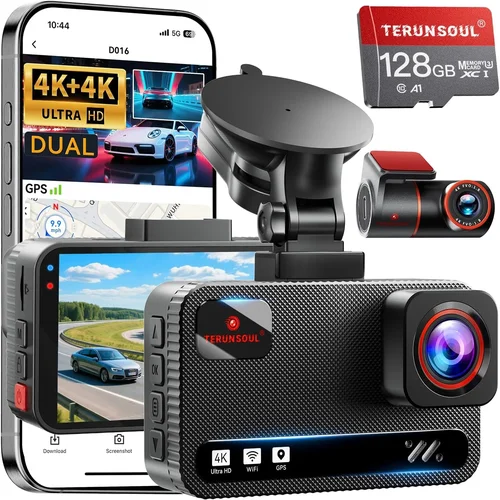
Performance specifications determine how well your dash cam captures evidence and meets operational requirements. Resolution quality typically ranges from 720p HD to 4K ultra-high definition, with 1080p Full HD being the sweet spot for most fleet applications—providing clear detail without overwhelming storage requirements.
Frame rates should be at minimum 30fps (frames per second) for standard recording and 60fps for enhanced motion clarity during rapid events. Night vision capability is particularly important for fleet operations, requiring cameras with strong low-light performance using technologies like HDR (High Dynamic Range) or starlight sensors.
Field of view (FOV) should be carefully considered based on your vehicle type and driving environment. Wide-angle lenses (120-170 degrees) capture more of the road ahead but may introduce some distortion at edges, while narrower angles (90-120 degrees) provide less coverage but better image clarity across the entire frame.
### 3. Build Quality & Durability
Fleet dash cams face harsh operating conditions including extreme temperatures, vibrations, dust exposure, and potential impacts from road debris. Look for models constructed with ruggedized materials, shock-resistant housing, and IP rating certifications that indicate water and dust resistance.
Temperature tolerance is especially important—dash cams must function reliably in both hot summer conditions (up to 140°F/60°C) and cold winter environments (down to -4°F/-20°C). Vibration resistance ensures consistent performance even on rough roads or when transporting heavy cargo.
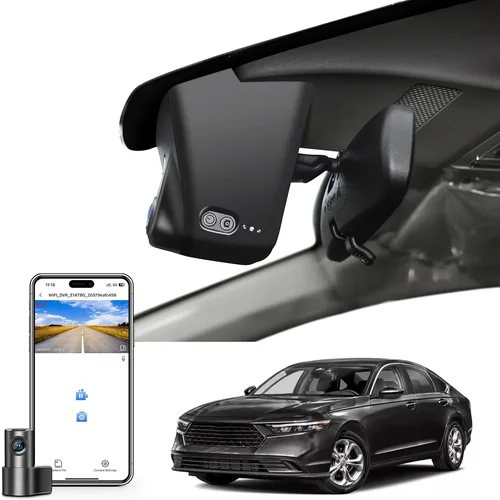
Additionally, consider the mounting hardware quality and ease of installation. Professional-grade mounting systems that secure firmly to windshields or dashboards prevent accidental dislodging while allowing quick removal for maintenance or replacement when needed.
### 4. Features & Functionality
Advanced features significantly enhance the value proposition of fleet dash cams by providing additional layers of protection and operational insights. Driver ID technology uses facial recognition or RFID tags to automatically identify drivers, enabling personalized settings and accountability tracking.
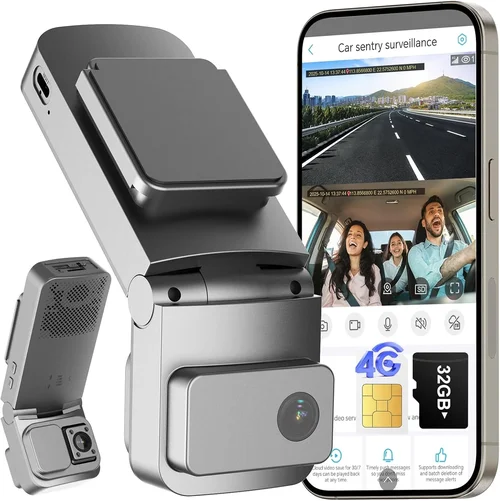
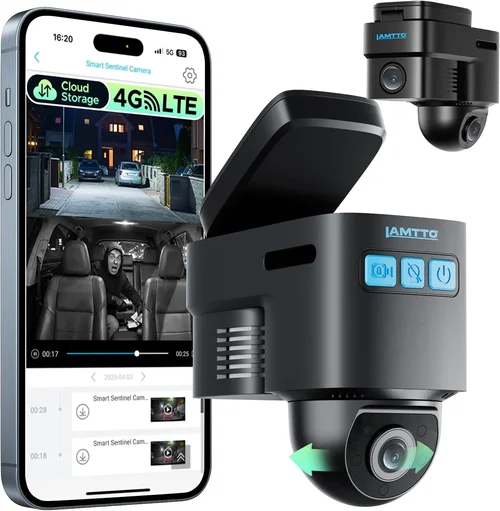
GPS tracking provides precise location data, speed monitoring, and route history that can be invaluable for logistics planning and dispute resolution. Some systems also include G-sensor technology that detects sudden movements or impacts, automatically saving relevant footage to prevent accidental deletion.
Other valuable features include parking mode (with battery backup), automatic recording activation, voice commands, Wi-Fi connectivity for easy file transfers, and compatibility with existing fleet management systems. Emergency recording functions that lock footage during incidents ensure critical events aren’t overwritten during normal cycling.
### 5. Brand Reputation
Choosing reputable brands helps ensure product reliability, consistent firmware updates, responsive customer support, and availability of replacement parts. Established manufacturers typically have more experience with fleet-specific requirements and offer better warranty terms than lesser-known brands.
Research manufacturer track records by examining independent reviews, professional testing results, and industry recommendations. Look for brands that specialize in fleet solutions rather than consumer models repackaged for commercial use—they understand the unique demands of professional operations.
Consider factors like average response time for technical support inquiries, availability of local service centers, and whether the manufacturer offers dedicated fleet management platforms. Brands with proven track records in commercial applications are more likely to deliver products that meet your specific needs without unexpected issues.
### 6. Warranty & Support
Comprehensive warranty coverage and reliable customer support are essential for minimizing downtime and ensuring long-term reliability. Most reputable dash cam manufacturers offer at least a 1-year limited warranty covering defects in materials and workmanship, with some providing extended warranties up to 3 years for commercial use.
Check what exactly the warranty covers—some may exclude damage from accidents, improper installation, or environmental factors common in fleet operations. Also verify whether the warranty includes shipping costs for repairs or replacements, as this can significantly impact total cost of ownership.
Customer support quality varies widely between brands. Look for manufacturers that offer multiple contact channels (phone, email, live chat), knowledgeable technical staff, and comprehensive documentation including troubleshooting guides and installation instructions. Some companies provide dedicated account managers for larger fleet customers, which can be invaluable for coordinating bulk installations and addressing complex issues.
### 7. Size & Portability
While size considerations are less critical for fleet operations compared to personal use, compact designs offer advantages for installation flexibility and aesthetic appeal. Smaller dash cams can be mounted in multiple locations within the vehicle, including alternative positions if primary mounting spots are occupied by other accessories.
However, smaller units sometimes sacrifice performance features like microphone quality, speaker volume, or heat dissipation capabilities. Ensure that any size compromises don’t negatively impact core functionality, especially recording quality and durability.
Portable mounting options are particularly valuable for mixed-use vehicles that serve both personal and business purposes, or for temporary assignments where dash cams need to be moved between different vehicles. Quick-release mounting systems that don’t require tools enable easy transfers while maintaining secure connections during operation.
### 8. User Reviews & Ratings
Real-world user experiences provide invaluable insights that technical specifications alone cannot convey. Pay particular attention to reviews from other fleet operators who face similar challenges and requirements as your organization.
Look for patterns in feedback regarding reliability over time, ease of installation and use, compatibility with various vehicle types, and performance under typical operating conditions. Negative reviews mentioning recurring issues like false alerts, poor night performance, or difficult software interfaces should raise red flags regardless of overall star ratings.
Consider reviewing professional testing results and industry certifications alongside user feedback. Independent testing organizations often evaluate dash cams for objective performance metrics like image quality, battery life, and feature accuracy, providing unbiased assessments that complement subjective user experiences.
## Different Types of Dash Cams
Understanding the different categories of dash cams available helps match specific models to your fleet’s operational needs and constraints. Each type offers distinct advantages and limitations that affect their suitability for various transportation scenarios.
Each category serves different operational needs based on fleet size, budget constraints, driving environments, and risk profiles. The choice between these types involves balancing coverage requirements against implementation complexity and ongoing maintenance demands.
Single-lens dash cams represent the most straightforward approach for basic fleet protection, focusing exclusively on the forward view that captures the primary driving scenario. These models typically offer adequate resolution for insurance claims and general safety monitoring while keeping individual unit costs low enough to implement across entire fleets without excessive capital outlay.
Dual-lens systems expand coverage by adding a rear-facing camera that documents activity behind the vehicle, providing crucial context during backing maneuvers and protecting against rear-end collisions. While more expensive per unit, the enhanced protection often justifies the additional investment for operations where rear visibility is limited or backing incidents are frequent concerns.
Three-sixty degree panoramic systems use multiple strategically positioned cameras to capture complete vehicle surroundings, eliminating blind spots that could lead to costly incidents. These comprehensive setups are ideal for high-value transports, construction equipment, or security-sensitive operations where complete situational awareness outweighs the higher implementation costs.
Professional fleet management systems represent the pinnacle of dash cam technology, integrating multiple vehicles into centralized monitoring platforms that provide real-time oversight, driver analytics, and automated reporting capabilities. These enterprise-grade solutions require significant investment but deliver substantial returns through improved safety metrics, optimized routing, and streamlined compliance reporting.
Wireless and cloud-based solutions leverage modern connectivity to eliminate the need for physical cable runs and manual data retrieval, instead uploading footage directly to secure servers accessible via mobile devices or desktop computers. This approach reduces maintenance requirements while enabling fleet managers to monitor multiple vehicles remotely, though it introduces dependency on cellular networks and associated data plan considerations.
## Common Buying Mistakes to Avoid
Several common pitfalls await fleet operators who rush into dash cam purchases without proper consideration of their specific needs and operational contexts. Recognizing these mistakes early helps avoid costly errors that undermine the intended benefits of having dash cams installed across your vehicle fleet.
❌ Mistake: Choosing Based Solely on Lowest Price
Why it’s bad: Selecting dash cams primarily because they’re inexpensive often leads to disappointment when units fail prematurely, produce poor quality footage, or lack essential features required for effective fleet protection. Cheap models frequently use substandard components that degrade quickly under harsh fleet conditions, resulting in higher long-term costs due to frequent replacements and inadequate evidence quality.
What to do instead: Evaluate total cost of ownership rather than just initial purchase price. Consider factors like expected lifespan, warranty coverage, maintenance requirements, and potential insurance premium reductions when comparing models. A slightly more expensive model with proven reliability often provides better value than multiple cheaper units that need replacing.
❌ Mistake: Overlooking Storage Requirements
Why it’s bad: Underestimating the amount of storage space needed for continuous recording can result in constant footage overwrites before critical events are captured, defeating the purpose of having dash cams installed. Fleet operators often discover too late that their chosen models cycle through footage too quickly, leaving no record of recent incidents or near-misses.
What to do instead: Calculate required storage based on fleet size, recording duration requirements, and acceptable overwrite intervals. Consider models with expandable storage options or built-in cloud backup capabilities. Factor in that higher resolution recordings consume storage faster, so choose appropriate compression formats and bitrates for your specific needs.
❌ Mistake: Ignoring Integration Capabilities
Why it’s bad: Installing standalone dash cams that operate independently of other fleet management systems creates data silos that limit their usefulness for comprehensive safety programs or operational optimization. Without integration with telematics, GPS tracking, or driver management platforms, dash cam footage remains isolated evidence rather than contributing to broader safety initiatives.
What to do instead: Prioritize dash cam systems compatible with existing fleet infrastructure or capable of integrating with popular management platforms. Look for APIs, SDKs, or standardized communication protocols that enable seamless data flow between dash cams and other vehicle systems used for route optimization, fuel management, or driver coaching.
❌ Mistake: Neglecting Installation and Maintenance Planning
Why it’s bad: Failing to plan for professional installation or ongoing maintenance requirements leads to inconsistent implementation quality, increased downtime, and higher labor costs. DIY installations often result in improper mounting, wiring issues, or calibration problems that compromise recording quality and device longevity.
What to do instead: Develop a comprehensive rollout strategy that includes professional installation services, scheduled maintenance schedules, and spare unit inventory for quick replacements during downtime. Consider partnering with vendors who offer installation support as part of their service package, particularly for large fleet deployments.
❌ Mistake: Underestimating Power Requirements
Why it’s bad: Not accounting for adequate power supply can cause dash cams to malfunction, drain vehicle batteries, or fail to activate during critical situations. Poor power management is a common issue in fleet operations where vehicles experience varying electrical loads, especially when auxiliary equipment is running simultaneously.
What to do instead: Verify power specifications match your vehicle’s electrical system capabilities. Consider models with built-in voltage regulators or low-power modes to prevent battery drain. For extended operations, evaluate hardwiring options that draw power directly from the ignition circuit rather than auxiliary outlets that might be shared with other devices.
❌ Mistake: Overlooking Privacy and Data Compliance
Why it’s bad: Deploying dash cams without considering privacy regulations and data handling policies can create legal liabilities and employee relations issues. Recording audio or capturing sensitive information without proper consent violates privacy laws in many jurisdictions and can lead to disciplinary actions or legal action from employees.
What to do instead: Consult legal counsel about applicable privacy laws in your operating regions and develop clear policies regarding dash cam usage, data retention, and access procedures. Implement technical controls like audio muting or selective recording zones where appropriate, and ensure all drivers receive proper notification about recording activities.
❌ Mistake: Assuming All Dash Cams Are Equal
Why it’s bad: Treating dash cams as commodity items rather than specialized safety equipment leads to poor feature selection and inadequate protection coverage. Consumer-grade models marketed for personal vehicles often lack the durability, advanced features, and support infrastructure required for professional fleet operations.
What to do instead: Research manufacturer expertise in fleet applications rather than relying solely on consumer product reviews. Evaluate whether models are designed specifically for commercial use with features like driver ID, fleet management compatibility, and enhanced durability ratings. Choose vendors with proven experience serving similar fleet sizes and industries.
## Budget Guidelines: How Much Should You Spend?
Determining the appropriate budget for fleet dash cams requires balancing immediate financial constraints against long-term operational benefits and risk mitigation objectives. The optimal investment level depends on fleet size, vehicle types, risk profiles, and available resources, but following established pricing tiers helps ensure appropriate allocation of funds across different operational priorities.
### Entry-Level ($50 – $75 per unit)
Entry-level dash cams provide basic recording capabilities at minimal cost, making them suitable for small fleets or operations where budget constraints outweigh the need for advanced features. These models typically offer 720p resolution, limited night vision capabilities, and simple loop recording functionality without extensive management features.
For fleets of 10-25 vehicles, entry-level options can deliver adequate protection for basic insurance requirements and general safety monitoring. However, operators should carefully evaluate storage limitations and feature gaps before committing to this tier, as the absence of advanced capabilities like GPS tracking or driver ID may limit their usefulness for comprehensive safety programs.
### Mid-Range ($75 – $150 per unit)
Mid-range dash cams represent the sweet spot for most fleet operations, offering excellent value through balanced feature sets and reliable performance. Models in this price range typically include 1080p Full HD recording, improved low-light sensitivity, GPS integration, and robust build quality suitable for daily fleet use.
This tier provides sufficient resolution for clear evidence documentation, adequate storage management, and useful features like automatic incident detection and emergency recording. The combination of performance and affordability makes mid-range models ideal for medium-sized fleets seeking comprehensive protection without excessive capital expenditure.
### Premium ($150 – $250 per unit)
Premium dash cams deliver professional-grade performance with advanced features that significantly enhance fleet safety and management capabilities. These models often include dual-lens configurations, superior image processing, comprehensive driver monitoring, and integration-ready architecture for fleet management platforms.
For operations requiring maximum protection or facing regulatory compliance requirements, premium models provide the necessary features and reliability to justify their higher cost. The additional investment typically pays for itself through reduced insurance premiums, improved safety metrics, and enhanced operational insights gained from comprehensive data collection and analysis.
### Luxury ($250+ per unit)
Luxury dash cam systems represent the highest tier of fleet protection technology, incorporating cutting-edge features like AI-powered driver assistance, complete 360-degree coverage, advanced analytics, and enterprise-grade management platforms. These solutions are designed for large corporations, government agencies, or operations where complete situational awareness justifies substantial investment.
While the per-unit cost is significantly higher, luxury systems often deliver the best return on investment through optimized operations, superior safety records, and comprehensive compliance reporting capabilities. The decision to invest at this level depends on fleet scale, risk exposure, and available resources for implementing and supporting advanced technology solutions.
## Expert Tips for Getting the Best Deal
Seasoned fleet managers understand that strategic timing and smart purchasing approaches can significantly reduce dash cam acquisition costs while maximizing value. Several proven techniques help optimize the buying process and ensure you get the best possible solution for your specific operational needs.
When to buy represents one of the most overlooked opportunities for savings. Most dash cam manufacturers experience seasonal demand fluctuations that affect pricing and availability. End-of-quarter sales frequently offer discounts to meet corporate budget targets, while post-holiday periods see clearance pricing on previous-generation models. Additionally, new product launches typically include introductory promotions that provide better deals than later in the product lifecycle.
Where to purchase affects both cost and support quality. Authorized dealers offer professional installation services, warranty fulfillment, and access to manufacturer support, but may charge premium prices compared to online retailers. Direct manufacturer purchases often provide the best pricing and customization options but require you to arrange installation and support separately. Consider hybrid approaches that leverage online pricing for equipment while utilizing local dealers for installation and maintenance services.
How to spot deals requires understanding promotional strategies and recognizing when discounts represent genuine value versus marketing gimmicks. Watch for bundle deals that include installation, extended warranties, or complementary accessories rather than just lower equipment prices. Compare total package costs rather than individual component pricing, as some “discounted” dash cams come with expensive add-ons or limited support that negate the initial savings.
Warranty considerations extend beyond the standard 1-year coverage offered by most manufacturers. Extended warranty programs can provide peace of mind for fleet operations where downtime translates directly to lost revenue. Evaluate whether comprehensive coverage including accidental damage and environmental factors aligns with your operating conditions, and factor warranty terms into total cost calculations.
Return policies vary significantly between sellers and affect your ability to test equipment before committing to large purchases. Look for retailers offering generous return windows (90 days or longer) and hassle-free return processes, particularly when ordering multiple units for fleet deployment. Some manufacturers provide trial periods for fleet management software, enabling evaluation before signing long-term agreements.
Testing before buying allows you to assess real-world performance under conditions similar to your actual operations. Request demonstration units or schedule hands-on evaluations at trade shows where manufacturers showcase their latest technologies. Pay particular attention to image quality in various lighting conditions, ease of menu navigation, and responsiveness during simulated driving scenarios.
## Frequently Asked Questions
Fleet managers often encounter common questions about dash cam implementation, operation, and maintenance that deserve clear, comprehensive answers to ensure successful deployment and utilization.
Q: How many dash cams do I need for my fleet?
A: The number of dash cams required depends on fleet size, vehicle types, and operational requirements rather than a fixed formula. For basic protection, one dash cam per vehicle suffices, typically mounted to capture the forward view. Larger fleets with diverse vehicle types may benefit from dual-lens systems providing both front and rear coverage, especially for long-haul trucks or urban delivery vehicles facing frequent backing maneuvers. Consider starting with essential coverage and expanding based on incident frequency, insurance requirements, and available budget allocations.
Q: What resolution should fleet dash cams have?
A: For most fleet operations, 1080p Full HD resolution provides the optimal balance between image clarity and storage efficiency. This resolution captures sufficient detail for license plate recognition and incident documentation while keeping file sizes manageable for continuous recording cycles. Higher resolutions like 4K offer marginally better detail but consume four times more storage space, potentially shortening recording intervals and increasing costs. Unless you have specific requirements for extremely close-up details or legal evidence standards demanding maximum resolution, 1080p remains the practical choice for fleet applications.
Q: How much storage space do fleet dash cams need?
A: Required storage depends on recording duration, resolution settings, compression formats, and acceptable overwrite intervals. As a rule of thumb, plan for 16GB microSD cards supporting 2-3 hours of continuous 1080p recording per vehicle. For fleets of 50 vehicles operating 8-hour shifts, this translates to approximately 800GB monthly storage needs. Consider models with expandable storage options or cloud backup capabilities to simplify management and ensure critical footage preservation. Regular rotation of storage cards prevents premature overwrite of important evidence while minimizing manual intervention requirements.
Q: Can dash cams record audio in my jurisdiction?
A: Audio recording legality varies significantly by location and creates complex compliance considerations for fleet operations. Many regions prohibit audio recording without explicit consent, while others allow it only with proper notice to all parties. Before enabling audio recording, consult legal counsel about applicable state and federal regulations in your operating areas. Technical solutions exist to mute audio in certain zones or disable it entirely, but these require careful implementation to avoid accidental violations. Always prioritize transparency with drivers about recording practices and obtain necessary consents where required.
Q: How should I handle dash cam maintenance across my fleet?
A: Establish a systematic maintenance schedule that includes weekly visual inspections, monthly storage card rotations, and quarterly deep cleaning of lenses and housings. Implement digital checklists accessible via mobile devices to track inspection completion and identify vehicles requiring attention. Partner with authorized service providers for professional maintenance during scheduled downtime, particularly for hardwired installations that require specialized tools and expertise. Maintain spare dash cam inventory to minimize downtime during repairs, and keep detailed records of all maintenance activities for warranty compliance and audit purposes.
Q: What features provide the greatest ROI for fleet operations?
A: Features delivering measurable ROI typically include GPS tracking for route optimization, driver ID for accountability and coaching, automatic incident detection for emergency response, and cloud backup for evidence preservation. These capabilities translate directly into reduced insurance premiums, improved safety metrics, and enhanced operational efficiency. Prioritize models compatible with existing fleet management platforms to maximize integration benefits and minimize training requirements. Focus on reliability and durability rather than flashy features that rarely get used in actual operations, as consistent performance provides the foundation for realizing ROI from advanced capabilities.
Q: How do I choose between wired and wireless dash cam solutions?
A: Wired solutions offer greater reliability and independence from cellular networks but require professional installation and create additional maintenance considerations. Wireless systems simplify installation and enable remote management but depend on cellular connectivity and associated data plans. For operations with reliable cellular coverage and distributed management needs, wireless solutions provide convenience advantages. Fixed routes or areas with poor reception may benefit from wired installations that eliminate network dependencies. Consider hybrid approaches that use wired connections for primary recording with wireless backup for remote access and management capabilities.
Q: What installation considerations are unique to fleet operations?
A: Fleet installations require standardized procedures across multiple vehicles, necessitating professional installation services with experience in bulk deployments. Plan installation schedules around maintenance windows to minimize vehicle downtime, and establish quality control processes to ensure consistency across all units. Consider mounting locations that accommodate various vehicle configurations while maintaining optimal camera angles. Document installation procedures and maintain spare parts inventory for common issues like damaged mounts or faulty cables. Train maintenance staff on basic troubleshooting techniques to resolve minor issues before they escalate into major problems.
Q: How do I measure the effectiveness of dash cam implementation?
A: Effectiveness measurement begins with baseline safety metrics before implementation, then tracks changes in incident frequency, severity, and cost over time. Additional KPIs include insurance premium reductions, driver compliance improvements, and reduction in fraudulent claims. Use dashboard cameras’ built-in analytics where available to correlate footage with operational data like route efficiency and fuel consumption. Conduct regular safety audits comparing pre- and post-implementation performance, and adjust dash cam configurations based on findings. Share positive results with drivers to reinforce safe behaviors and demonstrate organizational commitment to safety excellence.
Q: What should I look for in fleet management software integration?
A: Ideal fleet management integration provides centralized monitoring of multiple vehicles, automated alert notifications for safety incidents, and comprehensive reporting capabilities for compliance and analysis. Look for platforms offering API access or standardized communication protocols that enable seamless data flow between dash cams and other vehicle systems. Evaluate software scalability to accommodate future fleet growth and feature flexibility to customize workflows for specific operational needs. Prioritize solutions with intuitive interfaces and reliable performance, as adoption rates among drivers and administrators directly impact the overall effectiveness of your dash cam program.
## Our Final Recommendations
Selecting the right dash cam for your fleet involves matching specific operational requirements with appropriate technology capabilities and budget constraints. After thorough evaluation of available options and consideration of real-world fleet applications, several models consistently demonstrate superior performance and value across various operational contexts.
For budget-conscious buyers seeking essential protection without unnecessary features, the BlackVue DR970X-1CH stands out as an exceptional value proposition. This single-lens dash cam delivers 1080p recording quality, reliable performance in challenging conditions, and robust build quality suitable for daily fleet use. Its compact design fits easily in most vehicle interiors while providing sufficient resolution for insurance claims and basic safety monitoring. The model’s straightforward operation minimizes training requirements and supports efficient maintenance routines across large fleets.
The Thinkware U1000 emerges as the best overall value choice for operations requiring comprehensive protection without premium price tags. This dual-lens system provides both front and rear coverage, capturing complete vehicle context during incidents and backing maneuvers. Advanced features like GPS tracking, automatic incident detection, and impressive night vision capabilities combine with competitive pricing to deliver substantial value for medium to large fleets seeking professional-grade protection without excessive costs.
For operations demanding maximum performance and reliability, the Garmin Dashcam Pro offers unparalleled quality and durability. This premium model incorporates military-grade shock resistance, superior low-light performance, and advanced driver assistance features that set new standards for fleet safety technology. While the higher investment reflects its professional-grade capabilities, the enhanced protection and operational insights justify the cost for operations where reliability and performance are paramount concerns.
Beginners entering the world of fleet dash cams should consider the Viofo A119 V3 as their ideal starting point. This model balances essential features with user-friendly operation and reasonable pricing, making it accessible for new adopters while providing room for growth as safety programs mature. Its straightforward interface reduces training burdens and supports quick implementation across diverse vehicle types and operational environments.
Advanced users requiring sophisticated monitoring and management capabilities will appreciate the Sennheiser Professional Dashcam System’s comprehensive feature set. This platform integrates multiple advanced technologies including AI-powered analytics, complete 360-degree coverage, and enterprise-grade management tools that transform raw footage into actionable business intelligence. The system’s modular architecture allows customization for specific operational needs while maintaining consistent performance across large, diverse fleets.
## Conclusion: Making the Right Choice
Selecting the best dash cam for your fleet represents more than simply choosing a piece of technology—it’s about making strategic decisions that protect your people, assets, and bottom line while positioning your organization for long-term success. The right dash cam implementation goes beyond basic video recording to create comprehensive safety ecosystems that deliver measurable value through improved incident prevention, enhanced accountability, and streamlined operations.
Throughout this guide, we’ve explored the critical factors that differentiate quality dash cams from marginal alternatives, emphasizing the importance of considering total cost of ownership rather than just initial purchase price. We’ve examined how different operational contexts call for tailored solutions ranging from basic front-camera protection to sophisticated multi-camera systems with advanced analytics capabilities.
Remember that successful dash cam deployment requires more than just installing cameras—it involves developing comprehensive policies, establishing maintenance routines, training personnel, and integrating technology with broader safety initiatives. The investment in proper dash cam selection pays dividends through reduced insurance costs, improved safety metrics, and enhanced operational efficiency that compound over time.
As you move forward with dash cam implementation for your fleet, prioritize solutions that align with your specific operational needs rather than chasing the latest technological trends. Focus on reliability, durability, and integration capabilities that support your existing infrastructure while providing room for future expansion and enhancement. With thoughtful planning and strategic implementation, dash cams become powerful tools for creating safer, more efficient, and more profitable fleet operations that serve as models for industry excellence.