Best Dash Cam for Expedition Buying Guide
For serious adventurers and expedition drivers, a standard dash cam just won’t cut it. When you’re pushing the limits of the road, whether navigating remote mountain passes, traversing scorching deserts, or braving the unpredictable weather of high-altitude trails, your vehicle’s safety and security become paramount. A regular dash cam might struggle to capture clear footage in extreme temperatures, lack the necessary storage for long trips, or fail to withstand the rigors of constant travel. This comprehensive buying guide is designed specifically for those who demand more from their dash cam. We’ll dive deep into what makes a dash cam truly expedition-ready, helping you navigate the market and find the perfect device that will reliably document every mile of your journey, protect you in case of an incident, and provide peace of mind when you’re far from home.
This article will equip you with the knowledge to make an informed decision, covering everything from critical features like low-light performance, GPS tracking, and robust build quality to practical considerations such as power management, storage capacity, and ease of installation. Whether you’re planning a multi-week off-road adventure, a cross-country tour, or simply want unparalleled peace of mind on your daily commute through challenging terrains, understanding these key factors will ensure you select a dash cam that not only meets but exceeds your expectations. We’ll also explore common pitfalls to avoid, offer expert tips for getting the best value, and provide detailed recommendations across various price points to suit different needs and budgets. By the end of this guide, you’ll be confident in choosing the best dash cam for expedition, knowing exactly what to look for and how to prioritize your needs.
The market for dash cams has exploded in recent years, offering a dizzying array of options. While many are designed for everyday city driving, the demands of expedition travel require a specialized subset of these devices. These aren’t just cameras; they’re ruggedized recording systems built to endure extreme conditions. The right dash cam for your expedition will act as a tireless witness to your travels, capturing crucial evidence, providing navigation data, and even offering emergency features like collision detection. With so many choices, it’s easy to get overwhelmed. Our goal is to cut through the noise, provide clear insights, and help you identify the models that stand out in terms of durability, functionality, and reliability, ensuring your next adventure is documented safely and securely.

What to Look for When Buying Dash Cams
1. Extreme Temperature Tolerance & Durability
Expedition driving often means exposure to some of the harshest environmental conditions imaginable. Your dash cam must be able to function flawlessly in blistering heat, sub-zero cold, heavy rain, dust storms, and everything in between. Unlike a standard car’s interior, which might have some climate control, your dash cam is often exposed to direct sunlight for hours, causing internal components to overheat. Look for models explicitly rated for wide temperature ranges, ideally from -4°F to 140°F (-20°C to 60°C) or even wider. Beyond temperature, consider its build quality. Is it made from durable materials like reinforced plastic or metal? Does it have a sturdy mount that can withstand vibrations on rough terrain? A dash cam that cracks under the sun or fails due to condensation will be utterly useless during your expedition. Think of it as an electronic companion that needs to survive the elements just as much as you do.
2. High-Resolution Video Quality & Wide Dynamic Range (WDR)
The primary purpose of any dash cam is to capture clear, usable video. For expeditions, where lighting conditions can shift dramatically—from bright, harsh sunlight to deep shadows in tunnels—a camera with excellent WDR is non-negotiable. WDR technology helps balance the exposure, preventing details from being washed out in bright areas while still capturing detail in darker regions. Aim for at least 1080p Full HD resolution, but 2K or 4K Ultra HD is highly desirable for sharper details, especially when reviewing footage for license plates or identifying small objects. Consider the lens specifications: a wide-angle lens (typically 130°-170° horizontal field of view) captures more of the road, which is crucial for context, but be wary of fisheye distortion at the edges. Look for features like HDR (High Dynamic Range), which complements WDR, and ensure the sensor performs well in low-light conditions, as dusk and dawn are common on long drives.
3. Robust Storage Capacity & Loop Recording
Expeditions can span thousands of miles, generating massive amounts of video data. A dash cam with limited internal storage (e.g., only 16GB) will fill up quickly and require frequent manual deletion, which defeats the purpose. Look for models that support expandable storage via microSD cards, ideally up to 512GB or even 1TB. This allows you to record continuously without worrying about running out of space. Loop recording is essential; it automatically overwrites the oldest footage when the storage is full, ensuring you always have the most recent events recorded. Some advanced models offer cloud storage integration, allowing you to back up critical footage remotely, though this requires a stable internet connection, which might not always be available on remote expeditions. Ensure the card you choose is high endurance, designed for continuous write cycles.
4. Power Management & Battery Life
Power sources can be unreliable on expeditions, especially when camping off-grid or in remote areas. Most dash cams draw power directly from your car’s 12V cigarette lighter socket. However, if your battery is weak or you’re using other power-hungry devices, this can drain your car’s battery overnight. A good dash cam should have intelligent power management, perhaps with a built-in capacitor or supercapacitor instead of a lithium-ion battery, which is less prone to degradation from heat. Some models offer a “parking mode” that uses motion detection or G-sensor to trigger recording only when needed, minimizing power consumption. For extended off-grid use, consider a dash cam that can run on an external power source (like a portable solar panel or deep-cycle battery) for a few hours, or one that integrates with your vehicle’s electrical system via hardwiring for continuous operation without draining the main battery.
5. Advanced Features for Safety & Convenience
Beyond basic recording, modern dash cams offer a suite of features that significantly enhance safety and utility during expeditions. GPS Tracking logs your speed, location, and route, providing valuable data for accident reconstruction and creating a visual map of your journey. Built-in Wi-Fi allows for wireless transfer of footage to your smartphone or tablet, making it easier to manage large files on the go. Emergency Recording (via G-sensor) automatically locks and saves footage when sudden acceleration, braking, or impact is detected, preserving critical evidence during collisions. Lane Departure Warning (LDW) and Forward Collision Warning (FCW) can alert you to potential hazards, adding an extra layer of driver assistance. Time-lapse Mode is great for documenting long journeys without consuming excessive storage. Consider how these features align with your specific needs and driving style.
6. Ease of Installation & User Interface
A complicated installation process can be a major headache, especially when you’re far from home. Look for dash cams with straightforward mounting systems—either suction cups or adhesive mounts—that are secure and easy to remove. Hardwiring kits are often recommended for permanent installations, allowing the dash cam to draw power directly from your fuse box, eliminating the need for a separate power cable cluttering your dashboard. The user interface should be intuitive, with clear menus and responsive buttons. A touchscreen display can be convenient but may be difficult to use while driving or in extreme temperatures. Consider the size of the screen; larger screens are easier to read but take up more dashboard space. Ensure the controls are simple enough to operate while wearing gloves or in poor visibility conditions.
7. Reliability & Brand Reputation
When you’re relying on your dash cam for safety and evidence, brand reputation matters. Choose manufacturers known for producing reliable electronics and offering good customer support. Research user reviews and forums to see how a particular model performs in real-world expedition scenarios. Look for consistent feedback regarding longevity, firmware updates, and responsiveness to issues. A reputable brand is more likely to offer timely software updates that fix bugs or add new features, ensuring your dash cam remains functional and up-to-date throughout your travels. Avoid unknown brands or those with a history of poor customer service, as replacing a faulty unit in the middle of nowhere can be incredibly frustrating.
8. Weather Resistance & Protection
Beyond just temperature tolerance, your dash cam needs protection from moisture, dust, and debris. A sealed housing with an IP rating (Ingress Protection) can indicate its resistance to water and dust. While most dash cams aren’t fully waterproof, a good seal will prevent rain, snow, and splashes from damaging the internal components. Consider the placement of the camera; if it’s mounted high on the windshield, it might be more susceptible to direct rain and snow. A protective cover or a slight tilt away from direct precipitation can help. Also, think about the lens itself; anti-fogging coatings can prevent condensation buildup inside the lens, ensuring clear footage even in humid or cold environments.
9. Night Vision Capabilities
Night driving is inevitable on long expeditions, and your dash cam must perform well in low-light conditions. Look for cameras with excellent low-light sensitivity, often indicated by a large aperture (low f-number) and a high-quality image sensor. Some models employ infrared LEDs to illuminate the road at night, though this might affect color accuracy. Night vision is crucial for capturing details like license plates, road signs, and obstacles in the dark, making it a vital feature for safety and evidence collection after sunset.
10. Audio Recording (Optional but Useful)
While not always essential, audio recording can provide additional context to your video footage. It can capture conversations, traffic sounds, or even the sound of an accident, which can be invaluable for insurance claims or legal proceedings. However, be aware of privacy laws regarding audio recording, as some jurisdictions require consent from all parties being recorded. If audio is important to you, ensure your chosen dash cam supports it and check local regulations before enabling the feature.
11. Firmware Updates & Software Support
Technology evolves rapidly, and your dash cam’s capabilities can be enhanced or improved over time through firmware updates. Choose a manufacturer that regularly releases updates to fix bugs, improve performance, and add new features. Good software support also means having access to user manuals, troubleshooting guides, and responsive customer service. This ensures your dash cam remains compatible with your smartphone apps and continues to function optimally throughout its lifespan.
12. Size & Portability
While dash cams are primarily designed to be installed in your vehicle, portability can be a factor if you frequently switch vehicles or plan to use it in multiple locations. Compact designs are easier to store and transport, taking up minimal space on your dashboard. However, a slightly larger model might offer better screen size or more robust features. Consider how easily you can move the dash cam between vehicles, especially if you’re traveling with multiple cars or renting vehicles during your expedition.
13. Warranty & Customer Support
A solid warranty provides peace of mind, protecting you against manufacturing defects and premature failures. Look for warranties that cover at least one year, with some premium models offering two or three years. Check the terms carefully—some warranties might exclude certain types of damage or require you to return the unit to a specific location for repairs. Responsive customer support is equally important; you want to be able to get answers to questions or resolve issues quickly, especially when you’re far from home. Research the brand’s reputation for handling warranty claims and providing timely assistance.
14. Integration with Other Devices
If you already own other smart devices or have specific needs, consider how your dash cam might integrate with them. Some models offer compatibility with dash cam apps that sync with your smartphone, allowing for easy file management and sharing. Others might work with navigation systems or other vehicle accessories. This can streamline your workflow and enhance the overall functionality of your expedition setup.
15. Price vs. Value
While budget is always a consideration, don’t let it be the sole deciding factor for an expedition dash cam. Cheaper models might skimp on critical features like durability, storage capacity, or video quality, leading to frustration down the line. Instead, focus on finding the best value for your money—a balance between cost and the features you truly need. Sometimes spending a bit more upfront can save you significant hassle and expense later by providing a more reliable and capable device.
Different Types of Dash Cams

Common Buying Mistakes to Avoid
❌ Mistake: Prioritizing Price Over Quality
Why it’s bad: Opting for the cheapest dash cam available might seem like a good deal initially, but these models often cut corners on essential features like durability, video quality, and storage capacity. They may fail prematurely due to cheap materials, struggle to record in low light or extreme temperatures, or lack the storage needed for long expeditions. A failing dash cam in the middle of nowhere is not just inconvenient; it could leave you without crucial evidence or safety features.
What to do instead: Invest in a mid-range to premium dash cam that offers the features you need for your expedition. Focus on reliability, build quality, and essential functionalities like high-resolution recording, ample storage, and robust power management. Remember, the cost of replacing a faulty unit or dealing with poor-quality footage can far exceed the initial savings.
❌ Mistake: Ignoring Extreme Environment Specifications
Why it’s bad: Many buyers assume a dash cam will perform similarly to a standard smartphone or laptop, which is a critical oversight. Expedition driving exposes your device to temperatures ranging from freezing cold to scorching heat, heavy rain, snow, dust, and intense UV radiation. If your dash cam isn’t rated for these conditions, it might crack, malfunction, or fail altogether, leaving you vulnerable and without documentation during critical moments.
What to do instead: Always check the manufacturer’s specifications for operating temperature range, ingress protection (IP) rating for water and dust resistance, and any mentions of UV resistance. Look for models explicitly designed for rugged use or outdoor adventures. Don’t assume; verify that the device can handle the extremes you’ll encounter.
❌ Mistake: Underestimating Storage Needs
Why it’s bad: A dash cam with only 16GB of internal storage will fill up quickly, especially if you record in high resolution or for extended periods. Without sufficient storage, you risk losing critical footage due to automatic overwrite, forcing you to manually delete old files constantly. This is particularly problematic on long expeditions where you can’t easily replace or upgrade the storage mid-trip.
What to do instead: Choose a dash cam that supports expandable storage via microSD cards, ideally up to 512GB or even 1TB. Plan for your trip by calculating how much storage you’ll need based on recording duration, resolution, and whether you use loop recording effectively. Always carry spare high-endurance SD cards and consider cloud backup options if feasible.
❌ Mistake: Neglecting Power Management
Why it’s bad: Running your dash cam directly from your car’s 12V outlet can drain your battery, especially if you leave it on during stops or overnight. On expeditions, where you might not have easy access to charging, this can leave you stranded. Additionally, some cheaper dash cams rely on lithium-ion batteries that degrade quickly under heat or cold, reducing their lifespan and reliability.
What to do instead: Opt for a dash cam with intelligent power management, such as a capacitor-based system or one that can be hardwired into your car’s fuse box. Consider models with parking mode that activates only when triggered by motion or impact. If you’re off-grid for extended periods, ensure your dash cam can run on alternative power sources like portable solar panels or deep-cycle batteries.
❌ Mistake: Overlooking Video Quality Requirements
Why it’s bad: Settling for lower resolution (e.g., 720p) or skipping advanced features like WDR (Wide Dynamic Range) can result in blurry, washed-out footage that’s useless for identifying details in accidents or incidents. In expedition conditions, lighting can vary drastically—from bright sunlight to deep shadows—making WDR essential for balanced exposure and clear image quality.
What to do instead: Aim for at least 1080p Full HD resolution, but 2K or 4K Ultra HD is preferable for sharper details. Ensure the dash cam has WDR or HDR capabilities to handle challenging lighting. Test the low-light performance if possible, as night driving is common on long trips. A high-quality lens with a wide field of view (130°-170°) will also capture more of the scene, providing better context.
❌ Mistake: Skipping Advanced Safety Features
Why it’s bad: Relying solely on basic recording neglects valuable safety features that can prevent accidents or provide critical data during incidents. Features like lane departure warning, forward collision warning, and emergency recording (G-sensor) can alert you to potential hazards or automatically lock footage during impacts, enhancing driver awareness and preserving evidence.
What to do instead: Evaluate which advanced features align with your driving style and the risks associated with your expedition routes. Prioritize safety-enhancing technologies like LDW, FCW, and emergency recording. These features can offer peace of mind and potentially prevent costly accidents or disputes.
❌ Mistake: Choosing Based Solely on Brand Name
Why it’s bad: While brand reputation matters, blindly following popular names without researching specific models can lead to disappointment. Some well-known brands might produce inconsistent products, and newer entrants might offer better value or features. Focusing only on brand can cause you to overlook niche manufacturers that specialize in rugged, expedition-grade dash cams.
What to do instead: Do thorough research beyond just the brand name. Read user reviews, compare specifications, and look for models that have proven themselves in similar expedition scenarios. Consider lesser-known brands if they offer superior durability, features, or value for your specific needs. Balance brand recognition with actual product performance and reliability.
❌ Mistake: Ignoring Ease of Use and Installation
Why it’s bad: A complicated installation process or an unintuitive user interface can be frustrating, especially when you’re far from home. Poor usability might lead to missed recordings, incorrect settings, or difficulty accessing footage when needed. Complexity can also increase the risk of improper installation, which might void warranties or cause electrical issues in your vehicle.
What to do instead: Choose a dash cam with a straightforward installation process, clear instructions, and an intuitive menu system. Look for models with simple mounting options (suction cup or adhesive) and easy-to-understand controls. If hardwiring, ensure the kit includes clear diagrams and all necessary components. Test the interface before committing to a purchase if possible.
Budget Guidelines: How Much Should You Spend?
Entry-Level ($50 – $100): What to Expect
In this price range, you’ll find basic dash cams that offer essential recording capabilities but may lack advanced features. Expect models with 1080p resolution, limited internal storage (often 16-32GB), and minimal additional functionalities like GPS or Wi-Fi. These are suitable for short trips or occasional use but might struggle with the demands of long-term expedition driving. Build quality may be average, and extreme environment tolerances might be limited. While they can capture decent footage in ideal conditions, they’re generally not ideal for the rigors of off-road or extreme travel. If you’re on a tight budget and only need basic protection, this tier can suffice, but be prepared to compromise on durability and advanced features.
Mid-Range ($100 – $250): The Sweet Spot for Most Buyers
This category represents the optimal balance between cost and capability for most expedition drivers. You’ll find dash cams with excellent video quality (2K or 4K resolution), robust build materials, ample storage (up to 512GB via microSD), and a suite of useful features like GPS tracking, Wi-Fi connectivity, and emergency recording. These models often come with capacitors instead of batteries for better thermal resilience and may have wider operating temperature ranges. Mid-range options typically offer reliable performance in diverse conditions, making them well-suited for extended trips, off-road adventures, and varied climates. They provide a compelling combination of durability, functionality, and value, making them the preferred choice for serious adventurers seeking dependable protection without breaking the bank.
Premium ($250 – $500): For Enthusiasts and Professionals
Premium dash cams deliver top-tier performance, cutting-edge technology, and exceptional build quality. Expect features like ultra-high-resolution recording (4K or higher), advanced AI-powered driver assistance (LDW, FCW, blind spot monitoring), seamless cloud integration, dual or multi-camera systems, and superior low-light sensitivity. These devices often boast military-grade durability, extensive operating temperature ranges, and sophisticated power management. Premium models might include professional-grade sensors, superior lenses, and enhanced weatherproofing. While the price tag is significant, these dash cams offer unparalleled peace of mind, reliability, and functionality for demanding expeditions, fleet operators, or anyone who requires the absolute best in dash cam technology.
Luxury ($500+): Top-Tier Features
Luxury dash cams represent the pinnacle of automotive recording technology, offering exclusive features and uncompromising performance. These might include 8K resolution recording, advanced HDR/WDR processing, integrated satellite connectivity for global coverage, AI-driven predictive analytics, and bespoke customization options. Luxury models often feature premium materials, artisan craftsmanship, and limited-edition designs. They may also offer concierge-level customer support, extended warranties, and priority firmware updates. While primarily targeted at high-net-worth individuals, professional drivers, or specialized expedition teams, luxury dash cams provide the ultimate in security, documentation, and technological sophistication for those whose needs demand nothing less than perfection.

Expert Tips for Getting the Best Deal
1. Time Your Purchase Strategically
The best deals on dash cams often appear during specific seasons and sales events. Major shopping holidays like Black Friday, Cyber Monday, Prime Day, and end-of-year clearance sales (typically in January) offer significant discounts on electronics. Additionally, consider purchasing just before new model releases, as older versions are often marked down to make room for updated versions. For expedition-specific gear, keep an eye out for outdoor or adventure-focused sales events, as retailers might bundle dash cams with other travel accessories at reduced rates.
2. Compare Retailers Across Multiple Platforms
Don’t limit yourself to a single retailer. Compare prices across major online platforms (Amazon, B&H Photo, Best Buy, Newegg), specialized electronics stores, and even the manufacturer’s official website. Each platform might offer different promotions, shipping costs, or return policies. Sometimes, buying directly from the manufacturer can provide exclusive bundles or warranty benefits, while big-box retailers might offer better customer service or in-store pickup options. Use price comparison tools and browser extensions to track historical pricing and identify genuine deals versus temporary markups.
3. Leverage Cashback and Rewards Programs
Maximize your savings by combining cashback websites (Rakuten, Honey, Capital One Shopping) with credit card rewards programs. Many credit cards offer elevated cashback percentages on electronics purchases, and some retailers offer their own loyalty points or member discounts. Stack these benefits with sale prices for substantial overall savings. Just ensure you’re meeting minimum spending requirements for bonus categories and understand the terms of any promotional financing offers.
4. Consider Refurbished or Open-Box Options
Certified refurbished dash cams from reputable sellers can offer significant savings while maintaining quality standards. These units undergo rigorous testing, come with full warranties, and often include original packaging and accessories. Open-box items—products returned by customers within a short period—can also provide excellent value at reduced prices. Always verify the refurbishment or return policy, check seller ratings, and confirm that the unit comes with a manufacturer’s warranty before purchasing.
5. Bundle Accessories for Better Value
Many dash cam manufacturers and retailers offer accessory bundles that include valuable add-ons like extra microSD cards, hardwiring kits, protective cases, or mounting brackets at discounted rates. While you might not need all the included items immediately, bundling can save money compared to purchasing each component separately. Consider future needs when evaluating these packages, and only buy bundles that genuinely add value to your expedition setup.
6. Negotiate with Local Retailers
While online prices are competitive, don’t overlook the potential for negotiation with local electronics stores or automotive shops. Mentioning competitor prices or expressing interest in purchasing multiple accessories can sometimes prompt retailers to offer discounts or match lower online prices. Building rapport with knowledgeable staff might also give you access to insider deals or upcoming promotions not advertised publicly.
7. Take Advantage of Extended Return Policies
When purchasing a dash cam for expedition use, you want to ensure it meets your specific needs before committing long-term. Look for retailers offering generous return windows (typically 30-90 days), especially for electronics. This allows you to test the device in real-world conditions, evaluate its performance on actual trips, and return it if it doesn’t meet expectations. Some manufacturers also offer trial periods or satisfaction guarantees, providing additional protection for your investment.
8. Monitor Price Drops After Purchase
Even after buying your dash cam, continue monitoring prices for potential refunds or price adjustments. Some retailers offer price matching or automatic refunds if the price drops within a specified timeframe (usually 7-30 days). Sign up for email alerts from your preferred retailers and consider using price tracking services that monitor competitors’ pricing. This proactive approach can save money even after you’ve made your purchase.
9. Join Manufacturer Loyalty Programs
Some dash cam companies maintain loyalty programs that offer members exclusive discounts, early access to sales, free accessories, or extended warranty benefits. These programs often require minimal commitment and can provide ongoing value beyond the initial purchase. Additionally, participating in manufacturer surveys or product testing programs might earn you additional discounts or free products, further enhancing your overall savings.
10. Evaluate Total Cost of Ownership
When comparing dash cam prices, consider the total cost of ownership rather than just the sticker price. Factor in potential expenses like additional microSD cards, hardwiring kits, replacement mounts, or extended warranties. A seemingly affordable dash cam might become costly if it requires frequent accessory purchases or lacks durability. Conversely, a pricier model with superior build quality might save money long-term by reducing the need for replacements or repairs during your expedition.

Frequently Asked Questions
Q: What is the absolute minimum resolution I should look for in a dash cam for expedition use?
A: While 1080p Full HD is technically sufficient, we strongly recommend aiming for at least 2K or 4K Ultra HD resolution for expedition dash cams. Higher resolutions provide significantly clearer images, making it easier to identify details like license plates, road signs, and small objects from a distance. In expedition conditions, where lighting can be challenging and distances greater, 4K footage offers superior clarity and evidence quality for accident reconstruction or insurance claims. The extra cost is well worth the enhanced detail and peace of mind.
Q: How much storage capacity do I actually need for a month-long expedition?
A: For a month-long expedition, you’ll need substantial storage. A 512GB microSD card is our recommended minimum, which should comfortably handle 4K recording for approximately 1-2 weeks depending on usage patterns. If you plan to record continuously with high bitrates, 1TB would be even safer. Always calculate your needs based on your specific trip: longer days, more scenic driving, or frequent stop-and-go traffic will consume storage faster. Remember, loop recording will automatically overwrite old footage, but you need enough capacity to capture critical events without interruption.
Q: Can I run my dash cam off my car battery without draining it?
A: Yes, but with caveats. Most dash cams draw power directly from your car’s 12V socket, which can drain your battery if left on for extended periods. The solution is intelligent power management: look for models with capacitors instead of batteries (more heat-resistant), parking mode that activates only when triggered by motion or impact, or hardwiring kits that connect to your fuse box. Some premium models offer supercapacitors that last longer than traditional batteries and can handle wider temperature ranges. For extended off-grid use, consider portable power solutions like solar panels or deep-cycle batteries specifically designed for automotive applications.
Q: Are dash cams with GPS really necessary for expeditions?
A: While not absolutely essential, GPS tracking is highly beneficial for expedition driving. It provides accurate location data, speed logging, and creates a visual map of your route—all invaluable for accident reconstruction, insurance claims, or simply documenting your journey. GPS eliminates guesswork about where incidents occurred and provides objective evidence of your movements. For remote expeditions where landmarks are scarce, GPS coordinates can be crucial for search and rescue operations or communicating exact locations to emergency services. Most modern dash cams integrate GPS seamlessly, adding minimal bulk or complexity to your setup.
Q: What’s the difference between a capacitor and a battery in dash cam power systems?
A: Capacitors and batteries serve similar functions but differ significantly in performance characteristics. Traditional lithium-ion batteries degrade over time, especially when exposed to extreme temperatures—common on expeditions. Capacitors, particularly supercapacitors, offer several advantages: they’re more resistant to temperature extremes, last longer without degrading, and can handle frequent charge/discharge cycles better than batteries. They also eliminate the fire risk associated with certain lithium batteries. However, capacitors typically hold less charge than batteries, which is why they’re often used in conjunction with direct vehicle power rather than as standalone backup systems for extended parking mode operation.
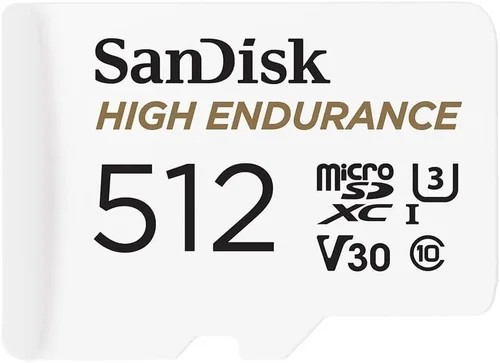
Q: How do I choose the right microSD card for my expedition dash cam?
A: Selecting the correct microSD card is crucial for reliable dash cam performance. Look for cards specifically labeled as “high endurance” or “designed for continuous recording.” Class 10 UHS-I or UHS-II cards are recommended, with U3 speed rating for 4K recording. Minimum write speeds of 30MB/s are ideal for smooth video capture without dropped frames. Brands like SanDisk Extreme, Samsung PRO Endurance, and Lexar Professional offer reliable options. Avoid counterfeit cards, as they often underperform and can corrupt footage. Always format the card in your dash cam before first use and carry spares—especially important for long expeditions where you can’t easily replace cards mid-trip.
Q: Can I install multiple dash cams on my vehicle for complete coverage?
A: Absolutely! Multi-camera systems provide comprehensive coverage, which is especially valuable for expedition vehicles that might carry passengers, tow trailers, or operate in complex environments. Most systems include a primary front-facing camera and secondary cameras for rear and side coverage. These can be powered by a central unit or individual devices with synchronized recording. Multi-camera setups offer several advantages: they eliminate blind spots, provide 360-degree situational awareness, and create overlapping footage for enhanced evidence quality. For expedition driving, where hazards can come from any direction, this comprehensive coverage significantly enhances safety and documentation capabilities.
Q: How does WDR (Wide Dynamic Range) improve my dash cam footage?
A: WDR (Wide Dynamic Range) is essential for expedition dash cams because it balances exposure in challenging lighting conditions. During expeditions, you’ll encounter extreme contrasts: bright headlights illuminating dark roads, harsh sunlight creating deep shadows, or tunnels with sudden transitions from dark to light. Standard cameras struggle with these transitions, resulting in washed-out highlights or crushed shadows. WDR technology adjusts exposure dynamically, preserving detail in both bright and dark areas simultaneously. This results in clearer license plates, better facial recognition, improved road sign readability, and overall superior footage quality that remains useful for evidence even in the most demanding lighting scenarios.
Q: What’s the best way to protect my dash cam from extreme weather conditions?
A: Protecting your dash cam from extreme weather involves both proper selection and strategic placement. First, choose a model with an IP rating indicating water and dust resistance, and ensure it’s rated for your expected temperature range. Second, position the camera to minimize direct exposure—slightly angled away from heavy precipitation or use a subtle hood to block rain and snow. For extreme heat, consider applying a UV-protective film to the lens to reduce glare and prevent lens cracking. In very cold conditions, ensure the mount allows some movement to accommodate expansion/contraction. Finally, always clean the lens gently with appropriate microfiber cloths to maintain clarity and avoid scratching during cleaning.
Q: Should I choose a dash cam with audio recording for my expedition?
A: Audio recording can be valuable for expeditions as it provides additional context beyond visual information—capturing conversations, traffic sounds, or the acoustics of incidents. However, this feature comes with important considerations. Privacy laws vary significantly by region and country, with some requiring consent from all parties being recorded. Before enabling audio recording, research and comply with local regulations regarding electronic surveillance and audio recording. If privacy laws permit it, audio can enhance evidence quality for insurance claims or legal proceedings. Some advanced models allow you to disable audio recording entirely if privacy concerns arise, providing flexibility for different destinations and circumstances.
Our Final Recommendations
Best for Budget-Conscious Buyers
The Viofo A11 Pro Max offers exceptional value for expedition drivers on a budget. Priced competitively, it delivers 4K recording with impressive image stabilization, a wide 150-degree field of view, and robust build quality that handles extreme temperatures. Its dual-channel capability (front and rear) provides comprehensive coverage without the complexity of multiple units. The A11 Pro Max includes essential features like GPS tracking, Wi-Fi connectivity, and emergency recording via G-sensor, all while maintaining reliability and ease of use. For those prioritizing core functionality without overspending, this model strikes an excellent balance between cost and capability, making it our top recommendation for budget-conscious adventurers who refuse to compromise on essential expedition features.
Best Overall Value
The BlackVue DR970X-2CH represents the pinnacle of value for serious expedition drivers seeking premium features at a reasonable price point. This dual-channel system delivers stunning 4K recording from the front and crisp 1080p from the rear, with exceptional low-light performance and advanced AI-powered driver assistance. Its supercapacitor-based power system offers superior thermal resilience compared to lithium batteries, and the comprehensive BlackVue Cloud integration provides seamless remote viewing and management. The DR970X-2CH boasts military-grade durability, extensive operating temperature ranges, and a user-friendly interface that simplifies complex features. With its perfect blend of cutting-edge technology, robust construction, and versatile functionality, this model excels in every aspect critical for expedition success, making it our definitive choice for overall value.
Best Premium Option
The Samsung Galaxy SmartCam S30 elevates the dash cam experience to unprecedented heights with its integration of Galaxy ecosystem capabilities. While primarily a smartphone app-controlled device, its dedicated hardware delivers 4K recording with exceptional image quality, AI-powered safety features, and seamless connectivity with Samsung devices. The SmartCam S30 offers advanced parking mode with impact detection, cloud storage integration, and real-time notifications. Its premium build quality, intuitive touchscreen interface, and comprehensive feature set make it ideal for tech-savvy adventurers who demand the absolute best in convenience and functionality. For those willing to invest in a dash cam that doubles as a connected smart device, this model represents the current gold standard in premium expedition recording technology.
Best for Beginners
The Garmin Dashcam Mini is the perfect entry point for new expedition drivers seeking simplicity without sacrificing reliability. Despite its compact size, it delivers solid 1080p recording with Garmin’s renowned GPS accuracy, providing precise location data and route mapping. The Mini features automatic firmware updates, voice commands, and seamless integration with Garmin’s ecosystem of navigation and safety devices. Its straightforward interface, reliable performance, and trusted brand reputation make it ideal for beginners who want dependable protection without overwhelming complexity. The included magnetic mount offers quick installation and removal, while the compact design minimizes dashboard clutter—perfect for those starting their expedition journey with confidence and ease.
Best for Advanced Users
The Thinkware F800 Pro caters to experienced expedition drivers who demand maximum functionality and customization. This premium model offers 4K recording with superior low-light sensitivity, advanced driver assistance systems, and exceptional build quality that withstands extreme conditions. Its comprehensive feature set includes dual recording, parking mode with impact detection, GPS tracking, Wi-Fi connectivity, and customizable settings for advanced users. The F800 Pro’s robust construction, professional-grade performance, and extensive configuration options make it ideal for seasoned adventurers who require maximum control, reliability, and evidence quality. Whether navigating challenging terrain or conducting professional expeditions, this model delivers the advanced capabilities and precision that discerning drivers expect from their recording equipment.
Conclusion: Making the Right Choice
Selecting the best dash cam for expedition requires careful consideration of your specific needs, the challenges you’ll face, and the features that will provide true value during your travels. Rather than chasing the latest technology or focusing solely on price, prioritize durability, reliability, and functionality that align with your expedition goals. Remember that your dash cam is more than just a recording device—it’s a critical component of your safety, security, and documentation strategy when you’re far from home.
The journey to the perfect dash cam begins with understanding your unique requirements. Consider how frequently you’ll drive, the types of terrain you’ll encounter, the length of your typical expeditions, and which features matter most to you. Will you need comprehensive coverage with multiple cameras? Is extreme temperature tolerance non-negotiable? Does GPS tracking and cloud integration significantly enhance your workflow? By answering these questions honestly, you’ll narrow your options to models that genuinely meet your needs rather than simply offering flashy features you might never use.
Once you’ve identified your priorities, research thoroughly. Read detailed reviews from other expedition drivers who’ve tested similar conditions. Pay attention to real-world performance rather than marketing hype. Compare specifications not just against your requirements but against competing models in the same category. Don’t forget to consider the total cost of ownership—including potential accessories, maintenance, and replacement parts—rather than just the initial purchase price.
The right dash cam will become your tireless companion on every expedition, capturing crucial evidence, providing peace of mind, and serving as your digital witness when you need it most. Whether you choose a budget-friendly option that delivers essential functionality or invest in a premium system with cutting-edge technology, the key is selecting a device that inspires confidence and performs reliably when it matters most.
As you prepare for your next adventure, remember that technology should enhance your journey, not complicate it. Choose a dash cam that integrates seamlessly into your expedition planning, operates intuitively in challenging conditions, and provides the reassurance you need to focus on the incredible experiences ahead. With the right device by your side, you can push boundaries with confidence, knowing that your story—and your safety—are being documented with professional-grade care.
Ultimately, the best dash cam for expedition isn’t just about recording what happens on the road; it’s about empowering you to explore further, travel more confidently, and return home safely with every adventure. Make your choice wisely, test your selection thoroughly, and let your dash cam become an indispensable part of your expedition toolkit—ready to capture every moment, protect your interests, and ensure that your extraordinary journeys are remembered for all the right reasons.