Best Dash Cam Buying Guide for Commercial Vehicles with Nexar
Why this guide matters
Choosing the right dash cam for your commercial vehicle isn’t just about recording what happens on the road—it’s about protecting your business, drivers, and assets. In today’s fleet management landscape, dash cams have evolved from simple video recorders into sophisticated safety and compliance tools. For commercial fleets, the stakes are higher: one incident can mean thousands in liability costs, insurance premiums, or operational disruptions. A quality dash cam system provides crucial evidence in disputes, helps train drivers, and can even reduce fuel costs through improved driving behavior.
This comprehensive buying guide will walk you through everything you need to know when selecting the best dash cam solution for your commercial operation. We’ll cover technical specifications, feature comparisons, real-world use cases, and how modern connectivity options like Nexar can transform your fleet’s safety and efficiency. Whether you’re managing a single delivery van or a large trucking operation with dozens of vehicles, understanding these factors will help you make an informed decision that delivers maximum value.
What readers will learn
By the end of this guide, you’ll understand exactly what features matter most for commercial applications, how to evaluate different types of dash cams, and how to balance cost with performance. You’ll learn about critical considerations like storage capacity, video resolution, GPS tracking, cloud connectivity, driver identification, and integration capabilities with existing fleet management systems. We’ll also explore common pitfalls to avoid, budget ranges for different business sizes, and expert tips for getting the best deal while ensuring long-term reliability.
Brief overview of the market
The commercial dash cam market has matured significantly in recent years, moving beyond basic recording to include advanced analytics, AI-powered insights, and seamless cloud integration. Traditional standalone dash cams are now being complemented—and in many cases replaced—by connected platforms like Nexar that offer real-time alerts, driver coaching, and centralized fleet management. This shift has created new opportunities for businesses to proactively address safety issues, reduce incidents, and optimize operations through data-driven insights.

What to Look for When Buying Dash Cams
Budget & Price Range
Before diving into specific features, it’s essential to establish your budget framework. Commercial dash cam systems vary dramatically in price based on complexity, features, and scalability requirements. Entry-level options might start around $100 per unit, while enterprise-grade solutions with advanced analytics and integration capabilities can exceed $500 per vehicle.
For small fleets (3-10 vehicles), you might prioritize cost-effective solutions that still provide essential recording and basic cloud access. Medium-sized operations (11-50 vehicles) often benefit from mid-range systems that balance functionality with reasonable ongoing costs. Large fleets (50+ vehicles) typically require premium platforms designed for scale, automation, and deep integration with existing dispatch and maintenance systems.
When budgeting, remember to factor in not just the initial hardware cost but also ongoing expenses like cloud storage fees, cellular data plans, software subscriptions, and potential installation costs. Some providers offer tiered pricing models where you pay per camera, per vehicle, or per feature set—understanding these structures upfront prevents surprises down the line.
Performance Specifications
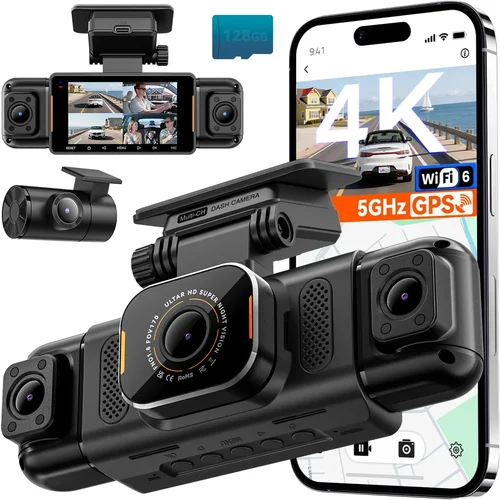
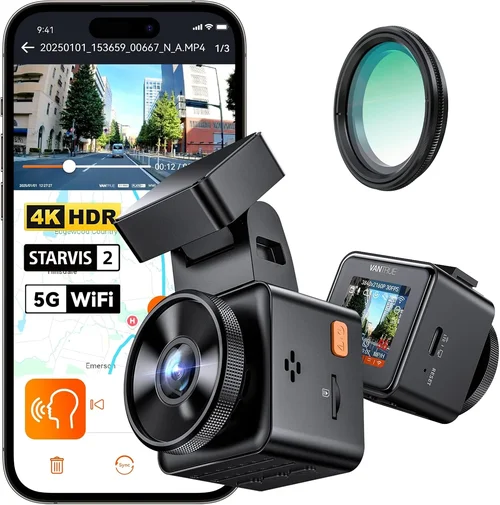
Video quality is arguably the most critical performance specification for any dash cam, especially in commercial settings where clear footage can make or break an insurance claim or legal case. Look for cameras with at least 1080p Full HD resolution, though 4K Ultra HD is becoming increasingly common in premium models. Higher resolution means better detail capture, which is crucial for identifying license plates, reading signs, and capturing fine details in accidents.
Frame rate matters too—30 frames per second (fps) is standard, but 60fps can provide smoother motion capture during rapid changes like sudden braking or lane changes. The field of view (FOV) should be wide enough to capture both the front scene and adjacent lanes; a 120-150 degree horizontal FOV is generally recommended for commercial vehicles.
Storage capacity needs depend heavily on your usage patterns and local regulations. Most dash cams use loop recording, overwriting old footage once storage is full. However, commercial operations often benefit from “event-triggered” storage that preserves critical clips regardless of available space. Consider whether you need internal storage only or cloud backup as well, as this affects both immediate access and long-term retention.
Build Quality & Durability
Commercial vehicles operate in harsh environments—extreme temperatures, constant vibrations, dust, moisture, and potential impacts from road debris. Your dash cam must withstand these conditions year after year without failing. Look for ruggedized designs with IP rating certifications (typically IP65 or higher) that guarantee protection against dust and water ingress.
Temperature tolerance is another key factor. Many dash cams fail in winter when temperatures drop below freezing or in summer heat waves. Specifications should clearly indicate operating temperature ranges—ideally -20°C to +70°C (-4°F to +158°F) for North American markets.
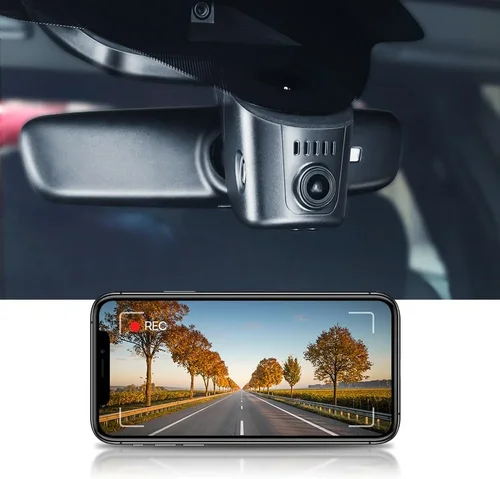
Mounting systems also deserve attention. Professional-grade mounts should resist vibration and remain secure through rough driving conditions. Some commercial setups require hardwired power sources that integrate cleanly with vehicle electrical systems, eliminating battery dependency and ensuring continuous operation.
Features & Functionality
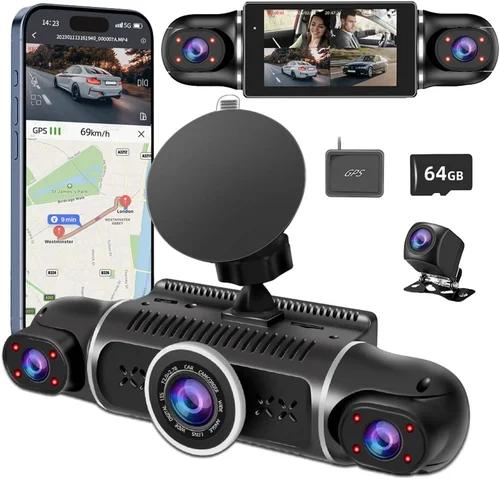
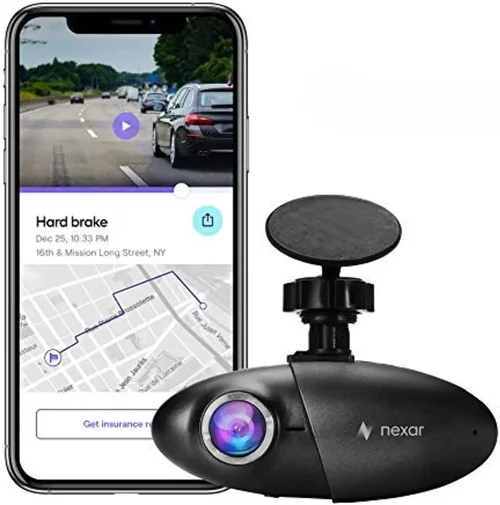
Beyond basic recording, modern dash cams offer numerous features that enhance safety, compliance, and operational efficiency. Event detection capabilities like G-sensor alerts automatically save footage during hard braking, sharp turns, or impacts—critical for post-incident analysis. Parking mode provides surveillance while the engine is off, deterring theft or vandalism.
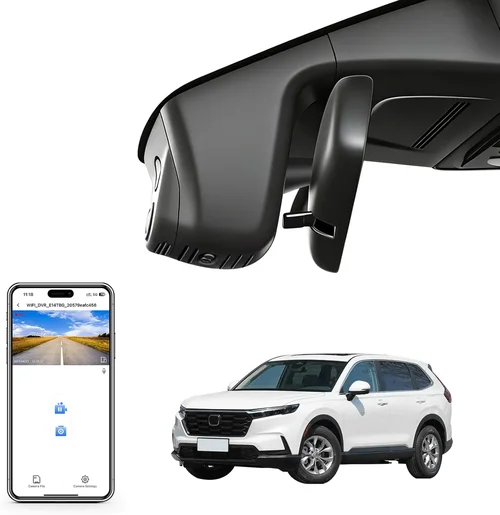
GPS tracking enables precise location logging, speed monitoring, and route verification. This data proves invaluable for delivery time windows, fuel tax reporting, and proving lawful stops during traffic stops. Some advanced systems include Wi-Fi connectivity for easy firmware updates and file transfers without removing the device.
Driver identification technology uses facial recognition or RFID tags to associate recordings with specific operators. This accountability encourages safer driving behaviors and simplifies incident attribution. Real-time alerts through mobile apps can notify managers immediately about dangerous maneuvers, speeding, or extended idle times.
Cloud connectivity transforms dash cams from passive recorders into active safety tools. Platforms like Nexar allow instant sharing of critical events with stakeholders, enable remote fleet monitoring, and provide analytics dashboards showing trends over time. Cloud storage eliminates physical retrieval hassles and ensures footage isn’t lost due to memory card failures.
Brand Reputation
While price and features are important, brand reputation shouldn’t be overlooked. Established manufacturers with proven track records in automotive electronics tend to deliver more reliable products with better customer support. Research user reviews across multiple platforms, check industry forums, and look for third-party testing results.
Consider how long the company has been in the dash cam market and whether they specialize in commercial solutions or primarily serve consumer segments. Commercial customers often benefit from dedicated account managers, bulk pricing discounts, and service level agreements unavailable to individual buyers.
Warranty & Support
Comprehensive warranty coverage is non-negotiable for commercial applications. Look for minimum 2-year warranties covering both parts and labor. Some providers offer extended warranty options or “no-fault” replacement policies that cover failures regardless of cause.
Technical support availability matters immensely when issues arise during critical moments. 24/7 multilingual support lines, online knowledge bases, and responsive email channels all contribute to effective problem resolution. Ask about average response times and escalation procedures before committing to a vendor.
Size & Portability (if applicable)
While most commercial dash cams are fixed installations, some fleets benefit from removable or portable units for secondary vehicles, temporary assignments, or evidence collection purposes. Portable models should still maintain professional-grade image quality while offering convenient transfer options via USB or wireless connections.
User Reviews & Ratings
Real-world experiences from other commercial users provide invaluable insights that specs alone cannot convey. Pay special attention to reviews mentioning reliability over time, ease of installation, software usability, and customer service responsiveness. Be wary of overly positive reviews that seem scripted or those that focus solely on price without addressing performance trade-offs.
Different Types of Dash Cams

Common Buying Mistakes to Avoid
❌ Mistake: Prioritizing price over reliability
Why it’s bad: Cheaper dash cams often suffer from poor build quality, inconsistent recording, and frequent failures—especially in commercial environments where downtime equals lost revenue. These devices may seem economical initially but lead to higher total cost of ownership through replacement frequency and missed evidence.
What to do instead: Invest in proven brands with strong track records in commercial applications. While the upfront cost may be higher, reliable performance reduces long-term expenses and ensures critical footage is always available when needed.
❌ Mistake: Ignoring storage limitations
Why it’s bad: Assuming unlimited storage leads to unexpected data loss. Without proper management, dash cams overwrite important footage before incidents occur or compliance requirements are met. This undermines the entire purpose of having a recording system.
What to do instead: Calculate your storage needs based on recording duration, video quality, and required retention periods. Implement automated cloud backup solutions or schedule regular manual transfers to preserve critical events.
❌ Mistake: Overlooking integration capabilities
Why it’s bad: Standalone dash cams create isolated data silos that don’t leverage your existing fleet management infrastructure. This fragmentation makes it difficult to correlate dash cam events with dispatch logs, maintenance records, or other operational data.
What to do instead: Choose systems compatible with your current software stack or select unified platforms that combine dash cams with telematics, routing, and maintenance modules. APIs and standardized data formats facilitate seamless integration.
❌ Mistake: Neglecting driver adoption
Why it’s bad: Even the most advanced dash cam fails if drivers resist using it or perceive it as invasive surveillance rather than a safety tool. Poor adoption leads to disabled features, removed cameras, or intentional misuse that compromises effectiveness.
What to do instead: Involve drivers early in the selection process, emphasize safety benefits over monitoring concerns, and implement transparent policies explaining how footage is used. Driver coaching programs can transform dash cams into positive safety enablers.
❌ Mistake: Underestimating installation complexity
Why it’s bad: DIY installations often result in improper mounting, wiring issues, or suboptimal camera angles that compromise recording quality. Improper setup can also create electrical problems or void warranties.
What to do instead: Budget for professional installation services, especially for hardwired systems requiring fuse box access or dashboard modifications. Certified installers ensure optimal placement while maintaining manufacturer warranties.
❌ Mistake: Focusing solely on hardware
Why it’s bad: Hardware represents only part of the solution. Without adequate software, analytics, and support services, even high-end cameras generate overwhelming amounts of unstructured video that’s difficult to review and act upon.
What to do instead: Evaluate the complete ecosystem including cloud platform usability, mobile app functionality, reporting capabilities, and customer support quality. Software experience often determines actual ROI more than raw hardware specs.
Budget Guidelines: How Much Should You Spend?
Entry-Level ($100 – $300): What to expect
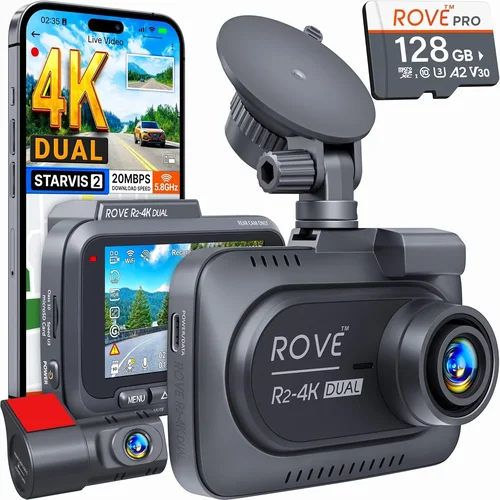
For very small operations or pilot programs, entry-level dash cams offer basic recording capabilities at minimal cost. These typically include 1080p recording, loop recording, G-sensor event detection, and sometimes GPS tracking. Storage usually comes from microSD cards ranging from 32GB to 128GB.
However, entry-level systems often lack cloud connectivity, advanced analytics, or robust build quality suitable for daily commercial use. They may struggle with extreme temperatures or vibration resistance. While acceptable for occasional use or supplemental recording, they shouldn’t serve as primary safety equipment for regular fleet operations.
Mid-Range ($300 – $600): Sweet spot for most buyers
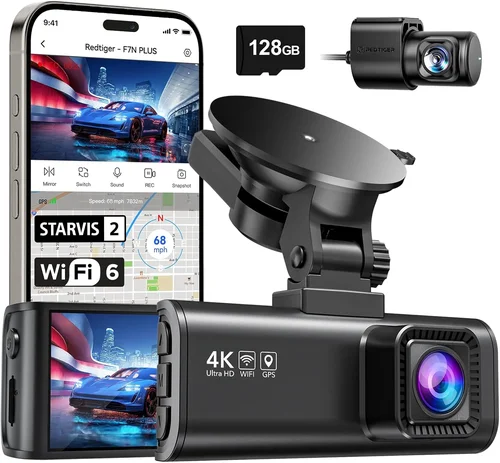
This category represents the optimal balance between functionality and affordability for most commercial applications. Mid-range dash cams typically feature dual-camera setups (front + interior), higher resolution recording (often 4K), built-in WiFi for easy file transfer, and reliable cloud synchronization.
You’ll find better build materials, improved temperature tolerance, and more durable mounting systems in this range. Many mid-tier models offer subscription-based cloud storage plans starting around $10-$20 per vehicle monthly. These systems provide sufficient reliability and features to justify their investment while remaining accessible to medium-sized fleets.
Premium ($600 – $2000): For enthusiasts and professionals
Professional-grade dash cams deliver military-spec durability, exceptional image quality, advanced AI features, and deep integration capabilities. Expect multi-sensor configurations, HDR imaging for challenging lighting conditions, superior audio capture, and comprehensive driver identification systems.
These platforms often include proprietary analytics engines that detect distracted driving, forward collision warnings, lane departure alerts, and other risk factors in real time. Integration with existing fleet management software reduces administrative overhead and creates unified dashboards showing both vehicle status and safety metrics.
Luxury ($2000+): Top-tier features
Ultra-premium solutions represent the cutting edge of commercial dash cam technology. These systems typically combine multiple specialized cameras (forward, rear, interior, blind spot), AI-powered behavioral analytics, predictive maintenance integration, and blockchain-secured evidence storage.
At this level, you’re investing in enterprise-grade security, forensic-grade video preservation, and comprehensive compliance reporting tailored to specific industries like waste management, construction, or long-haul trucking. While expensive, these solutions can deliver substantial returns through reduced insurance premiums, lower incident rates, and enhanced operational visibility.
Expert Tips for Getting the Best Deal
When to buy (seasonal sales, timing)
Dash cam sales typically follow predictable seasonal patterns influenced by fleet purchasing cycles and holiday spending habits. Q1 (January-March) often sees strong demand after year-end budget allocations, leading to competitive pricing as vendors clear inventory. Back-to-school season (August) may offer educational institution discounts relevant to school bus fleets.
Avoid major shopping holidays like Black Friday unless you’re certain about compatibility and support availability. Instead, target post-holiday lulls in January and February when retailers adjust inventory levels. Summer months (June-August) sometimes yield better deals as outdoor equipment retailers refresh product lines.
Where to buy (retailers, online vs in-store)
Online retailers generally offer broader selection, competitive pricing, and detailed product information but may lack hands-on testing opportunities. Physical stores allow immediate inspection and professional installation but often charge premium prices with less flexibility.
Consider hybrid approaches: purchase core fleet units online for consistency and volume discounts, then visit local dealers for specialized accessories or urgent replacements. Always verify seller credentials regardless of channel—look for authorized dealer status, positive reviews, and transparent return policies.
How to spot deals
Be wary of unusually low prices that seem too good to be true—they often indicate refurbished, gray-market, or incompatible units. Watch for bundled offers combining dash cams with installation, cloud storage, or extended warranties. Some vendors provide loyalty programs or referral bonuses that reduce effective costs.
Compare not just list prices but total cost of ownership including installation, ongoing subscriptions, and potential integration expenses. Request detailed quotes broken down by component rather than accepting vague “fleet packages.”
Warranty considerations
Always read warranty terms carefully—some exclude wear items like batteries or memory cards while others require original packaging for returns. Extended warranty options may offer significant peace of mind but verify what additional coverage they actually provide versus basic manufacturer guarantees.
Ask about repair timelines and whether loaner units are available during servicing. For large fleets, consider service agreements that include preventive maintenance and priority support channels.
Return policies
Test equipment thoroughly before committing to large orders. Many commercial dash cam providers offer trial periods (typically 30-90 days) allowing you to evaluate performance under real operating conditions. Insist on written confirmation of trial terms and ensure adequate time for installation and driver training.
Understand restocking fees and condition requirements for returns. Some systems require factory resetting or returning original packaging to qualify for refunds.
Testing before buying
Request demonstration units or participate in pilot programs whenever possible. Observe video quality in various lighting conditions, test event detection sensitivity, and evaluate software usability with your actual drivers. Pay attention to how easily footage can be accessed during emergencies.
If testing isn’t feasible, request sample videos from the manufacturer showing typical scenarios relevant to your operations. Ask about field reliability statistics and customer satisfaction metrics specific to commercial applications.

Frequently Asked Questions
Q: Can I use consumer-grade dash cams for my commercial fleet?
A: Generally not recommended for regular commercial use. Consumer models lack the durability, reliability, and advanced features needed for demanding fleet operations. They often fail under temperature extremes, vibration exposure, or heavy usage patterns common in commercial settings. While acceptable for supplemental or occasional recording, they shouldn’t serve as primary safety equipment.
Q: How much cloud storage do I really need?
A: Storage requirements depend on several factors including recording duration, video quality, number of vehicles, and retention policies. As a rule of thumb, plan for 1-2 weeks of continuous recording per vehicle. High-resolution 4K footage consumes significantly more space than 1080p. Many commercial dash cam platforms offer scalable storage tiers starting around $10-$20 per vehicle monthly, with options to archive older footage to lower-cost cold storage.
Q: Will dash cams drain my vehicle’s battery?
A: Modern commercial dash cams are designed to minimize power consumption while maintaining reliability. Most draw less than 3 watts continuously, comparable to interior dome lights. Hardwired installations with smart power sensing automatically enter low-power modes when ignition is off, preventing battery drain. However, prolonged parking in extreme temperatures may affect overall battery health regardless of dash cam usage.
Q: How do I handle driver privacy concerns?
A: Transparent communication is key. Develop clear policies explaining how dash cam footage is collected, stored, accessed, and used. Emphasize safety benefits over surveillance aspects and involve drivers in policy development. Limit access to recorded footage strictly to authorized personnel for approved purposes only. Many platforms offer privacy controls allowing drivers to blur faces or license plates when not relevant to safety incidents.
Q: What resolution should I choose for legal evidence?
A: For legal admissibility, aim for at least 1080p Full HD resolution with clear audio recording. Higher resolutions like 4K provide additional detail but require proportionally more storage and processing power. Ensure your chosen system meets local evidentiary standards—some jurisdictions require specific compression formats or metadata inclusion. Professional-grade dash cams often include forensic-grade video encoding optimized for court presentation.
Q: Can dash cams integrate with existing fleet management systems?
A: Yes, many modern dash cam platforms offer API integrations and standardized data formats compatible with popular fleet management software. Integration capabilities vary by provider but commonly connect to dispatch, routing, maintenance, and HR systems. Unified platforms eliminate duplicate data entry and create comprehensive views linking vehicle status, driver performance, and operational metrics.
Q: How do I ensure consistent recording across multiple vehicles?
A: Centralized fleet management platforms solve this challenge by providing uniform configuration templates, automatic firmware updates, and synchronized recording schedules. Remote monitoring allows real-time status checks and troubleshooting without dispatching technicians. Standardized hardware ensures predictable performance and simplifies spare parts inventory management across your fleet.
Q: Are there insurance discounts available for dash cam installations?
A: Many insurance providers offer premium reductions for fleets with certified dash cam systems demonstrating improved safety records. Requirements vary by insurer but typically include professional installation, cloud backup, driver identification, and minimum recording duration. Document your system’s capabilities and maintenance procedures to maximize discount eligibility. Some platforms even provide official certification documentation accepted by major insurers.
Q: What maintenance does a commercial dash cam require?
A: Regular maintenance includes cleaning lenses, checking mount security, verifying storage capacity, and testing event detection features. Cloud-based systems often automate many routine checks through remote diagnostics. Schedule quarterly inspections and replace memory cards every 6-12 months depending on usage intensity. Keep firmware updated according to manufacturer recommendations to ensure optimal performance and security.
Q: How do I handle footage requests from law enforcement or insurance companies?
A: Most commercial dash cam platforms include secure sharing portals allowing controlled access to specific events without exposing entire libraries. Configure permissions so only authorized personnel can release footage while maintaining audit trails of all access attempts. Automated redaction tools can blur sensitive information like license plates or faces when appropriate. Having organized, searchable archives significantly speeds up response times during investigations.
Our Final Recommendations
Best for Budget-Conscious Buyers
For small fleets needing essential recording without breaking the bank, we recommend evaluating mid-tier dual-camera systems with cloud connectivity. Look for providers offering flexible payment plans or volume discounts for multiple units. While sacrificing some premium features, these solutions deliver reliable performance at accessible price points. Consider starting with a pilot program to validate ROI before expanding deployment across your entire fleet.
Best Overall Value
The sweet spot for most commercial operations lies in integrated fleet management platforms combining hardware, software, and support services. These systems provide comprehensive visibility while reducing administrative overhead through automation and analytics. Seek providers with demonstrated success in your industry vertical and proven integration capabilities with existing tools. Prioritize platforms offering modular pricing so you can scale features as your needs evolve.
Best Premium Option
For large enterprises or highly regulated industries requiring maximum reliability and forensic-grade evidence preservation, ultra-premium dash cam ecosystems deliver unmatched capabilities. These include multi-sensor configurations, AI-powered risk detection, blockchain-secured storage, and deep integration with compliance frameworks. While representing significant investment, they provide the highest return through minimized incidents, streamlined audits, and enhanced operational intelligence.
Best for Beginners
New to dash cams? Start simple with reputable standalone models featuring intuitive interfaces and straightforward installation processes. Focus on core requirements like clear recording, reliable event detection, and basic cloud access. As your comfort grows and needs expand, gradually add advanced features or migrate to integrated platforms. Avoid overwhelming yourself with unnecessary complexity until you’ve validated your fundamental requirements.
Best for Advanced Users
Experienced fleet managers seeking maximum control and customization should explore open-platform solutions with extensive API access and scripting capabilities. These allow deep integration with proprietary systems and custom analytics development tailored to unique operational challenges. Expect higher implementation complexity but gain unprecedented flexibility in data utilization and workflow automation. Partner with experienced integrators to maximize value from these powerful but complex systems.
Conclusion: Making the Right Choice
Selecting the best dash cam for your commercial vehicle requires balancing immediate needs with future growth potential. No single solution fits every fleet perfectly—your choice should reflect your specific operational requirements, budget constraints, and strategic objectives. Remember that dash cams aren’t just about recording events; they’re investments in safety, compliance, and operational excellence.
Prioritize reliability and integration over flashy features alone. Choose systems with proven track records in commercial environments rather than chasing the latest innovations that haven’t yet demonstrated real-world durability. Consider total cost of ownership including installation, ongoing subscriptions, and potential downtime costs when evaluating options.
Engage your drivers throughout the selection process, emphasizing how dash cams protect them as much as the business. Implement transparent policies explaining footage usage and establish clear protocols for accessing evidence when needed. With thoughtful planning and ongoing evaluation, your dash cam system can become a powerful force multiplier for your fleet’s safety and efficiency goals.
The commercial dash cam landscape continues evolving rapidly, with new capabilities emerging regularly. Stay informed about technological advances but resist the urge to adopt everything immediately. Focus first on solving your most pressing safety and compliance challenges, then layer additional features incrementally as your needs grow. By taking this measured approach, you’ll maximize both immediate value and long-term sustainability of your dash cam investment.